Equipment - Brewer's Friend - Part 4

Archive for the ‘Equipment’ Category

I love my Keezer

Saturday, April 3rd, 2010

Home brewers who keg their beer have a keezer or kegerator to keep it cold.

Kegerator = keg + refrigerator
Keezer = kegerator + freezer
Keezer = the place where my beer is kept cold and on tap

I prefer the Keezers, not to be confused with Geezers…
kegerator keezer home brew

A kegerator or keezer can also double as a way to lager. I have used a standard fridge (kegerator) in the past. In the image above, the bucket on the right is a German lager bubbling away. In my opinion, the chest freezer setup (keezer) is much much better than a top/bottom fridge (kegerator). The keezer was cheaper to get setup, it holds more, and it is quieter. I think it also draws less power than a fridge.

Most setups will require a temperature controller. Freezers are designed to go below 32F, so to avoid freezing the beer, the temperature controller cuts power to the compressor when the desired temperature is hit. I keep mine around 40F, but raise it to 50F when doing my primary fermentation for lagers. You can just barely see in the bottom left corner where the senor probe is duct taped to the inside of the freezer.

The unit I went with is the Frigidaire 7.2 Cubic Ft. Chest Freezer from Lowe’s, Model #FFC0723GB. I paid $228 with free delivery! The top/bottom fridge I bought was $499.

Home Brew Talk has an awesome thread about the options here:
https://www.homebrewtalk.com/f35/sizing-your-chest-freezer-corny-kegs-75449/

You can choose between getting one that holds anywhere from 2-10 corny kegs!

The only down side I have found is it is a little harder to lift full buckets, carboys, and corny kegs into the unit.

The inside of chest freezers have a ‘hump’ where the motor is. Corny kegs are too tall to sit on top the hump because the lid would not close. The way around this is to build a collar extension that raises the height of the lid. Most people put their taps through the collar.

In the image above there is a rag to catch drips from the picnic tap. I have read that keezers can get gross inside if not taken care of. Once I spilled a bit of beer on some bottles and did not take care of it. A few weeks later mold started growing. It wasn’t too bad, but I’m glad I caught it early. To avoid any future mess I make sure any beer that goes astray is wiped up immediately. Sometimes the walls of the keezer have moisture on them so I wipe them off occasionally.


Digital Thermometer for Brewing

Saturday, February 6th, 2010

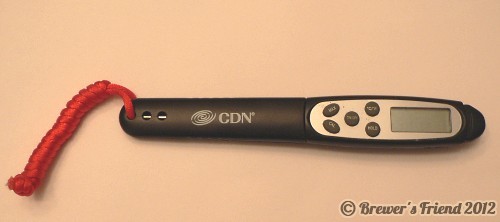
A handy tool in brewing is a digital thermometer. When it comes to all grain brewing this is a must to accurately monitor and maintain the desired mash temperature. It also helps to know when boil is approaching (“a watched pot never boils…”). I keep this handy tool by my side when ever I brew.

baby hops cones

baby hops cones

This digital thermometer by CDN is called the “Q2-450 Proaccurate Quicktip Digital Thermometer”. They currently run about $18 on Amazon.com. We also use it around the house occasionally when baking or cooking.

Some tips:

  • Make sure to calibrate it first! It was off by several degrees, which can throw off a mash severely. The instructions say to stir up some crushed ice.
  • Keep it clean.
  • Remember to keep it off, so that the battery lasts longer.

Brewers who build out their rig will want to go with a thermometer embedded inside their hot liquor tank or mash lauter tun. This has been covered by a separate Brewer’s Friend article.


StirStarter Equipment Review

Saturday, January 2nd, 2010

An essential tool in the home brewer’s kit is a stir plate. Using a stir plate with a yeast starter boosts yeast cell counts dramatically*. This leads to healthier fermentation, and thus better beer! I recall using a stir plate in chemistry lab. In that case it was a hot plate and stir plate combined. When I looked these up online, I found they were quite expensive (excess of $100).  Thankfully the StirStarter exists and fills this need for brewers perfectly at a much more affordable price. https://www.stirstarters.com/.

stir plate

The stir starter comes complete with everything you need. It measures 4”x6” which is fine for up to a 1 gallon vessel. Any Erlenmeyer flask for yeast starters would fit comfortably on StirStarter.

stirstarter

It includes a rubber mat for the top so the flask grips the surface nicely.

stir starter

Stir bar, catch magnet, instructions, and power supply (not pictured) are also included.

stir bar

catch magnet

Using the StirStarter is simple. A yeast starter is prepared as normal. A sanitized magnetic stir bar is dropped into the flask containing the yeast starter. The stir bar is then centered in the bottom of the flask with a catch magnet (kept on hand). The flask is then set down on top of the stir plate. Gently the spin speed is increased to a steady rate. A whirlpool effect is not needed. If the dial is set too high the magnet can get spun off center. The spinning stir bar continuously mixes the contents of the flask. This increases the surface area potential of the yeast, leading to more yeast activity.

yeast stir plate home brewing

Some other notes about Dan at StirStarter. He ships fast, my package got here within three days. There is also a lifetime guarantee on the product. That is hard to beat.

In case you are thinking about building one yourself, here is the inside of the unit:

yeast stir plate home brewing

There are a few things going on in there involving electronics that have to be correct. One is the power level for the fan, the other is the wiring for the speed switch. The StirStarter website provides instructions on how to build your own. After just a couple seconds of reading, I realized building my own would be trouble. It would take me several trips to the electronics store and the better part of a weekend to build my own.  At the low price of the StirStarter, there is not much savings potential over buying a StirStarter worry fee built by a pro.

This site will feature an upcoming article about yeast washing, which explains saving and recycling yeast over and over again.

* According to MB Raines’ article about yeast starters, stirred yeast starters can get as much as ten times the amount of active yeast compared to a standard shaken yeast starter. According to the brewersfriend.com article on stir plates, it may be closer to a 100% increase.

StirStarter was kind enough to hook me up with a StirStarter for writing this post.


Keg Care and Cleaning PBW vs Oxiclean

Saturday, August 29th, 2009

Soda kegs, commonly used in home brewing draft systems, require regular cleaning and maintenance. Following is a brief description of keg care and cleaning requirements to assure optimum performance from these pressurized vessels. For an explanation of the keg components referenced below, see our article on keg anatomy.

Believe it or not, soda kegs do not always require cleaning between fillings. If a soda keg is emptied and is capable of being refilled with a similar beer prior to to the remnants of the previous brew going “sour” in the keg, cleaning is generally only required once every 2-3 batches.

  1. Leave the emptied keg in the kegerator until ready to refill.
  2. Lubricate all accessible seals with keg lube (a food grade lubricant) Fig. 1
  3. Rack your new brew into the uncleaned keg.
  4. Replace lid and pressurize.

keg care lube
Fig. 1

Normal keg cleaning will be necessary when simply racking into an uncleaned keg is not possible.

  1. Thoroughly rinse the keg with water to remove most of the remnants from the previous brew.
  2. Fill with an OxiClean solution of (1) scoop OxiClean and 5 gallons water. Fig. 2
  3. With the lid secure, attach keg to your draft system to push about 1 liter of solution through the keg to fill the beer out dip tube and soak the poppet.
  4. Let keg sit for 24 hours, or for months, it is up to you.
  5. Rinse keg with water and then again with a sanitizer like Star San prior to filling again.
  6. Lubricate all accessible seals with keg lube.

Intense cleaning should take place once every 4-6 batches.

  1. Dis-assemble keg components, soak all components and keg in an OxiClean solution for 24 hours.
  2. During the dis-assembly inspect all components for wear and possible need for replacement. (poppets, seals, pressure relief valve)
  3. Once clean, reassemble keg components, making sure to lubricate all rubber seals with keg lube during re-assembly.
  4. Once assembled, rinse keg with water and then again with a sanitizer like Star San prior to filling again.

keg care oxiclean
Fig. 2

Typical trouble spots in keg cleaning/maintenance will include:

Poppets: These consist of springs and intricate parts that can trap hop particles. The seals on the tip, if worn, will lead to leaks in the keg post when assembled. Be sure to clean them thoroughly and lubricate the small seals on the tip of the poppet.

Dip Tubes: The internal surfaces of the dip tubes can be a hiding place for all sorts of nasties. The use of an effective cleaner such as OxiClean or PBW (Powdered Brewery Wash) will rid these hidden areas of all organic matter, the use of a specialized dip tube cleaning brush can also put your mind at ease.

Dip Tube Seals: These seals are no more important than the other seals on your keg, but they are the most inconvenient to replace when the keg is full of beer and you realize a leak. Be sure that these areas are clean and that the seals do not show wear, of they do, replace them to save yourself a potential headache after the keg is filled.

The use of OxiClean (or its generic equivalent) has been referenced in this article. Following are some guidelines to keep in mind when using this, or any oxygen based cleaner in place of PBW. OxiClean is an attractive option as it costs anywhere from 50% as much as PBW, or 25% as much if using the generic equivalent. PBW is an excellent cleaner, but at $4 per pound there are other options that are much more wallet friendly for the home brewer, if you are so inclined.

Use OxiClean (or equivalent) if you answer yes to all of the statements below:

  1. I have relatively soft water (hard water reduces the effectiveness of OxiClean).
  2. I will not be cleaning aluminum (oxygen based cleaners will damage aluminum).
  3. I like to save money.

Use PBW if you answer yes to any one of the statements below:

  1. I have relatively hard water.
  2. I will be cleaning aluminum.
  3. Money is no object when it comes to brewing.


Anatomy of a Corny Keg

Saturday, August 15th, 2009

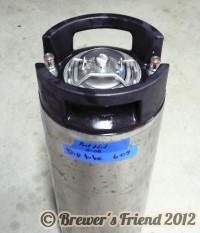
If you do not keg your beer already, someday you almost certainly will. It is a superior package for the home brewer. They save time and they feel cool. Only downside is they are not portable.  Cornelius kegs, or corny kegs for short, are a widely available means for home brewers to package their beer. Generally they hold 5 gallons.  Most of the ones home brewers use were formerly soda kegs.   Beyond the keg itself, a CO2 tank, regulator, gas in line, gas in connector, beer out connector, and a beer line + picnic tap are needed to complete the setup.

The following is an introduction to what a 3, 5 or 10 gallon home brewing keg is comprised of and what to look for while using and maintaining them.

keg parts

KEG VESSEL ITSELF: This is a SS vessel which can have a volume ranging from 3-10 gallons typically. When buying kegs, the condition of outer vessel itself is of little concern… dents, scrapes and bruises from years of service will not affect the performance of the keg. If you want pretty kegs, you can buy them new, but there is a price for vanity.

LID: Lids come in different shapes depending upon keg make and model but the purpose is the same, to provide you with a large opening and access to the inside of the keg for filling and cleaning. Lids require pressure to properly seal, this is a plug type lid, it actually fits inside the keg where the pressure inside the keg pushes the lid out, tightening the seal as the pressure increases. The bail (locking handle) on the lid has small rubber feet, if these are worn or missing they can affect how well the lid seals since these feet help to pull the lid into place as well. If your lid simply will NOT seal on the first or second attempt, open the lid and turn it 180 degrees and try again, I assure you it will (if your seal is not faulty). Lids themselves will not wear out, but the O-ring around the circumference of the lid will, as well as the small rubber feet on the locking handle.

keg parts lid

PRESSURE RELIEF VALVE: This valve is located in the center of the lid and is simply used to purge the pressure from the keg at any time. Typical use this when you fill a keg and wish to purge the O2 from the head space before storing, or to relieve excess pressure after carbonating your beer at a pressure higher than your desired serving pressure. These spring loaded valves have a small rubber foot inside them that can wear and lead to a leak, but are easily replaced by unscrewing them and then inserting a new valve.

keg parts pressure relief valve

KEG POSTS: The keg has (2) posts, beer out and gas in, these are not interchangeable. There is one purpose to these posts, provide a means by which to secure a gas line and a beer line. Ball lock kegs are like quick disconnects with small ball bearings that will catch in a groove on the post to secure the connector. Pin lock posts will have three small pins that provide a locking mechanism so that you may twist and lock the connector into place. Depending on the make and model you will need different tools to remove these post for cleaning or maintenance. For the typical HEX post I recommend a suitably sized crescent wrench as these can vary in size. Other keg posts are star shaped with many small points, these will require a special tool. These rarely wear out, unless they become bent. Replace these with the style appropriate for your make and model of keg. (see poppets below as well)
keg parts post

POPPETS: These small spring loaded devices sit atop the dip tube and inside (under) the keg posts. The spring and pressure inside the keg will press these poppets securely into the small hole in the keg post so that the keg will remain sealed and pressurized when not in use. When you attach a gas or beer line, that connector will have a small pin in the center that will push the poppet in, thus allowing the flow of gas and beer. These wear out, these will leak and these do require cleaning and replacement at time. Poppets may look the same but they are NOT! You must be sure to buy replacement poppets that fit your make and model of keg or they may not seal inside the keg post.

keg parts poppets

DIP TUBES: Dip tubes come in two types, GAS IN and BEER OUT, associated with the GAS IN and BEER OUT keg posts. The difference between these two is that the gas tube only protrudes into the keg about one inch, while the beer out tube extends all the way to the bottom (so you can get all of that goodness out). These are mainly comprised of SS, though I have seen rare instances where the gas lines will be plastic. These components do not wear out, but if you do need to replace one, they are readily available.

keg parts gas in tube

keg parts dip tube out

O-RINGS: There are typically O-rings in the following locations:
Lid: (1)
Gas dip tube: (1)
Beer dip tube: (1)
Gas in post: (1)
Beer out post: (1)

These O-rings will wear and need replacement at some point, but the sizes are standard so you can buy them anywhere keg components are sold, or find the industrial equivalents at a supplier like McMaster-Carr.

Stay tuned for an article on keg maintenance.


Brew In A Bag (BIAB) All Grain Brewing Method

Saturday, June 20th, 2009

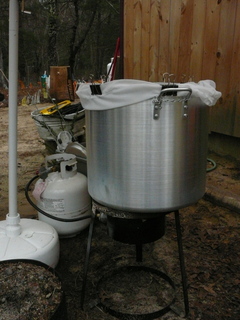
BIAB is an acronym for Brew In A Bag. It is a dead simple all grain brewing technique. All it requires is a large grain straining bag, 15 gallon kettle and a propane burner. This method is excellent for brewers who are wishing to convert from extract brewing to all grain, because you can make that leap for a very minimal cost. It will also save an all grain brewer 1.5-2.5 hours on a typical brew day. If you combine this method with the No Chill brewing method also listed on this site, you can go from extract to all grain brewing for as little as $25!

BIAB utilizes THREE pieces of equipment:

The kettle: This kettle is the ONLY vessel required to BIAB. The only special requirement is that the kettle have a volume of at least 15 gallons for a 5 gallon brew session. This is because this one vessel will have to hold your entire water requirement as well as your grain bill. This volume will regularly exceed 10 gallons. You will mash and boil in this vessel.

The bag: This is a mesh bag that is large enough to conform to the inside diameter of the kettle and reach over the top lip. This bag is sometimes likened to a large pillow case, the kettle should be able to fit INSIDE it while still being able to close the top of the bag. Typically composed of “voil” or another mesh like material, this will hold your grain bill and must be strong enough to hold the water saturated grain when you lift it out of the mash water at the end of the mash.

The heat source: This is typically the very popular “turkey fryer” burner that is used widely by home brewers. This will be utilized to provide heat for strike water, maintaining mash temperature, mash-out and the boil.

brew in a bag
Fig 1.

The process:
Crush your grain finer than you would with a typical all grain brew. This is because you no longer have to worry about a stuck sparge. The bag is the filter and the finer crush will improve your conversion efficiency.

Fill the kettle with the TOTAL water required to complete the entire brew session. Take into consideration that the water absorbed by the grain with this method is about HALF that of a typical all grain brew session that utilizes a MLT. Remember, when you remove the grain bag after the boil, the wort that is left is exactly what you are boiling, so calculate this carefully. Insert and secure the bag at this time.

brew in a bag
Fig 2.

After heating the water in the kettle to your calculated strike temperature, pour your entire grain bill into the secured bag. Use a mash paddle to thoroughly mix the grain with the water so that there are no dough balls. There will be a very large volume in the kettle, so temperature control should be as easy as intermediate stirring and a couple quick firings of the burner if the temperature drops.

brew in a bag
Fig 3.

After the mash is complete you heat the mash to mash-out temperature, which is crucial to achieving good efficiency with BIAB since you are NOT rinsing the grains.

After mash-out, remove the grain bag and allow it to drain into the kettle. Some brewers will place a rope and a hook above the kettle to suspend the grain bag as it can become heavy with larger grain bills.

brew in a bag
Fig 4.

brew in a bag
Fig 5.

Finally, boil the wort just as you normally would.

brew in a bag
Fig 6.

Additional References:
https://www.homebrewtalk.com/f36/more-brew-bag-biab-success-88486/
https://www.aussiehomebrewer.com/forum/index.php?showtopic=11694

Here are a few important points to make about BIAB:

**DO have a large enough kettle to accommodate about 9 gallons of water AND your grain bill.

**DO have a bag large enough that you can fit the kettle INSIDE it and still close the top.

**DO crush your grain fine, it will produce better conversion efficiency and there is no danger of a stuck sparge.

**DO NOT skimp on mash time, this is more crucial with BIAB, mash for 60-70 minutes to achieve full conversion.

**DO NOT allow your grain bag to come into contact with the bottom of the kettle when you are applying heat, it may melt! Some place a wire cake cooling rack in the kettle to lift the bag off the bottom.

Photos courtesy of user “Daddymen” on homebrewtalk.com. Thank you!


Lautering Equipment False Bottom vs Manifold

Saturday, May 2nd, 2009

There are some distinct differences between the these two popular methods of lautering your mash that you will want to consider prior to building your mash tun. As with most brewing equipment or brewing methods, you need to determine which one will provide you with the results that you desire.

A false bottom is simply a plate, generally stainless steel, that is filled with hundreds of uniformly spaced small holes. These are generally round, limiting the user to a round mash tun.

false bottom in mash lauter tun
Fig 1: Example false bottom.

A manifold is simply a series if pipes, either CPVC or copper, that has been drilled or slotted with a saw. These are laid as closely to the bottom of the mash tun as possible with the holes or slots facing downward. A manifold can be constructed to fit any size or shape mash tun.
copper manifold in mash lauter tun
Fig 2: Example copper manifold which fits into cooler.

Time to explore some facts!

Let’s begin with a list of FACTS about false bottoms, their Pros and Cons.

PRO’s for false bottoms:

1. They are readily available, professionally manufactured
2. They are nearly 100% efficient
3. They will lauter nearly 98% of the grain bed uniformly
4. Grain bed depth barely affects their efficiency
5. They are more efficient than manifolds in all cases

CON’ s for false bottoms:

1. More prone to stuck sparges than manifolds
2. They are difficult to make yourself
3. They are only manufactured to fit ROUND coolers or buckets

Time for the FACTS about pipe manifolds, their Pros and Cons.

PRO’s for pipe manifolds:

1. Though not commercially available, they are very easy to manufacture at home
2. They are nearly 93% efficient
3. They will lauter nearly 93% of the grain bed unifromly
4. Stuck sparges are very rare with a properly built manifold

CON’s for pipe manifolds:

1. They are never as efficient as false bottoms
2. Grain bed depth with affect the efficiency of the lauter
3. Pipe spacing will affect the efficiency of the lauter
4. More prone to channeling (fluid taking path of least resistance, also rinsing less sugar)
5. Cleanup can be tiresome as it should be taken apart and rinsed completely.

False bottoms are pretty simple, there is little left to the imagination or to the design, this cannot be said for the construction of manifolds. There are a few principles that need to be discussed if you want to get the most out of your manifold.

#1. Plan your MLT size to coincide with having a deep grain bed, the deeper the better. This will serve to improve the efficiency of any manifold that you construct. A 12” or deeper grain bed is preferred.

#2. Plan the layout of your manifold pipes carefully, optimum spacing is about 2” to 2.5” between pipe centers, OR 4x the pipe diameter. (1/2” pipe spacing is optimal at 2” between centers, 3/8” pipe spacing is optimal at 1.5” on center etc…)

#3. Pipe spacing from the walls of the MLT should be planned at HALF of the optimal center to center distance from #2 above. (1/2” pipe spaced at 2” between centers, would be spaced 1” from center to the edge of the inner wall, 3/8” pipe would be spaced at .75” from the pipe center to the edge of the inner wall etc…)

The afore mentioned design rules will allow for the most efficient manifold for YOUR mash tun. The principles that govern the design needs for a specific manifold are related to fluid dynamics, fluid flow, path of least resistance and creating an even flow velocity around EACH tube in the manifold.


Adding Sight Gauges on A Budget

Sunday, April 26th, 2009

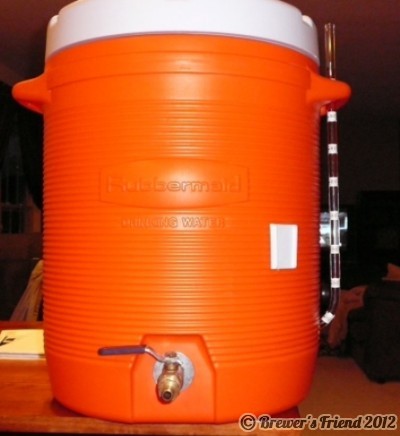
$3.26 Sight Gauge modification for hot liquor tank (HLT) or mash lauter tun (MLT).

This article explains how I added a sight gauge to a 10 gallon hot liquor tank (HLT) cooler as well as an identical 10 gallon mash lauter tun (MLT). Gas fired vessels may also be converted in this manner, but use caution! Many polycarbonate tubes are rated up to only 200F, so their use on boil kettles can become a concern if the heat from the gas burner moving up the side of the kettle exceeds this value to any large degree. The temperature of the liquid may be 200F-205F, but the heat licking at the side of the kettle may be much hotter. This parts list for this modification are suited for the mash lauter tun or hot liquor tank – NOT THE BOIL KETTLE!! When adding a sight gauge to a boil kettle, the tubing needs to be rated for higher temperatures, and different gaskets and fittings are needed to withstand the higher temperature and pressure.

This article demonstrates heating and bending the plastic tubing.  I took care to follow safety precautions such as wearing thick gloves, eye protection, not drinking alcohol while doing this mod, staying away from flammable materials, and I kept a fire extinguisher on hand.   Now that we are past the safety warnings we can get on with the mod, which comes out looking like this:

sight gauge for brewing

Parts List:
Qty: (1) ½” OD x ¼” ID polycarbonate tube approx. 19” in length (McMaster Carr $1.65/foot)
Qty: (1) #5.5 drilled gum rubber stopper (LHBS $.65 each)

Tools Required:
Hack saw/cutoff saw/Dremel tool
Propane Torch/Deep Fryer
1” hole saw/1” step drill
Label Maker
Drill

Step 1. Properly locate the hole where the stopper and sight gauge will enter the side of the vessel. This does not need to be at the very bottom of the vessel, but rather at a location where the minimum fluid level required in the vessel can still be measured. For me this is near the 1 gallon mark. I drilled a 1” diameter hole on center at this location. Fig 1

drill hole for cork
Fig 1

Step 2. Determine the length of the tubing which to cut. I was sure that the tube reached nearly to the top of the vessel, and that there was ample length after the “L” bend at the bottom to get the tube into the vessel and into the stopper. (The sidewalls on some coolers can be as thick as 2”-3”) Cut the tubing using a fine tooth hack saw or some sort of cutoff saw. A rotary tool such as a Dremel would work as well.

Step 3. Determine where to bend the tubing, this will be 2”- 4” from the end of the tubing depending on your application. I marked this location with a permanent marker. Fig 2
site gauge tubing
Fig 2

Step 4. The polycarbonate tubing will need to be heated at the end that you intend to make the 90 degree bend. This is where the propane torch, OR deep fryer will work. Using a torch will take more skill than using the deep fryer method, and requires heating the tubing gently and evenly.With the deep fryer, I set the temperature to 350F. When the oil was heated I inserted the end of the tubing intended to be bent, submerging it just past the point where I wanted to make the bend. In either case, 350F polycarbonate retains its integrity, but is very pliable and HOT! I used an oven mitten to protect my hands. After the tubing was made pliable I needed to move fairly quickly make the bend, I used the edge of a cutting board with a ½” radius corner as my guide. This allowed a uniform bend and assured a 90 degree angle. Fig 3, Fig 4
site gauge fat fryer
Fig 3
site gauge bent ready to install
Fig 4

Step 5. Then I let the tubing cool!

Step 6. ASSEMBLE: Inserted the stopper from the inside, into the hole that I drilled in Step 1, then inserted the bottom of the “L” tubing into the stopper in the wall of the vessel. I though of using an eye bolt to support the top of the gauge, but then I realized I can simply use the existing cooler handle.

Step 7. CALIBRATE: I filled the vessel one gallon at a time, marking the level of fluid in the sight gauge as I went. Using a label maker I marked these locations accordingly so that I can now precisely measure strike water, infusion water and sparge water quantities quickly and easily. Fig 5
site gauge fitted to cooler
Fig 5


Introduction to RIMS and HERMS

Sunday, February 22nd, 2009

This article explains the basic difference between RIMS and HERMS systems. Both are advanced setups for home brewers where mash water (wort) is circulated through a heating system. The benefits include clearer wort, higher efficiency, and an impressive looking setup that helps automate the brewing process and leads to consistency.

The difference between RIMS and HERMS comes from the method of heating in order to maintain or change the mash temperature. This is very different from the basic style of mashing, where hot water is infused to raise temperature. With RIMS and HERMS heat is directly applied to the mash water.

We can begin with de-constructing the acronyms RIMS and HERMS.

RIMS is short for Recirculating Infusion Mash System.
HERMS is short for Heat Exchange Recirculating Mash System.

We also need to introduce two additional acronyms: the HLT and the MLT.

The hot liquor tank (HLT) is a kettle, or cooler full of heated water. The mash lauter tun (MLT) is where the grains are mashed, coveted to sweet wort, and lautered.

The MLT in this case is again usually a kettle or cooler, and has a false bottom to allow lautering.

A HERMS will rely on a heat exchanger, in most cases the hot liquor tank (HLT) in which a copper coil is placed, in other cases, another external vessel that is filled with a heating medium (water) in which a copper coil is immersed. The mash water is pumped through this coil, picking up heat from the surrounding water, and returned to the mash lauter tun (MLT).

A RIMS system relies on a form of direct heating where the mash water (wort) is pumped through a small tube in which an electric heating element has been installed. The mash water is pumped through this tube, past the heating element, and heated to the proper temperature prior to returning to the MLT.

Lets get more specific with the components and function of a typical HERMS. As previously stated this system is used to maintain and change the temperature of your mash, so the need for some level of automation is almost a necessity. Whether the HLT is heated with a gas burner, or with an electrical heating element, you have to control the temperature of the HLT water (heating medium) precisely in order to take full advantage of the systems ability. This control is accomplished easier when heating with electricity, where the switching (on/off) of a heating element is done via a simple temperature controller which is wired to the heating element. During operation the controller is reading the HLT water temperature via a temperature probe in the HLT water (heating medium).

To accomplish this with a gas fired HLT would require some additional equipment. This equipment would include items such as a gas solenoid valve to cut the gas to the burner when your target HLT temperature has been reached, as well as a pilot or spark ignition system to automatically re-light the burner when the temperature controller commands gas (heat) through the solenoid valve. Changing the temperature of the mash is as easy as changing the temperature setting on the temperature controller to adjust the temperature of the HLT water.

In this same system the wort is typically recirculated continuously, which is of great benefit to the all grain brewer for a couple reasons. First, you will have little or no temperature variation in your mash due to the constant draining and return of precisely heated mash water to the MLT. Second, you will have superior wort clarity since you are setting up your grain bed (filtration) during the mash while recirculating the wort. **When I say superior wort clarity, I would compare it to looking through a glass of any of the typical American Lagers that have been filtered, it is quite amazing. This recirculating of 150F-160F wort is no easy task for a simple pump, which is why most home brewers have come to rely on the March 809 pumps, which are high temperature, food grade, magnetic impeller pumps. They are a perfect fit for both HERMS and RIMS.

In brief, the RIMS is utilized to accomplish the same outcome as a HERMS, but by a slightly different means. In a RIMS you are passing the mash water directly over an electric heating element that is contained in a small tube with an inlet at one end and an outlet at the other. Controlling the temperature of a RIMS is nearly identical to the HERMS… as it is done with some type of temperature controller connected directly to the heating element. The major difference is that the temperature is measured at the OUTLET of the RIMS heating tube prior to the mash water returning to the MLT. Just as in a HERMS, the RIMS can easily change the temperature of the mash by simply adjusting the temperature on the temperature controller. A RIMS will also generally utilize a constant recirculation of the mash water via a March 809 pump, providing the same benefits to the brewer as it will in a HERMS.

The similarities in these systems are great, and the befits are many. So, why choose one over the other? Some choose the HERMS because it is more energy and equipment efficient. If you are already heating the sparge water in the HLT, why not also use this water as a heating medium? Makes perfect sense right?

Some will choose a RIMS due to the fact that they do not have to change the temperature of a large volume of water in the HLT in order to make temperature corrections, or in some cases (step mashing) large temperature changes. This makes perfect sense as well… though both systems, if used properly, can perform temperature changes, even large ones, quite effectively. The choice is yours!


Add Thermometer Probe to HLT MLT Cooler

Sunday, February 15th, 2009

Instructions for adding a thermometer to your hot liquor tank (HLT) or mash lauter tun (MLT). This makes a handy addition, it is cheap to do (~$16), and improves temperature accuracy.

Lets face it, brewing is an art and a science.  Science in itself requires certain controls and measurements to be executed effectively. This is no different with all-grain brewing. To the all-grain brewer temperature measurement and control is of the utmost importance. The following is a simple, efficient and effective way to accurately measure your HLT and more importantly MLT temperatures. The art of building quality brewing equipment is to make it simple, effective and efficient.

This DIY project is targeted at the all-grain brewer who chooses to utilize coolers, whether they be beverage coolers or “cube” coolers, that desire a simple way to measure temperatures inside their vessels without opening them.

Outside view:
thermometer probe brewing beer

Inside view:
thermometer probe brewing beer

Parts you will need:

#5.5 SOLID gum stopper or silicone stopper (Qty 1) – $1

Digital (or dial) probe thermometer with a range of at least 100F – 200F (Qty 1).  Anywhere from $11-$16 on amazon.com (search for TruTemp thermometer or CDN thermometer).

Tools you will need:

3/8” chuck power drill
1” hole saw
3/16” drill bit
Utility knife or file.

Instructions:

Step 1)
Calibrate the thermometer before installing it.

Step 2)
Locate your hole for the thermometer in a place where you can easily read it. There are a few considerations for placement. Make sure it will be submerged below your water level in your HLT and the strike water level in your MLT. Determine the smallest volume of strike water you will use when mashing in, and place the MLT hole below this level. Why? When you pour your strike water into your MLT, you can monitor the temperature as the cooler absorbs some of the heat from the water and when it reaches your strike temperature, mash in. For a 5 gallon all-grain brew you are looking at 2.5-4 gallons of strike water, for a 10 gallon all- grain you will double that amount to 5-8 gallons. Be sure your thermometer will be below these levels!

Drill your 1” hole here through the wall of the cooler. Once the hole is drilled, be sure to remove any rough edges or hanging plastic splinters with a utility knife or file.

Step 3)
You will need to “drill” a small hole through the center of the solid stopper in order to accommodate the probe of the thermometer of your choice. Utilize the 3/16” drill bit to do this, you will not see much of a hole due to the stoppers ability to seal itself off, but it will provide an opening for the thermometer probe.

Step 4)
Place the stopper into the 1” hole that you drilled in the cooler, from the INSIDE. While holding the stopper in the hole, carefully press the thermometer probe into the hole in the center of the stopper from the outside. Sometimes using a food safe lubricant like keg lube can help slide the probe into place.

Step 5)
Test that the fitting is water tight with warm but not boiling water. As always when doing any modifications with your equipment, test it before you brew again! The worst time to realize that you have a leak is when you are in the middle of a brew session with 150-180F water in all of your vessels!

Congratulations, your installation is complete and you are ready to brew!


Want no ads? Go Premium and unlock all our brewing tools!