Equipment - Brewer's Friend - Part 3
Brew your best beer EVER. Save 10% on Brewer's Friend Premium today. Use code TAKE10. Sign Up ×

Archive for the ‘Equipment’ Category

Growler – The Perfect Gift

Sunday, September 4th, 2011

My friend got me a growler of Deschutes beer for my birthday. What a great gift! It came full of cold, delicious beer. The best part is, the growler is mine too. After we drank our way through several home brews, we finished off the growler among three of us.

home brew growler

I have had my eye on this particular growler for awhile. The design really stands out from the rest. It appears to be made in Germany too. They are not cheap. As of September, 2011, at the Portland Deschutes location, it is $26 for growler, and $14 to fill it. I hear it used to be a lot cheaper to fill them.

beer growler

Be careful if you want to bring in your own growler. My research indicates some breweries will only fill growlers with their name on them. It sounds like Oregon is more lax than California on this issue.

This growler holds 2 liters, which comes out to a little over 67 ounces. Most growlers are 64 ounces. It is a very high quality growler with a nice decorative handle.

deschutes beer growler

I really like the porcelain lid, it seals down nice and tight. I’ll be choosing this growler first when I show up at parties with home brew.


Brew Shed Complete and Brewing

Sunday, August 14th, 2011

The brew shed is looking good in time for the rains to return. It is a relief to have it done (at least on the outside). All it needs is interior trim. Slowly but surely all the equipment is migrating out there.

brew shed

The best part is the brewery is now operational. The first brew was an American Hefeweizen and it went great! The beer was drinkable in a week. It is already on draft and quenching my thirst. It’s true – a cool glass of hefe comes in real handy after painting all afternoon.

home brewery

My brew rig is presently a gravity fed electric setup. The main reason I made the push to go electric is the hazard of using propane indoors. It wasn’t cheap to go electric, nor was it without a few minor headaches. However, the team at HighGravityBrew.com is just awesome. They have all the parts you need worked out in advance. I highly recommend their products.

electric brewery

In the next few posts I will cover how to ‘go eletric’ and what it involved. I have to say I love it. Electric brewing is so quiet. It heats up fast (+4 degrees Farenheight per minute with about 8 gallons). Scorching is a myth – at least with the low density stainless steel element I got.  That light batch of Hefe was done in part to test for scroching – there was none whatsoever. I did have to modify my immersion chiller so it didn’t crush the element.

brew shed

I hope this inspires you to do your shed too. Total cost $8200.

Plans for the future:

  • RELAX!!!!
  • Finish up brew stand, add trim to front.
  • Fermentation chamber. I can build one of these for about $225. Next year…
  • Hops trellis on the front. Next year…

My advice to fellow brewers:

  1. Make at least two batches of thirst quenching beer BEFORE you start a shed. That way you have something to enjoy after working all day.
  2. Take the time to make the brewery functional and look cool. A brew shed is a once in a lifetime project for most people. The galvanized panels in my shed were hard to work with but the results were well worth it. I love the reflective look. It should last a long time. I wish I would have thought ahead about the wiring layout though. I had to work around where the electrician put one of the switches. It worked out fine but it would have made life easier had I drawn out everything.
  3. Invest in ventilation. Commercial vent hoods are really expensive ($600+). You will need a good one in order to vent all the steam out of the brewery during the boil. A kitchen hood is not powerful enough. Thankfully, my loft doubles as a vent hood. The intake is a dust collector attachment from a wood working catalog. The fan I went with is the Can Max Fan Mixed Flow Inline Fan (6-Inch 334 Cubic Feet Per Minute). It is quiter than the poplar 6″ Vortex fan, and has a built in 3 speed switch.
  4. Go electric for indoor brewing. Don’t even think about it, just do it. Yes it is a luxury, but it is night and day over propane. It is more energy efficient and safer (if wired correctly). HighGravityBrew.com is the place to go for parts. Porpane + indoors = recipe for Darwin award. I used to do it in my garage with the bay door open. Reading up about propane accidents scared the crap out of me and my wife (this helped justify the purchase too).


Basket Press for Fruit Based Brews

Saturday, July 9th, 2011

Fermenting crushed berries, grapes, and fruits can be a fun diversion from making beer. Home brewers who make beer already have all the equipment, except for a basket press. I tasted an amazing pear, blueberry, raspberry cider at a home brew club meeting last year. This inspired me to get more into fruity meads and wine. I tired making wine last fall. It is now in the bottle and going fast. It was totally worth it! Apples, Cherries, strawberries, blueberries, raspberries, blackberries, apricots, peaches… the list goes on, could all be experimented with.

wine and sweet mead home made

The Basket Press:

Once again, you will need a new piece of equipment to make this work. I looked into the Do-It-Yourself solutions. A good basket press would take a lot of time to build, more time than I wanted to spend. Personally, I decided to buy a professionally made press. The pressure from the screw, alignment, and reliability were reasons I decided not to build my own. A small size is perfect for the small amounts I am working with.

basket press
(Action shot of the wine press.)

When shopping for a basket press, check out the Yakima Press Company.

Yakima Press Company

Yakima Press Company sells high quality basket presses. If you are interested in pressing more than a few gallons, you will probably want a bigger press. All their products are 100% made in the USA.

Yakima Press Company


Outline of the process to make Fruit Wine, Hard Cider, Sweet Mead:

1. Pick and wash your fruit. Get good quality fruit, it will shine through in the end result! Wine grapes are normally not washed, as it is too time consuming, and not necessary due to addition of sulfites later on. You’ll need a lot of fruit to get 1 gallon of juice. For example, with apples one bushel is about 42 pounds, and gives 2-3 gallons of juice. You can top this off with water and add sugar or honey to compensate. You don’t have to go with 100% juice to get a good result.

2. Crush the fruit to release the juices. Wine grapes are done with a de-stemmer / crusher. Raspberries and blueberries can be done easily by hand. Fruits like apples and pears can be chopped and then put through a food processor.

3. Run fruit through basket press. The harder you press, the more tannins and other harsh flavors will come through. I sampled for flavor as the crush went just to tell where I was at. When it gets hard to turn the press, that’s probably a good sign it is time to stop. Beware, this step is sticky and messy but tastes good.

Note: Red wine is an exception. With red wine pressing comes after fermentation, as the skins are what give red wine its color.

4. Add 1 campden tablet per gallon of juice. Let sit for 24 hours. This step kills off all the wild yeasts and other bad guys and creates a stable environment for the brewing yeast to take off.

Campden is the same thing as  potassium or sodium metabisulfite. An equivalent solution can be created on your own (1 campden table in 1 gallon of water gives 67 ppm sulfur dioxide). Be careful not to over sulfite the batch!

Note: Again with wine from grapes the story is a little different. Sulfites are added right after the crush, targeting 60 ppm.

5. Measure gravity and volume. At this point, adjust with water and sugar or honey as desired so your target volume and alcohol level will be reached. This is going to vary widely depending on the recipe.

6. Transfer to carboy and pitch yeast. Yeast nutrient is a good idea. Dry mead yeast is very dry and will strip out all the sweetness. I’d recommend a sweet mead yeast on the first go.

7. Rack after primary fermentation is complete – could take up to a month. Expect to get a lot of trub, aka lees on the bottom of the carboy. Top off secondary with water or last year’s product. You may want to add more sulfites at this point to protect your new brew. The sulfites that were originally added are pretty much eliminated during primary fermentation.

8. Rack again and repeat every week or so until desired clarity is reached.

9. Bottle and age as desired.

10. Enjoy!


Brew Shed Update

Saturday, June 25th, 2011

The shed is taking its final shape. The roof is on, skylight is in, and gutters installed. The electrical is in and the inspection passed!

brew shed dominates

The paint job is just primer right now. It was all done by hand with rollers or by brush so it soaked in good. I was told by a friend who is a home inspector that spraying paint on T-111 will cause problems later. I plan to paint the trim brown for an exposed timber look. Painting T-111 is hard work, especially in the grooves. It took 4 gallons to get two coats of primer on the entire shed.

brew shed dominates

The entire shed is insulated. Before I insulated, I air sealed all the seams with caulk. For larger gaps I used expanding foam. I am working on getting the metal panels in place for the brewery section under the loft. I’m not that happy with how the corrugated panels line up at the seams. I might go with tile, or even metal tile, but that gets expensive fast.

brew shed dominates

The loft is good for storage and also forms a natural vent hood. The opening for the intake on the exhaust fan is visible on the left.  I looked into the expensive stainless steel kitchen hoods. Damn those things are spendy (minimum $600). This is an experiment on my part but I think it will work out fine.

brew shed dominates

The electrical panel has some spare circuit breakers and plenty of juice. I went with a 50 amp service installed by a professional signing electrician. To save money, I dug the trench and crawled under the house to run the wire. With 50 amps there is room for electric brewing in the future. To make it even easier when that time comes, I ran a wire inside the wall of the shed. If I ever want to switch to electric, all I need to do is buy a breaker and outlet.  My kettle and HLT will need adjustments too. That project will likely take 12 trips to the hardware store. I’m waiting on that adventure for now.

Next steps:

  • Sheet rock.
  • Exhaust fan.
  • Finish metal section for brewery.
  • Brew!
  • Then deal with all the little cosmetic details like interior paint and a nice trellis for the hops.

I’ll warn you, this project may look cool, but it has been a lot of work. It gets complex and expensive. So far I am in about $7,000. There is a lot of over head work up on ladders. I have skinned my knuckles many times, and cussed out loud many more. My beer supply is dwindling as I have not had time to brew. My wife has been just great about the whole thing and has helped on many sections. Without her I could not have done this.

I will be glad when this is completed and I can brew again!


Beer Wagon Deployed

Saturday, June 4th, 2011

The latest do it yourself (DIY) home brew project is complete! This is nowhere near as cool as my shed, but it does help save the back when it comes to brewing.

beer wagon in action

While my brew shed is underway I brew in the garage and ferment in the spare bedroom. This means I have to lug a full carboy up and down the hall. Carrying a full carboy sucks. I use carboy straps to help make it easier but it is a pretty long way. I built this beer wagon to make life easier.

beer wagon

The wagon measures 16.5” x 16.5”, 11.5” tall. That is plenty of room for a 6.5 gallon carboy. I used a 16”x16” 3/4” plywood base and some scrap wood I had left over for the rails. The white wood is aspen, 1/4” thick. The vertical supports are 1.25” wide. The horizontal rails are 2.25” wide. The trim is walnut and mahogany same dimensions. Any hard wood will do.

beer wagon bottom

For mobility and load capacity it has 3” casters. Wheels are fixed in the back, and swiveled in the front for steering. A gallon of water weighs 8.35 pounds, so figure if you want to move seven gallons plus the carboy you need to be able to support 65 pounds. Most 3” casters support over 100 pounds easily.

beer wagon storage


My New Tool – The Carboy Cleaner

Sunday, May 1st, 2011

Carboy Cleaner LLC has made life better by building a better carboy brush. Unlike a better mouse trap (which nobody cares about), the Carboy Cleaner really is a time saver and does a better job than my old ‘L’ shaped brush. Thank you capitalism.

You know, I didn’t have a good relationship with old ‘L’ anyway. ‘L’ was always spraying me in the face. I was on my second ‘L’, as the first one rusted. Now I can say goodbye and good riddance to ‘L’.

carboy brush L shaped

The Carboy Cleaner is a metal rod attached to two padded brushes at one end. It has a rubber gromet that fits in the neck of a carboy. Once you see how it works, it is a no brainer. You need a cordless drill to make it work. If you don’t own a cordless drill, buy the Carboy Cleaner first, then you have an excuse to buy a cordless drill. The product website has a great video demonstration. Ryan is an enthusastic presenter. https://www.carboycleaner.com/

carboy brush

The Carboy Cleaner can also be used to sanitize a carboy. Just soak the brushes in sanitizer solution, and add some of the sanitizer solution to the carboy, then go for it with the drill for minute or so.

carboy cleaner

Practicallity aside, it’s a great excuse to get out a power tool and fire it full throttle! I hooked up my 18V cordless drill and let it rip. Here’s how it went:

carboy cleaner

Start it off in the bottom slowly.

carboy cleaner

Spin it up to 100%.

carboy cleaner

Raise and lower the brush to cover the entire inside.

carboy cleaner

Nice and sudsy.

Brewer’sFriend received a complimentary Carboy Cleaner.


Racking Tutorial with a Built In Spigot

Saturday, April 9th, 2011

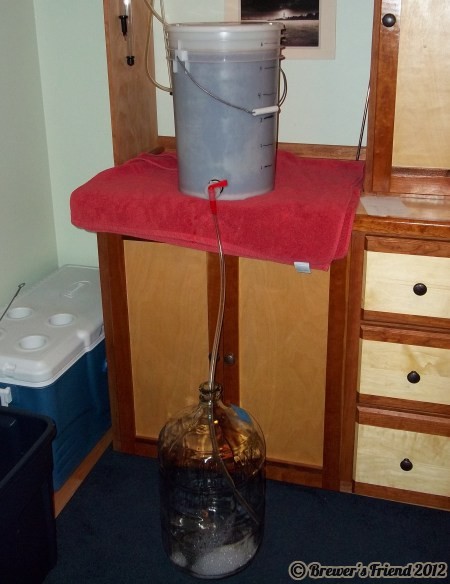
Racking beer is made easy if your primary fermenter has a spigot. Note that this piece of equipment is essentially a bottling bucket with a good lid. They are cheap and easy to use with only a few drawbacks.

Racking beer is not required, but it can add clarity in the final beer. I only rack my ales about a third of the time. If you are going to dry hop, doing a very strong beer, or fermenting for more than 3-4 weeks, then racking is a good idea. There is an exception, I always rack my lagers before cooling them down to 33F for 4-6 weeks.

Here is how I racked my latest batch of Oktoberfest:

1) At least one day before, lift the primary fermenter up to a table. This will give the yeast time to settle back down.

2) Sanitize secondary fermentor, hose, cork and airlock. I like StarSan for this purpose. Have your hydrometer and a sampling cup on hand.

racking beer

3) Get the hose hooked up and dropped into the secondary. Turn on the hose. Minimize splashing if possible. Depending on how low the spigot is some yeast will come through, but not a lot.

racking beer

4) About half way through I stop the hose, and take a sample for gravity and taste. I make sure my hands are VERY clean for this step.

beer smple

5) Continue draining. Tip the bucket at the end. Make sure to fill it to the top.
beer smple

6) Record your hydrometer value and note the flavors.

Primary fermentation in a bucket is easy for the following reasons:

  • Easy to sanitize the bucket. Those 90-degree brushes for cleaning carboys can be a pain to use.
  • Easy to clean the bucket after fermentation.
  • When fitted with a spigot, draining is a breeze. No siphon is needed. There is less equipment to sanitize and clean up.
  • Stopping the flow to take a sample is easy.

Knocks against using a plastic buckets as a fermenters:

  • Odors can remain behind in plastic, especially strong dark beers.
  • There is concern for oxygen penetration.
  • The seal can fail around the spigot. Never had this happen, but it would be a major mess. I fitted mine with a double set of washers on the inside and outside. This did involve a trip to the hardware store, and I bought extra. I keep a habit of only turning the spigot clockwise, so I don’t accidentally loosen the thread.

The real solution to this issue is to buy a stainless steel canonical fermentor. This is how commercial breweries do it. Compared to a carboy or plastic bucket they are fifteen times the price! Figure spending at least $500 on one.

Notice there was no head space in the secondary. That was 100% on purpose to avoid oxidation. Check out information in this article about why topping of the secondary is important.

Update 11/12/2011: Check out the article on Infected Batches to see why you might want to tear down your bottling bucket now and then, since the spigot can get pretty gross without you knowing it.


Hot Liquor Tank for All Grain Brewing

Sunday, February 13th, 2011

Advanced all grain brewers use a Hot Liquor Tank to heat their strike and sparge water. The term Hot Liquor Tank (HLT) is a misnomer that comes from the commercial brewing world. The HLT never holds anything that has alcohol in it or sweet wort. A better name would be a hot water tank, or hot water pot. The HLT has a simple job. It is the container where the brewing water is heated to mash temperature. The HLT is also where brewing salts are added to the source water.

In a gravity fed system, the HLT is at the highest level, the mash tun is at mid level, and the boil kettle is at the lowest level. Each level has a ball valve to allow draining to the next level with ease. Advanced setups involving a pump, single tier, or HERMS will have a modified version of an HLT.

gravity brewing

1) Brewing water is heated in Hot Liquor Tank (HLT)
2) Mashing happens in Mash Lauter Tun (MLT)
3) Wort is drained into Boil Kettle (BK)

An HLT is a luxury for all grain brewers. Up until now, I was using a combination of a 20qt extract kettle and a 4 qt pot to heat my brewing water. This was based on a two-tier gravity system where the mash tun drained to my boil kettle. It works, but lifting 18qt of hot water is dicey. Now that I am going for a 3-tier gravity system in my brew shed I need the HLT.

Extract brewers do not have to worry about an HLT, since there is no mashing involved. Extract brewers should focus on building a mash tun first (bulkhead, mainfold ).

A complete HLT has the following:

  • Ball Valve: for easily draining the brewing water to the mash lauter tun.
  • Thermometer: used to tell how hot the water is that will be drained into the mash lauter tun. Get one that can be calibrated with a set screw.
  • Sight Gauge: tells how much water is in the HLT
  • Dip tube: allows you to drain to the bottom (see dip tube article).
  • Capacity: Anything bigger than your brew kettle is wasted. I went with the same size for looks. Depending on the strategy for mashing, going with a smaller HLT would be fine.

The HLT I selected is from MoreBeer
more beer logo

hot liquor tank brewing

hot liquor tank brewing

hot liquor tank brewing

hot liquor tank brewing

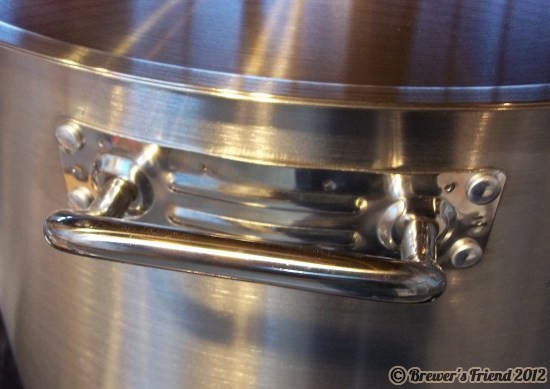
I wanted an all inclusive package that would be hassle free. I also wanted to match my existing brew kettle which is also from MoreBeer. I have been very happy with both! Morebeer custom welds the stainless steel ball valve, fits the sight gauge and thermometer before shipping. It took about 10 days for the HLT to arrive. I had to add my own dip tube, just like with my kettle. Manufacturers don’t seem to get the utility of a built in dip tube on such a heavy pot.

Other things to note:

  • When draining to your mash tun, make sure to use hosing rated for foods that can handle temperatures up to boiling.
  • Accurate water volume is critical for all grain brewing. Make sure to account for dead space in the HLT when marking off the water volume ticks. The sight gauge doesn’t come with marks on it. See this page for information about total water calculations.
  • The thermometer must be calibrated! Thankfully, MoreBeer HLT comes with a thermometer that can be adjusted. A poorly calibrated thermometer can lead to reduced brew house efficiency and differences in flavor and body if mash temperatures are wrong.

Morebeer.com gave BrewersFriend.com a $50 discount for writing this article.


Stainless Steel CAD Designed Dip Tube

Sunday, January 2nd, 2011

A dip tube allows a kettle to drain to the bottom by itself. No lifting and pouring required. It works because of siphon action. Adding a dip tube to your kettle or HLT is something to consider.

dip tube brew kettle

My kettle has female 1/2″ pipe thread on the inside, with a ball valve on the outside. This made it possible to screw in the dip tube with wrenches and a little pipe dope. No welding was required. This dip tube leaves 1.5 quarts of dead space, but it is all trub anyway.  I actually get clearer wort in the primary. The other nice thing about this approach is it can be disassembled.

This dip tube is specifically made of stainless steel. Brass can contain trace amounts of lead. Copper is okay, but I don’t trust solder materials (or my soldering skills). A dip tube has to be completely air tight or the siphon won’t work.

This was not cheap at $39.35, however stainless steel fittings are expensive no matter where you go. Having a working dip tube on the first try was really nice. I was picturing several trips to the hardware store, until I realized a stainless steel fitting to go from pipe thread to compression thread is a specialty item. I started calling around and found Swagelok, a company with a local office that stocked what I needed and was ready to help. They actually designed this part just for me, and they saved the design so other people can order it too.

dip tube CAD designed

This dip tube was computer designed in an ISO-9000 shop with me looking over the engineer’s shoulder! Swagelok makes valves and fittings for all kinds of percision industrial applications like semi-conductor fabs. The CAD design is overkill, but in a cool way. Bending the stainless steel tube is the hardest part. It requires a special tool. It took them a couple tries to get it just right.

dip tube PORTL08-002

Here is the information on the parts, and how to contact them if you want to order it.
Swagelok Northwest (Portland Valve & Fitting Co.)
(503) 288-6901
www.swagelok.com

Part #: PORTL08-002, 1/2″ DIP TUBE

If you just want the connector, and not the tube, it is part SS-810-1-8.


Instrument Calibration for Maximum Brewing Awesomeness

Sunday, December 19th, 2010

I am about to brew several batches of beer – whoot! In the spirit of science, and the interests of quality, I decided to recalibrate my equipment since it had been awhile. Besides, I broke my hydrometer and had to buy a new one, so I have no idea where I’m at with it. Beyond this basic checkup the brew kit doesn’t need much of a tune up this year besides tightening screws, checking seals on taps, and replacing old hoses. Here we come 2011 brewing season.

Brewing has aspects of chemistry involved. Scientific method is part of the process if you really want to master it. In order to replicate a batch accurate numbers must be measured and recorded. Please check out our brewday sheets for ready made record keeping.

Thermometer Calibration:

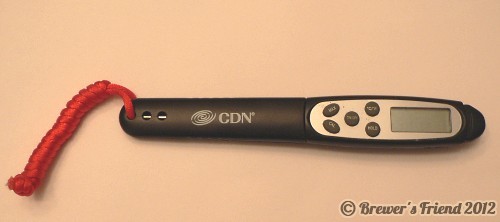
If you are an all grain brewer, it is essential to have at least one accurate thermometer and preferably a backup for use during the mash. I have a digital thermometer, and I keep an old school glass thermometer as a backup.

thermometer calibration

It turned out my digital thermometer was off by about ten degrees! This would have caused some very off mashes had I not addressed this.

My procedure was to check the temperature reading at freezing (32F / 0C), and at boiling (212F / 100C). I also compared the reading of my digital thermometer to my standard mercury thermometer. The procedure was simple, take some crushed ice and mix it in a glass of water. Let the ice start to melt. The solution will be at freezing temperature and should read within a tenth of a degree of 32F / 0C. Then I boiled a small pot of water and made sure it read 212F / 100C. I noticed some screwy readings, so I dug into the instructions on my digital unit and recalibrated it. This brought the numbers back to where they should be.

Hydrometer Calibration:

I would expect hydrometers to be factory calibrated, but of the two new ones I bought, one was +0.002. The other one was spot on and I’m using that now, but I have a mental note that my backup hydrometer needs an adjustment.

Keep in mind a hydrometer reading needs to be temperature corrected to 59F / 15C, or 68F / 20C depending on your hydrometer.
We have a calculator to handle that for you here.

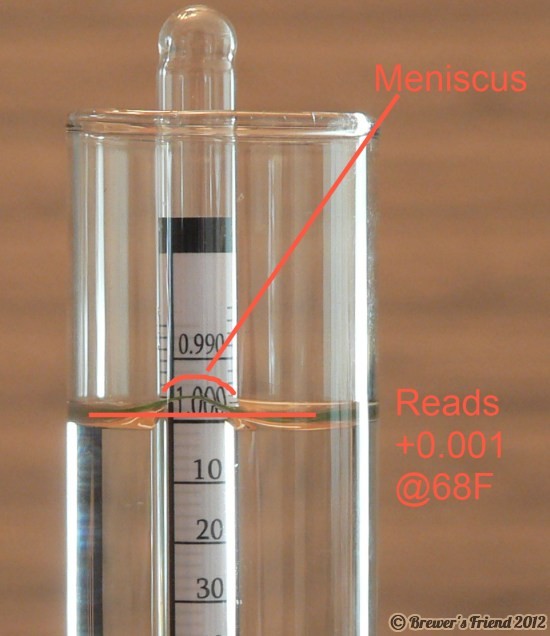
The first thing to do is measure the hydrometer reading in plain water. Mine is calibrated to 59F. That means it should be 1.000 @59F. Also make sure to read the hydrometer correctly. The meniscus is the curve that forms due to surface tension from the suspended hydrometer. Usually the water line is what you want to read and not the meniscus, but it varies by model. The instructions will say how to read the hydrometer. The image below illustrates a 1.001 reading @ 68F and points out the meniscus which should be ignored in my case. After temperature correction, this hydrometer would read 1.002 in water. +0.002 is quite a bit (4% off for an average batch).

hydrometer calibration

The second thing to do is prepare a sugar solution that will give you a reading of 1.046. One pound of table sugar in one gallon of water has a specific gravity of 1.046. My graduated cylinder (the tube the sample goes in) holds about 6 ounces, and 5 ounces is a good amount for taking a reading. Here’s where the math comes in. Figure out how many ounces you want to use for you reading, then use the equation below to figure out how much sugar to add in ounces.

Formula for 1.046 solution:
{ounces of water for hydrometer sample} * 0.125 = {ounces of table sugar needed}

I needed 5 ounces of water, and 5 * 0.125 = 0.625. I measured out 0.625 ounces of sugar and dissolved that into solution.

Derivation:
1 pound of sugar in 1 gallon of water has a specific gravity of 1.046, thus:
16 ounces of sugar in 128 ounces of water has a specific gravity of 1.046.
16 / 128 = 0.125, so we need 0.125 ounces of sugar per ounce of water for a 1.046 solution.

sugar solution for hydrometer calibration

My good hydrometer read 1.045, and the screwy one read 1.047, but after temperature correction (68F to 59F), the numbers came out to 1.046 and 1.048. Now I’m ready to brew like a scientist!


Want no ads? Go Premium and unlock all our brewing tools!