Brewing - Brewer's Friend - Part 4
Brew your best beer EVER. Start your Free Trial of Brewer's Friend today! Sign Up ×

Archive for the ‘Brewing’ Category

Racking Tutorial with a Built In Spigot

Saturday, April 9th, 2011

Racking beer is made easy if your primary fermenter has a spigot. Note that this piece of equipment is essentially a bottling bucket with a good lid. They are cheap and easy to use with only a few drawbacks.

Racking beer is not required, but it can add clarity in the final beer. I only rack my ales about a third of the time. If you are going to dry hop, doing a very strong beer, or fermenting for more than 3-4 weeks, then racking is a good idea. There is an exception, I always rack my lagers before cooling them down to 33F for 4-6 weeks.

Here is how I racked my latest batch of Oktoberfest:

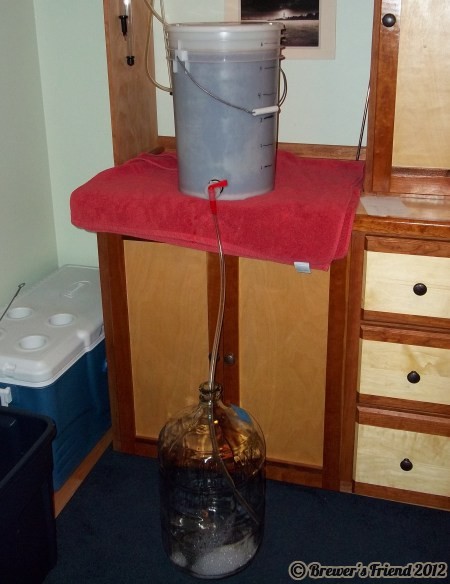
1) At least one day before, lift the primary fermenter up to a table. This will give the yeast time to settle back down.

2) Sanitize secondary fermentor, hose, cork and airlock. I like StarSan for this purpose. Have your hydrometer and a sampling cup on hand.
racking beer

3) Get the hose hooked up and dropped into the secondary. Turn on the hose. Minimize splashing if possible. Depending on how low the spigot is some yeast will come through, but not a lot.

racking beer

4) About half way through I stop the hose, and take a sample for gravity and taste. I make sure my hands are VERY clean for this step.

beer smple

5) Continue draining. Tip the bucket at the end. Make sure to fill it to the top.
beer smple

6) Record your hydrometer value and note the flavors.

Primary fermentation in a bucket is easy for the following reasons:

  • Easy to sanitize the bucket. Those 90-degree brushes for cleaning carboys can be a pain to use.
  • Easy to clean the bucket after fermentation.
  • When fitted with a spigot, draining is a breeze. No siphon is needed. There is less equipment to sanitize and clean up.
  • Stopping the flow to take a sample is easy.

Knocks against using a plastic buckets as a fermenters:

  • Odors can remain behind in plastic, especially strong dark beers.
  • There is concern for oxygen penetration.
  • The seal can fail around the spigot. Never had this happen, but it would be a major mess. I fitted mine with a double set of washers on the inside and outside. This did involve a trip to the hardware store, and I bought extra. I keep a habit of only turning the spigot clockwise, so I don’t accidentally loosen the thread.

The real solution to this issue is to buy a stainless steel canonical fermentor. This is how commercial breweries do it. Compared to a carboy or plastic bucket they are fifteen times the price! Figure spending at least $500 on one.

Notice there was no head space in the secondary. That was 100% on purpose to avoid oxidation. Check out information in this article about why topping of the secondary is important.

Update 11/12/2011: Check out the article on Infected Batches to see why you might want to tear down your bottling bucket now and then, since the spigot can get pretty gross without you knowing it.


Beat Oxidation Problems by Topping Off

Saturday, March 26th, 2011

From my recent experience making wine, I was reminded of the importance of completely filling up the secondary fermenter to the top. A sure way to get a spoiled batch of wine is to leave a lot of head space in the carboy after racking.

fermenter

In beer oxidation can lead to wet card board flavors, low shelf life, and other nasty defects. Leaving head space in the secondary is a sure way to trigger oxidation problems. Wine books say to top off the secondary with a similar style of wine. With beer that is not as easy because of the wide variation between beers even in the same style. The beer could be diluted with water but that doesn’t feel right to me if it is more than 1-2% of the total volume.

The best solution is to take the size of the secondary fermenter and add half a gallon to determine your batch size. For example if I will rack into a 5 gallon carboy, I would target 5.25 – 5.5 gallons for my batch size. Figure one to two quarts will be left behind in yeast and trub. Five gallons is a good size, easy to move around, and fits into a corny keg. I never use a bucket as a secondary fermenter because of the head space issue. Only carboys fitted with a stopper offer an easy way fill to the very top and prevent oxidation.

full fermentor
(5 gallon batch of lager, primary fermentation complete.)

racked to secondary fermentor
(5 gallon batch of lager racked into the secondary.)

How do you get exactly the amount of wort you want?

For extract brewers, this will be easy because you are topping off with water. Just adjust your recipe for the target OG and water volume and top off to that level. Your fermentation vessel should have water volume marks established on it ahead of time (either by you, or labeled by the manufacturer).

For all grain brewers it is not as easy because of mashing, the full wort boil, and no topping off allowed. It takes some practice in knowing your equipment. I have been referring back to this article lately to dial in my water volume.

Note this head space issue only applies to secondary fermentation (if you are racking). Oxygen is good for wort that is going into the primary. Fermentation will drive oxygen out of the airlock. Oxygen is only harmful after the wort has fermented (green beer and afterwards). You need head space in the primary because the foamy krausen head will rise as fermentation happens (both for ales and lagers).

I also do bigger batches, using my 8 gallon plastic primary and then racking form there to glass. Be careful on that one. I recently found out I have a 7 gallon carboy, thinking it was a 6.5, and wound up with head space I was not counting on! In that case, I slowly vented the head space with CO2 for about a minute. A full seven gallon carboy is pretty heavy too. Ultimately doing an 11 gallon batch and splitting it in half is the best way to make a large amount of home brew in one go.


Wax Sealed Home Brew Tested

Saturday, November 20th, 2010

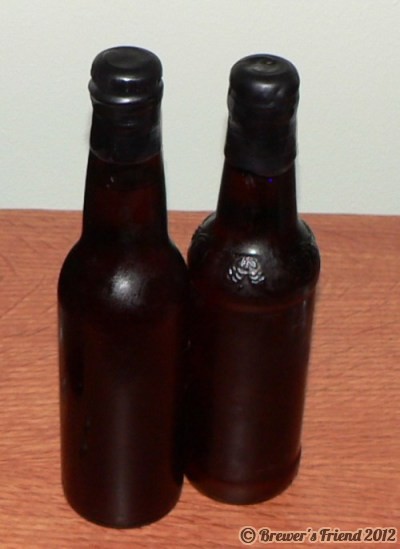
For centuries the seal of choice on spirits and wines was melted wax. Lately special release craft beers are being sold with a wax seal. Home brewers can wax seal bottled beer without too much trouble. All it takes is melting the wax, dipping the top of the bottle, and letting it dry. The wax adds a touch of old world feel to the bottle. A wax sealed bottle screams: “I contain some serious brew!”.

I tired this to see what it is like. I’m glad I did it once, but I probably won’t do it very often.

wax seal beer bottle

The wax can be bought in a variety of colors. Search for ‘bottle seal wax’ or ‘bottle wax’ online or at your local home brew store (LHBS). It might be in the wine section. A one pound bag is available for under $10.

wax seal beer bottle

Process:

Bottle your beer as normal and cap. I recommend oxy-caps. Clean out a tin can you don’t care about and gently melt the wax. Prepare a landing zone for the dipped bottles. The wax gets really hot and in my case, started to pop and shoot everywhere. It took a lot of time to get the wax completely melted, a puck formed on the inside of the can. I recommend a mild heat setting to melt the wax and a long stick to stir with. Make sure to turn off the burner when you go to dip the bottles.

wax seal beer bottle

Safety Disclaimer: The wax is hot and you should wear eye and hand protection. Do not over heat the wax, and do not leave the flame unattended. Shut off the flame when you are working above it. My package of wax recommended a temp between 160F and 170F, and to never pour water on a wax fire, instead use an extinguisher or cover with a metal lid.

After dipping the top I rotated the bottle to help cover the crimps in the cap. The cap is the hardest part to cover completely. Multiple coats will be needed depending on how thick you want the wax to be.

wax seal beer bottle

wax seal beer bottle

The wax can also be spooned out on top of the beer cap but this can create runs. Some people add floss or some kind of fabric around the cap so it makes the tear off easier.

Do It Yourself Wax:

Some people have used Gulf Wax (parrafin) and crayons for tint. This approach is a little cheaper than buying the already made wax beads. Using your own wax may require mixing in Vaseline or other additives to get the desired texture. I think buying the bag of wax pellets made for this purpose is worth the extra couple of dollars.

An excellent thread on a do it yourself approach using glue sticks is here:
https://www.homebrewtalk.com/f35/hot-glue-bottle-wax-experiment-127485/

Some Critiques On Wax Sealed Beer:

Yes, the wax seal makes it harder to open the bottle and creates a mess, sealing the bottles is time consuming, and the need for an additional seal beyond the cap is questionable. The benefits are mainly aesthetic. Home brewing is all about fun, and pride in your brew, so go for it if you want to! I would not put much faith in the extra sealing power the wax affords. I use oxycaps on all of my bottled beer, and I’ve opened bottled 2 years later that tasted awesome.

One clear drawback I noticed is the extra time it takes to clean the bottle if you want to reuse it. Of course that is not a concern when the bottle is given away.

In commercial news on this issue, Maker’s Mark bourbon has legal protection for their wax sealing practice as it was ruled to be part of their trademark: https://www.nytimes.com/2010/04/03/business/03bourbon.html

Big dark beers like Barely Wines, Belgian Strongs, Russian Imperial Stout, Double Imperial Porters, etc… are all great candidates for wax sealing!

wax seal beer bottle


Water Volume Management in All Grain Brewing

Saturday, June 12th, 2010

How to hit your target wort volume spot on.

There are several factors that go into how much water is lost during the brewing process from mash to fermentor.

1) Grain Absorption: Figure 1/2 quart per pound of grain. This comes out to ~1 pint (0.125 gallons) / pound of grain. Some reports are as high as 0.2 gallons per pound.

During the mash process the grains soak up water. This water is not transfered to the kettle when lautering. Make sure if you do a high gravity batch to account for this. My last big batch was a little short on wort volume and grain absorption is exactly why.

2) Mash Tun Dead Space: Dead space varies by equipment. Some of the water / sweet wort is left behind because of the shape of the mash tun or location of the valve.

I estimate 2 quarts (0.5 gallon) in my cooler mash tun.

mash tun dead space

3) Boil Off / Evaporation Rate: This depends on how vigorous of a boil and the shape of the kettle. The average is around 1.5 gallons (6 quarts) per hour. If the kettle is narrow (like a keggle), expect ~1 gallon per hour, or short and wide, as high as ~2.5 gallons / hour. If you are brewing with Pilsner malt and want to do a 90 minute boil to drive off DMS (which I do on my lagers), make sure to account for the extra boil time.

brewing boil off

4) Trub loss: Water absorbed by hops or adjuncts. I estimate 1/2 quart (0.125 gallons).

5) Wort Shrinkage: When the wort cools it looses some volume (4% is standard). This is minor in a 5 gallon batch, about 0.8 qt in a 5 gallon batch, and 1.6 qt in a 10 gallon batch.

Example Calculation 1:
How much starting water is needed to make a 5 gallon batch given, a) 10 pounds of grain, b) 60 minute boil? I shoot for 5.5 gallons of wort, to allow for samples, losses in the fermentor and bottling bucket. It is easier to work in quarts for water volume measurements.

5.5 gallons wort = 22 quarts
Grain losses = 5 qt (10 pounds * 0.5 qt/pound)
Dead Space = 2 qt
Boil off = 6 qt (1.5 gallons/ hr)
Trub loss = 0.5 qt
Shrinkage = 0.8 qt

Total input water: 36.3 quarts, or 9.08 gallons.

Example Calculation 2:
How much starting water is needed to make a 10 gallon batch given, a) 25 pounds of grain, b) 90 minute boil? Let’s go for 11 gallons total.

11 gallons wort = 44 quarts
Grain losses = 12.5 qt (25 pounds * 0.5 qt/pound)
Dead Space = 2 qt
Boil off = 9 qt (1.5 gallons/ hr)
Trub loss = 0.5 qt
Shrinkage = 1.6 qt

Total input water: 69.6 quarts, or 17.4 gallons.

Figure out your mash tun dead space and your boil off rate, and you will be able to hit your target volume spot on every time!


Malt Conditioning

Saturday, January 16th, 2010

I find that the longer I brew, the more involved I become in the process and the mechanics of every detail. Learning new techniques and testing them on your own is part of the joy of having a hobby as vast as home brewing. Some new processes or techniques offer little advantage, and thus are disregarded. However, some techniques require so little effort and provide such a noticeable difference that they become standard. For me, malt conditioning is one such technique.

Malt conditioning is a very simple process which consists of adding a very small amount of water to your grain bill prior to milling. The addition of water to your un-crushed malt results in more resilient grain husks. The husks take on a more “leathery” feeling. They are less dry and brittle, which means that they will remain much more intact during the milling process.

Why would a brewer care to leave their grain husks more intact during the milling process? There are several reasons that would lead one to consider malt conditioning:

  • Pulverized husks can lead to tanning astringency in beer
  • Intact husks will create a more free flowing grain bed (fewer stuck sparges)
  • You can crush finer to increase conversion efficiency without shredding husks

Items you will need:

  • Atomizer bottle (for misting the malt)
  • Scale, preferably digital (to accurately measure the water you are about to add)
  • Large spoon or paddle (to thoroughly mix the malt)
  • Malt
  • Grain mill

The amount of water that you are about to add to your malt is VERY important. If you do not add enough water, the husks will not absorb enough and will remain brittle. If you add too much water, you will potentially moisten the kernel, thus affecting your crush and perhaps causing gumming of your mill rollers. No worries, this technique is EASY.

You will want to add 2% of the weight of the malt bill, in water, to the grain. For example, if you have a 10 pound grain bill, which is 160 ounces, multiply this by .02 (2%) and your result will be 3.2 ounces. This is the WEIGHT of water that you will want to add to your grain bill for conditioning. By doing so, you will thoroughly wet the grain husks, but you will not create a sticky mess in your rollers.

Malt conditioning is easy. A few simple steps and you will be on your way:

1) Weigh the atomizer bottle of water
2) Mist the surface of the grain, and stir
3) Weigh the atomizer bottle again
4) Mist the surface of the grain and stir
5) Repeat until you have added the calculated weight of water to your grain
6) When complete, allow 10 minutes for the husks to absorb this water

As you add water to the grain, it will become more difficult to stir. You may find it easier to add the water to half the malt, or a third of the malt, at a time. When milling, there is no need to change your mill setting, unless you are also wishing to do so. This process will NOT affect the crush of the grain itself, only the condition of the husk material after milling.

If by chance you notice grain sticking to your rollers after milling, you can simply run a handful of dry malt through the rollers to clean them. Also, this could be a sign that too much water may have been added to the malt. You can adjust the water proportions accordingly for your process. Feel free to experiment with 2%, 1.5%, etc,. I have had excellent results, though, using the 2% rule.

Please note that just because this process will allow you to mill your grain finer without shredding the husks, it is not advisable to crush too fine. There will come a point where you will produce too much flour and no amount of husk material will protect you from a stuck sparge.

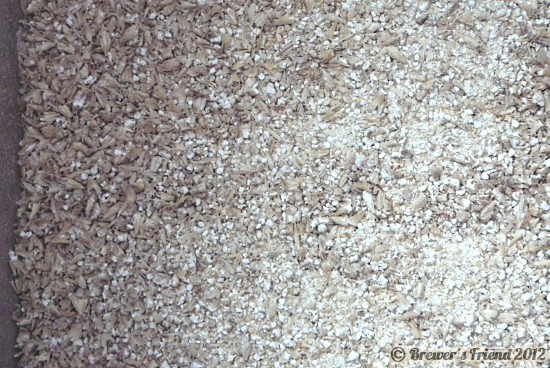
Below are a series of malt conditioning comparison photos, the results are astounding! The setting on my Barley Crusher for the test was .035”.

NON conditioned malt on the left, conditioned malt on the right.
malt conditioning for brewing

Closeup of conditioned malt:
conditioned malt for brewing

Closeup of NON conditioned malt:
non-conditioned malt for brewing

I have to give credit to Kaiser over at www.HomebrewTalk.com, who also has his own website www.BrauKaiser.com. His website and informative posts within the online brewing forums have been instrumental in educating me on this process.


Beer Head Retention

Saturday, December 19th, 2009

Beer head formation and retention can tell you more about your brewing process than you could have imagined, as you will soon see. Shortfalls in your brewing practices can be robbing you of that long lasting head that you are seeking on your favorite pint.

So, what makes beer foam?

LTP1 is a low molecular weight compound and is the primary substance in your beer needed for head formation. It has been shown that during the wort boil this compound is denatured and converted from an inactive form to a form that will actively make good foam in your beer.

Protein Z is an albumin, which means that it is soluble in water and coaguable by heat. This compound has a higher molecular weight than its partner, LTP1, and is the primary substance in your beer needed for head stabilization, or retention.

From what we have discussed, you may think that simply adding malts high in protein, such as wheat malt, are the answer to creating and retaining more foam. I have read this in the past, tried this, and have had no success, because it is almost certain that the malt bills that I used at the time were overflowing with enough proteins to create and retain beer foam.  One thing that might help for certain recipes is adding 1/2 pound of flaked wheat to the mash (or steep for extract brewers). Extract brewers in general may struggle with head retention depending on the age and quality of their extract. This is one more reason for extract brewers to take the plunge into all grain brewing.

So, where is the foam?

ANSWER: Foam destroying compounds that exist in your beer, bottles, kegs or glasses are robbing you of the foam that you strive to create. This is where the lack of foam, or lack of foam stability, can indicate flaws in your brewing process. Here are some examples:

  • High alcohols (fusel oils from high fermentation temperatures, under pitching)
  • Low carbonation levels (bubbles drag these proteins to the surface, causing more bubbles, more foam)
  • Shaking kegs during carbonation (causing your beer to foam can use up these foam producing compounds before the beer ever meets the glass)
  • Fat (soap scum or other fats occupy space on the surface of the beer, reducing foam)
  • Protease production from stressed yeast (under pitching or under aerated, high gravity fermentation)

Good brewing practices are essential for good foam formation and foam stability. Here are some things to keep in mind when exploring how to improve beer foam creation and stability:

  • Fermentation temperature must be proper for strain used (Belgian and German strains can tolerate more heat typically, others not so much)
  • Vigorous boils are necessary to denature LTP1, so that it becomes an active foam producer
  • Use the proper yeast pitching rate for your volume, OG and beer style (lager vs. ale)
  • Make sure you have proper carbonation levels
  • Proper water chemistry – see the brewer’s friend water chemistry calculator
  • Clean all glassware (carboys and glassware)
  • Adequately aerate the wort prior to fermentation
  • Avoid the use of chilies, cocoa or any other food that contains fats or oils
  • Do not shake your kegs to speed carbonation

You can easily determine if your beer is lacking foam forming compounds (ProteinZ or LTP1) or if you have too many foam killers such as the ones listed above. Here is a simple test:

  • First, shake the problematic beer you are about to test
  • Pour the beer into tall, clear and CLEAN glass
  • Observe the amount of foam

If the shaking and the pouring has created foam, then your beer most certainly has all of the protein Z and LTP1 needed to create beer foam. If this is the case, your brewing processes may require some refinement as stated in the factors above. Your beer probably has some foam killers lurking in it that will not allow for a long lasting head.
beer foam retention

If, however, the shaking and pouring do NOT produce foam, you may wish to experiment with the addition of malts that are high in proteins, such as wheat malt. A lack of foam after shaking almost certainly points to a lack of foam producers.

beer head retention

There are numerous factors that come into play when discussing beer foam formation and stability. Many studies have been completed, many resources written, and this article is by no means a complete resource on how brewing processes and chemistry affect this facet of beer production. This is, however, a very eye opening look at how good brewing practices can affect the production and stability of that sometimes elusive foam! The importance of solid brewing practices cannot be overstated.

For more resources on beer foam and stability:
https://www.byo.com/stories/article/indices/35-head-retention/747-head-games

https://www.byo.com/stories/article/indices/35-head-retention/625-fabulous-foam


What is SMaSH brewing

Saturday, September 5th, 2009

Beers are complex. They typically consist of several types of malt, some base, some specialty, and this lends to the complexity of the beer. In the same sense, many beers use more than one hop type, again adding to the complexity and dimension of the beer. Beer is the sum of all of its parts, but to create it you must understand each singular part.

SMaSH stands for single malt and single hop. The acronym was coined by a group of dedicated brewers at the popular home brewing forum HBT (https://www.homebrewtalk.com). A SMaSH brew is a way for any brewer to really get a feel (taste) for any base malt and any hop variety. It is also a very economical way to brew as it minimizes the cost of the batch.

SMaSH brewing is an excellent way to learn about the flavors various malts and hops impart on a beer. By focusing on just one grain and one type of hops in a recipe, you can truly get a feel for the flavor of the malt and hops used. This being said, unless you are experimenting with the properties of different yeasts, you will want to keep to a clean fermenting yeast like S-05, WLP001, Nottingham etc. Otherwise, the flavors contributed by the yeast will begin to overshadow those from the malt and hops.

A typical SMaSH recipe would resemble the following:

Malt:

  • 8 lbs Maris Otter
  • Mash for 60 minutes at 153F

Hops:

  • 1 oz Centennial @ 60 min.
  • .5oz Centennial @ 10 min.
  • 1 oz Centennial Dry Hop

Yeast:

  • SafAle S-05

Though not complex, a SMaSH brew will not only showcase the properties of the single malt and single hop being used. It can and will create a clean and easy drinking beer that will remind you with each glass of the properties of these individual ingredients. When formulating recipes, you will know if Maris Otter will suit your recipe better than Rahr 2-row pale malt. You will also have a better idea of whether or not you would prefer Centennial or Cascade in a certain recipe as well.

In order to formulate a recipe and enjoy the sum of all the parts, you need to understand the properties of each individual part. Do some experimenting, use your hop of choice for bittering, flavor and aroma. Explore the ability of the hop to create a favorable outcome in each of these roles. You may enjoy the bitterness of Centennial, but not the flavor or the aroma…. so be sure to use it in each of these capacities in your SMaSH.

One variation on this method is to split the batch into several parts. Brew a SMaSH brew and then split the 5 gallon batch into (5) separate 1 gallon batches. Pitch a clean fermenting yeast into one batch (WLP001, Nottingham, S-05) and then use any other yeasts that you are interested in testing into the other fermentors.

At this point you will have a simple beer where the yeasts properties can shine through. The clean fermenting yeast will provide a control, a flavor profile that all of the other yeast varieties can be judged against. With one 5 gallon brew you will be able to experiment with (5) yeasts and explore the properties of the malt and hops chosen for the SMaSH.

Update 9/23/2009:  Modified post to clarify origins of SMaSH acronym.


Beer Aeration Oxidation and Mitigation

Saturday, August 22nd, 2009

Oxidation is not the same as aeration. Aeration is the process by which oxygen is introduced to your beer or your wort, oxidation is the outcome, it is what happens to your wort or beer when exposed to oxygen at the wrong point in the process. Aeration of COOL wort (<80F) prior to fermentation beginning, is the only safe type of aeration.

Aeration of HOT wort (>80F): Aeration of hot wort will cause oxygen to bind with various wort compounds. Over time, these compounds will break down, releasing oxygen into the beer and oxidize hop compounds and alcohol, leaving off flavors. These flavors taste like wet cardboard or Sherry.

Aeration during fermentation: Likewise, introducing aeration after fermentation has begun can cause yeast to create more diacetyl in your beer (buttery flavor or smell).

Aeration of finished beer: Aeration after fermentation is complete will cause more rapid staling of your beer, loss of long term stability.

Below we will discuss where in the process aeration and subsequent oxidation can occur and how to mitigate these dangers.

How can aeration/oxidation occur?

  • Whipping up a froth while stirring your hot mash (>80F)

  • Whipping up a froth while chilling your wort after the boil (>80F)

  • Pouring hot wort from one vessel to another causing splashing (>80F)

  • Transferring hot liquids through spigots without tubing to reduce splashing (>80F)

  • Agitating the fermenter AFTER primary fermentation has begun (any temperature)

  • Agitation after fermentation is COMPLETE (any temperature)

  • Bottling, leaving too much head space and O2 in the bottle

  • Not purging the head space in the keg when kegging beer

How to mitigate the danger of aeration/oxidation:

  • Stir your mash gently

  • Stir your cooling wort gently, create a whirlpool effect

  • Do not pour hot wort from one vessel to another, it is dangerous AND can cause oxidation

  • Use high temperature tubing to transfer hot wort from one vessel, to the bottom of another

  • Do not agitate fermenting wort

  • Do not agitate or splash fermented wort, use a siphon or a spigot and tubing to transfer beer

  • Leave as little head space as possible when bottling (1” usually)

  • Use O2 absorbing caps when bottling

  • Purge kegs with CO2 prior to racking beer into them, and purge the head space with CO2 after the keg is sealed.

  • Use spigots, siphons and hoses to allow gentle movement of hot or fermented fluids

Mentioned above is the issue of beer becoming oxidized through the bottling process. This can be caused by improper (turbulent) transfer of the finished beer from the fermenter to the bottle, or by leaving too much head space in the bottle. One way to mitigate the oxidation danger of head space in your bottles is by the use of O2 absorbing bottle caps (called Oxycaps).

These caps have a special liner in the underside of the cap which absorbs and sequesters O2 that is left in the bottle after capping. These caps are easy to come by and are only slightly more expensive than standard bottle caps ($1-$2 more per gross) Oxidation from bottling may not be an issue in bottled home brew if you consume your beer in a timely manner. However, for extended aging and storing these caps are cheap insurance to preserve your creation over time.


Introduction to Partial Mash Brewing

Saturday, August 1st, 2009

Whether you’re a novice home-brewer who has outgrown kits and all-extract limitations, or a long-time brewer looking for an easier day brewing, the partial-mash technique of brewing has several merits worth exploring. It is considerably less time- and labor-intensive than all-grain brewing, requiring fewer steps and less cleaning.

Process-wise, partial-mash brewing most closely resembles extract brewing, and is a good intermediate step before going all grain. With partial mash brewing, some of the fermentable sugars come from mashed grains, and the rest from extract. The introduction of a more natural mash process using fresh ingredients translates into higher quality beer. The added control also allows for a boarder variety of styles and control.

The transition from all-extract to partial-mash brewing is fairly simple. In terms of hardware all that is needed extra are a strainer or grain bag, a floating thermometer, and an extra cook pot. In terms of brewing, it is just one additional step called mashing.

Mashing is simply the process of converting the starches in grains to sugars. All it takes is crushing the grain, and steeping it for an hour at 150F. The husks are then separated from the wort that is left behind, and the boil proceeds as normal.

The Process:

First the grains need to be crushed lightly. The goal is to crack the exterior shell of the grain, allowing the hot wort to convert the starches and proteins inside into sugars and non-fermentables for flavor. Most brew stores can crush your grains for you, or you can do it yourself with a rolling pin or similar instrument; if you decide to crush your own, remember that the goal is to crack the shell, not grind into powder. The best way to do it is with a grain mill attached to a cordless drill. Corn style mills called corona mills can be used as well. Make sure to crush the grains within 24 hours of brewing.

Start by heating 2 gallons of water to 170F in a 5 gallon pot. The reason the water is heated to 170F is when the room temperature grains hit the water the temperate will drop. 150-155F is the standard mashing temperature you are shooting for. When the water is ready, called the ‘strike water’, add the crushed grains to a bag and submerge. Make sure to gently stir the crushed grains so there are no dough balls. Cover the pot, and let sit for an hour. Monitor the temperature every 10-15 minutes for fluctuations and either increase or decrease the heat accordingly – do not let it boil!

At this point start preparing an additional 2 gallons of water at 175F. This will be your sparge water, used to strain the reaming sugars from the grain bag. You should have a really nice sweet smell emanating from the pot. After an hour, the partial mash is completed. The spent grains should be separated from the wort. Once separated, the grains should be sparged (washed with water) to remove as much of the converted sugars and non-fermentables as possible. When washing and pressing the grain, be as gentle as possible; the goal is not to further crush your grain, (which can add grist to your wort) but merely to wash and press out the converted wort.

Now you have your very own sweet wort you mashed yourself! Fire up the kettle and proceed as normal like you do for an extract batch. You will need less malt extract because you created some of the fermentables during the mash. The recipe should guide you to the correct amounts already.

Other thoughts:

There is some debate between home brewers as to ideal method of mashing the adjunct grains. One method is to add the grains to the extract as it comes to a boil, and allow the grains to boil with the wort. This method allows the grains to fully mash, but because of the high heat of the boil, a lot of the tannins in the grain enter the wort as well, giving it a more astringent or dry flavor, and leading to a chill haze in the finished beer. Chill haze is an aesthetic issue, but the grainy tannic flavor can be a serious negative depending on the brew. In pale ales and bitters, you may not notice, or may even find it a plus, while in sweeter beers such as bocks and browns, the dryness may be in strong (and unpleasant) contrast to the base flavors.

There are tools available online to convert between all grain and partial-mash recipes, letting brewers move up from extract brewing to partial mash at their own comfort level and experiment with more varied recipes. For exceptionally sweet or high-gravity beers, it may be easier to use a partial-mash approach; my brewing group’s attempt at an 17% ABV beer would have used almost 30 lbs of grain; by replacing the base malt with an extract, we saved ourselves several gallons of water and several hours of reducing the wort. For all-extract brewers, partial-mash lets them tinker with their tested recipes; the difference between a Porter and a Smoked Porter may be as little as half a pound of peat-smoked grain, and a dopplebock might get a nice biscuit flavor from a pound of Belgian Special B grain.


Dry Hopping Beer

Saturday, July 25th, 2009

While hops can be added to the boiling wort for as little as fifteen, ten, or five minutes to impart aroma and flavor, true hop-heads know the best approach to really punch up the hop profile of a beer is dry-hopping. Because hops have gone up in price over the last few years, dry-hopping your home brew is something of a luxury, and it’s especially important to make sure you do it right.

Dry hopping refers to adding hops to the fermenting beer and letting them soak in it for a period of no less than 10 days. For the typical five-gallon batch of home brewed beer, one to four ounces is the appropriate range of hops to use. In dry-hopping, as with flavor and aroma hops, the strain of hops used is crucial. Since the goal is to increase the hop character, the IBU and Alpha values are much less important.  For example, Amarillo imparts grape fruit notes, Centennial adds citrus, and Nugget is herbal.

The key to dry-hopping (beyond picking a strain you like) is timing. The most common error in dry-hopping is adding the hops immediately to the cooled wort. DON’T! The initial fermentation period is an active one, and the hops (which will float on the surface of the beer for about a week or so) will be highly agitated as a result, with some of the pollen and other aromatics (and thus flavor & aroma) being quite literally ‘blown out’ of the beer. Waiting until the initial blow-off is complete (about 3-5 days) removes this risk. Additionally, the alcohol in the fermenting beer will strip off some of the acids and flavor from the hops, so adding the hops later (and letting them soak longer) gives a better, richer flavor.

The hops are added to the beer without boiling or pasteurization first. While this may seem like an infection risk, the surface of the dried hop provides a poor environment for wild yeasts and bacteria, and infection from hops is rare enough to be inconsequential. Some home brewers place the hops in a hop sock for easier collection, but unless you intend to rack the beer after the hops have been added and continue dry-hopping, this isn’t necessary. It won’t affect the product, but it will save you a hop sock.  Tips on how to fully submerse the hops are provided below.

When the hops float on the surface they are not as well utilized. However you don’t want them stuck in the trub at the bottom either. To overcome this problem, get a muslin bag or similar, and add something inert to it so it is weighed down. Then tie a string around the hops bag so you can control how far down it drops. That way the hops will be suspended below the surface of the beer. Hops are quite buoyant so make sure to provide enough weight to sink it. In this case, glass beads are used:

dry hopping weight

These were enough to keep 1 ounce of loose leaf hops below the surface.

When primary fermentation is complete and the krausen is dissipating dry hopping can begin. In this case I did not bother to rack the beer, I just added the dry hops to the primary. First I sanitized the bag, beads, and string. Then I add the right amount of hops and beads into the bag and tied it off. Then I tied a string made of standard sewing thread around the top of the bag. I opened the cork on the carboy and pushed the bag inside, careful to keep hold of the string. When the hops were submerged, I put the cork back on, and tapped off the string. I let it sit for about ten days, then kegged. Delicious!

dry hopping beer

It is also possible to dry hop in the keg. Loose leaf hops or pellets can be added directly to the keg, or weighted down in a bag similar to above. If you don’t have them in a bag expect to get hops particles floating in the beer. Some hop heads are totally fine with this. The bag also makes cleanup easier.


Want no ads? Go Premium and unlock all our brewing tools!