Brewing - Brewer's Friend
Brew your best beer EVER. Save 10% on Brewer's Friend Premium today. Use code TAKE10. Sign Up ×

Archive for the ‘Brewing’ Category

Homebrewing Your First Extract Batch

Saturday, May 29th, 2021

Beginning Brewing Series – Sweet Stout

by Jim Vondracek

Congratulations, you stand on the precipice of a remarkable hobby – brewing – one practiced by over one million homebrewers in the US! Making something by hand appeals to many of us – baking bread, building a bookshelf, growing a garden, cooking. Similarly, brewing a handmade beer brings a sense of satisfaction, combines craft and science, and in the end you get beer! For me, some of my favorite memories involve sharing a handmade beer with friends and family.

The satisfaction we get from sharing something we made, with our own hands, enhances our lives. Nothing wrong with drinking professionally-made craft beer, it’s great, but to be able to say “I made this” elevates your spirit. For many brewers, they love the satisfaction of handcrafting and sharing their beers. It makes the process of enjoying beer more intimate, more personal.

Further down this article, you will find the recipe and step-by-step explanation for brewing a Sweet Stout using malt extract. Before we get to that, let’s go over a few preliminaries.

So Many Choices!

Many years ago, I brewed my first batch of beer using malt extract.  At that time, most brewers began brewing that way and I continued to brew extract batches for two or three years before switching to all-grain brewing using Denny Conn’s basic batch sparging method. 

That being said, extract brewing represents only one of the possible methods to use for your first batch. Since I began brewing, the advent of brew-in-a-bag changed the landscape for new brewers significantly, by removing many of the equipment hurdles.  Keep an eye out here for a future article about brew-in-a-bag for beginning brewers.  I’ve helped many brewers at my club (CHAOS in Chicago) learn to brew all-grain using batch sparging.  In addition, the development of electric all-in-one breweries like Grainfather, Brewzilla and Brew Easy offer new brewers another appealing (if somewhat costly) option.  

This article in no way implies or argues that your first batch *should* be brewed with malt extract – today, beginning brewers have lots of options.  Instead, this article intends to walk the aspiring brewer through their first batch if they choose to use a traditional entry to the hobby – extract brewing.  

Extract Brewing

For many brewers, brewing their first batch with extract offers a simplified, accessible approach to get into brewing.  The equipment costs can be low, so they can metaphorically stick their toe in the water and see if they like the hobby before making a more substantial commitment. 
By eliminating mashing, extract brewing eliminates a significant piece of equipment and an hour or more of time from your brew day.  Essentially, malt extract is the result of mashing.  Using extract, you lose some flexibility in creating your wort, but that can be made up for by steeping specialty grains, a remarkably simple process that adds layers of complexity and flavors to your beer.  

You may read that malt extract beers are inferior – don’t believe it.  Many brewers make excellent extract beers and win medals at competitions.  Focusing on sanitation and fermentation, instead of mashing, helps beginning brewers make better beer.  

This Sweet Stout recipe was among the first beers I brewed, probably my third or fourth, and it won a silver medal in the stout category at a four hundred entry competition.  

Why a Sweet Stout for My First Brew?

A style that is full of flavors may cover up some off-flavors that typically appear in a brewer’s first few batches – I think stouts generally are great for beginners and the sweet stout is especially good. It’s got both nice roast and chocolate, a little caramel and dark fruit, finishes off-dry and presents a medium to medium full mouthfeel.

Equipment

Many of us have a five-gallon stock pot in our kitchens, if not you’ll need to buy one (and will use it for other things, in any case, like making stocks or cooking big batches of chili). You’ll also need a whisk or spoon long enough to stir the batch, which you probably already have. A kitchen or cooking thermometer also comes in handy – using an instant read electronic thermometer or candy thermometer you already have works great.

You’ll need a fermenter – most of us won’t have anything in the kitchen we can repurpose for that, so you’ll need to buy a plastic fermentation bucket, lid and airlock.
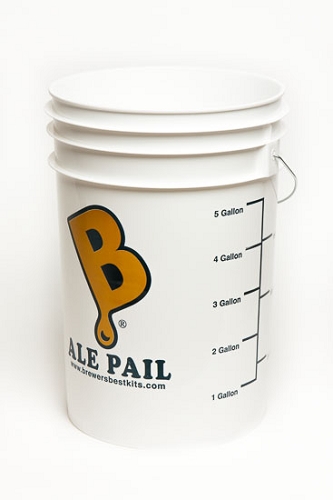
Looking ahead, when it’s time to bottle, you’ll need a bottling bucket (similar to your fermenting bucket, but with a spigot towards the bottom), an auto-siphon and plastic tubing (to get the fermented beer from your fermenter to the bottling bucket), a bottling wand and hand capper. A future article in this beginning brewing series will go through bottling step-by-step, but for now, if you want to buy everything you’ll need at once, add those bottling supplies to your list.

This list represents the bare-bones approach – you need these items, but you can buy many other helpful pieces of equipment, for example, a hydrometer.

If you have a homebrew store near you, great – go there and get what you need, plus your ingredients (listed below). If not, there are lots of excellent online homebrew stores to choose from.

Ingredients

The recipe we’re using for the Sweet Stout is here on Brewer’s Friend. When you buy your equipment, you can also pick up the ingredients you’ll need for this five-gallon batch:

  • Fermentables
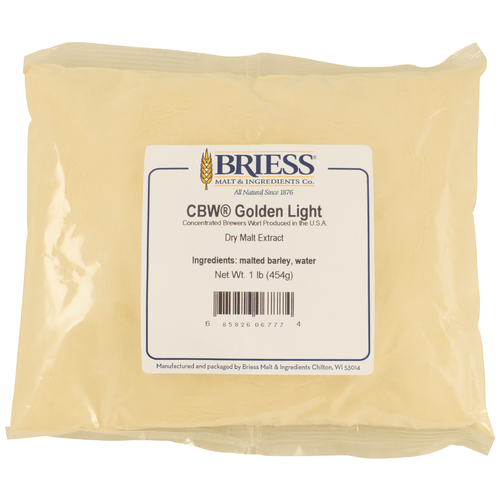
    • 6 lbs Extra Light Dry Malt Extract or 7 lbs Pale Liquid Malt Extract
    • 1 lb Lactose Powder (Milk Sugar)
  • Steeping Grains
    • 1 lb Black Patent malt (500L) (crushed)
    • ¾ lb Crystal 80L (crushed)
    • ½ lb Chocolate malt (200L) (crushed)
  • Hops
    • 1 oz East Kent Golding Hops
  • Yeast
    • 1 pack of Nottingham or US-O5 Yeast
  • Other Items You’ll Need
    • 1 muslin or grain bag
    • 1 container of Star San or Iodophor sanitizer

Required Reading

You should read this thorough explanation for beginning brewers here at Brewer’s Friend.  It is one of the strongest, clearest articles I’ve seen for beginners.  This article compliments it, it doesn’t replace it.  Go read it! 

Your First Brew Day!

First, review your recipe on Brewer’s Friend here.

Plan to allocate three or so hours for your first brew day. A very important thing to remember – don’t stress out as you follow these steps, if you get something wrong, take it in stride. Likely, you didn’t ruin your batch. And if you did, well, stuff happens. Think of it like cooking – most of us don’t bake the best batch of bread ever or make an excellent roast chicken on our first attempt. Relax.

Steeping the Specialty Grains

To start with, fill your pot with three to four gallons of water and heat it on your stove to 150F to 160F. When it reaches temperature, put the black patent, crystal 80 and chocolate malt in the muslin or grain bag and securely tie it closed (see the ingredients above for exact amounts). Dunk it in the hot water, like you would a tea bag.

Once the grain is wet and starts to expand in the bag, just drop it in. Maintain the water at the temp – you may cover your pot, or occasionally add heat. Do not let it rise to 170F – it is better to keep it cooler than too hot (which may cause your beer to be tannic). Steep the grain like this for approximately 30 minutes. Using tongs, a sturdy cooking spoon, or a sieve with a handle, lift the bag of steeping grains out of the wort (liquid) and let the contents drain into the pot. Throw the bag and grains away – they’ve done their job!

Start the Boil and Add Hops

Turn the heat under the pot up and bring the wort to a boil. Watch carefully, you don’t want this to boil over. If your stove has trouble getting it up to boil, you may cover it, but when it begins to boil, remove the lid. Maintain a steady, gently rolling boil.

When your wort is boiling, toss in your hops. Let them boil for 45 minutes (without a lid)

Add Malt Extract and Lactose

After 45 minutes, add the dry malt extract and lactose. Both of these will clump up and form a cement-like substance that will burn on the bottom of your pot if you just dump them in, so don’t do that! Rather, get a large mixing bowl and scoop out some of the boiling wort, then slowly add a portion of the extract and whisk or stir like a mad man until it dissolves. Pour the liquid back into the pot and repeat as needed until you have added all the extract and lactose. You likely will have lost the boil during this procedure, bring it back up to a boil and then let it boil another 15 minutes. Turn off the heat.

Chill the Wort, Sanitize the Fermenter and Top Off

Partially fill your sink with water and ice and put the pot in the ice water to cool. You may need to replenish the ice water from time to time.

Make a batch of sanitizer (Star San or Iodophor) following the directions on the package. Sanitize the thermometer – anything that will be touching the wort at this point forward (post-boil) needs to be sanitized. Take the temperature of the wort – when it has cooled to around 80F, you’re ready for the next step.

Using the Star San or Iodophor, sanitize your fermenting bucket and pour the wort into the bucket. This recipe calls for a five gallon batch, so now top off the wort with cold water to bring the total wort in the bucket to five gallons – your fermentation bucket will have markings on the side indicating volume. Stir or rock the bucket to mix and add some oxygen to the wort.

Pitch the Yeast and Ferment

Open the yeast packet and pour in, on top of the wort. Sanitize the fermentation bucket’s lid and close it. Fill your airlock with sanitizer and insert in the lid’s grommeted hole. Stash the fermenter somewhere coolish – if you have a space that stays in the mid to low sixties, that’s perfect. If not, wherever is coolest in your home will work. Let it sit for two or three weeks. Resist the temptation to open the lid, nothing good comes from that! Amuse yourself by watching the airlock bubble for a few days, don’t fret if it takes a day or two to start!

Woohoo, You’re Making Beer!

Congratulations, you’ve completed your first brew day – well, after you’ve cleaned up the mess you made! Enjoy a beer and get ready to bottle your beer in three weeks!



A Discussion With John Compton – Highway Manor Brewing

Tuesday, September 29th, 2020

By Udit Minocha

Do you remember how you got into homebrewing? John Compton III of Highway Manor Brewing, in Camp Hill, PA, remembers it all. One of his favorite beers was Franziskaner Dunkelweizen.

How John Got Started in Brewing

John Compton with homebrew equipment.

John started brewing in 2001. His parents, who were quite religious, were were not crazy about the idea. Since it kept him out of trouble, they felt it was worthwhile. The book that got him into brewing was “Brew Classic European Beers at Home.” He didn’t even get to try his first batch after those patient weeks of waiting because the dog got into it first. His woodworking career never took off, and John ended up devoting most of his free time to brewing.

Shortly after finding what commercial beer styles he liked as a drinker, he attempted to replicate them and their flavor profiles in his recipes. He used yeast dregs from Belgian beers. He felt it was key to understand everything about the ingredients and yeast.

In 2006 at Monk’s Café and Memphis Taproom in Philadelphia, PA, he had his first wild Belgian beer. At that time sour beers were a weird oddity and not widely available. Replicating Belgian sours was more difficult. He started doing more research on the wild yeast that predominated the area around the Abbeys. John asked himself how to get that yeast?

Replicating the Masters Before Him

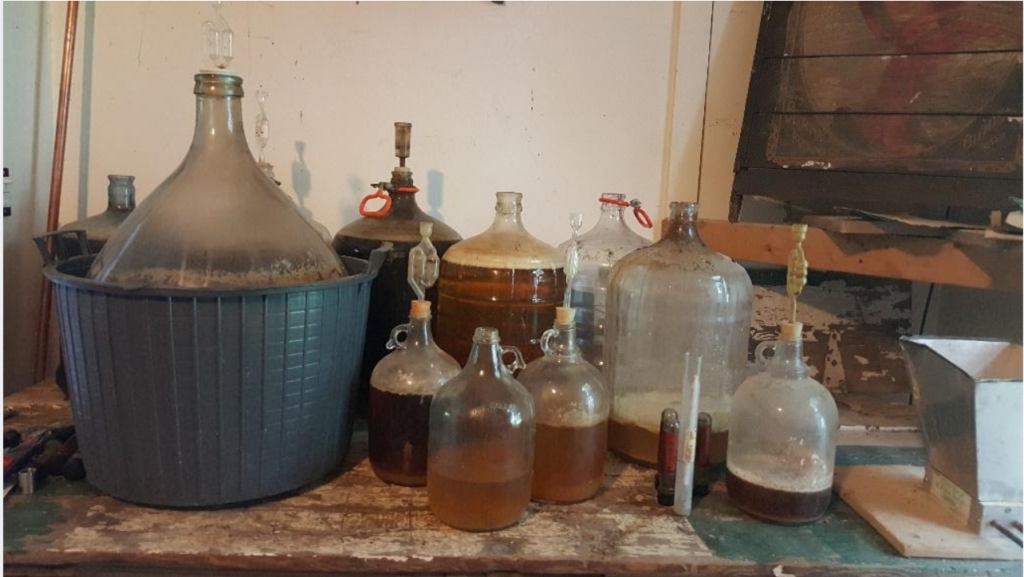
A Collection of sour beers in carboys

First, he tried to capture the wild yeast that lived around his home. He set out one gallon jugs containing wort. Most were terrible and experience became wonderful teacher – if they smelled like dirty feet or blue cheese – he dumped them before trying them. A few attempts seemed promising.

In 2010 -2011 he met Terry Holbacher of Pizza Boy Brewing Company and Vinnie Cilurzo of Russian River Brewing Company where he was introduced to more sour beers. John brewed a lot more sours and started entering homebrew competitions. Although sour beers were not yet main stream, they were in his future. He put together a plan; make about 3-5 great sour beers, make them stand out, and barrel-age them.

Going Pro

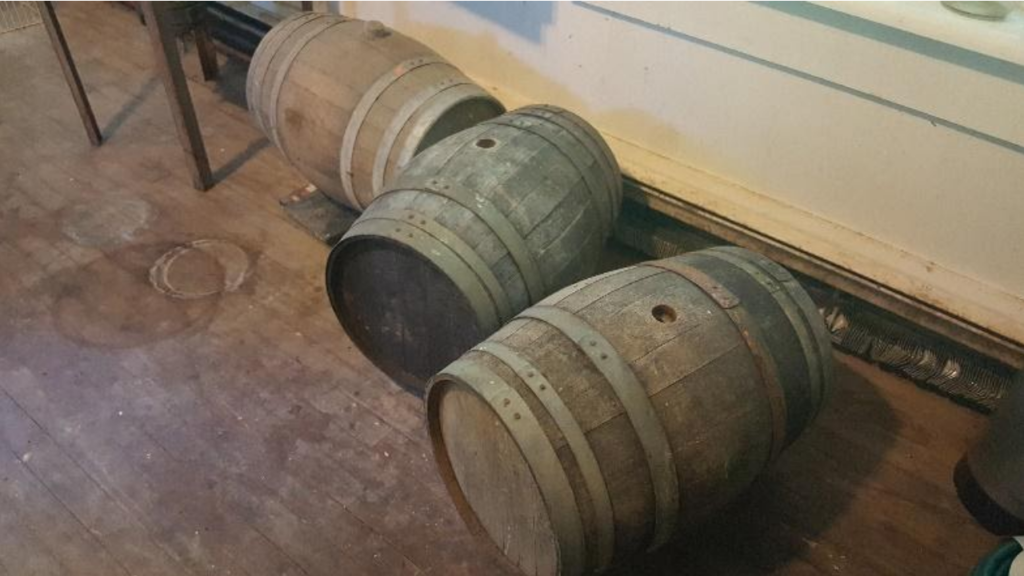
Three Sour Beer Barrels

That is how Highway Manor Brewing got started in September 2015. But that is only the beginning. In the initial stages, it took five brews a day to fill one wood barrel. Fermenting and aging took about a year or more. There are as many as four different wild yeasts fermenting the sour beer at once.

The recipe formulation, legal paperwork, ordering supplies, and fixing things were was taxing as the 5-batch a day brew days. Tackling the consistency factor on wild brews was just icing on the cake. That is how wild fermentations are – sometimes they go from wild to crazy!!

John had to make more time for himself. He moved a bed into the brewery to save on travel time. Any startup brewer will tell you that there is more than just making beer.  You have to sell it. That is a tale for a different day but in short, it takes a lot of time and effort.

So far the sour beers are available in Philadelphia, New York City, Rochester, New York, Florida, and Maryland while Vermont and New Jersey distribution is in the works.


Priming Sugar 101: How To, How Much, and When To Use?

Thursday, September 24th, 2020

by Chris Cook

Congratulations. You nailed your brew day, you’ve made it through what probably felt like several long weeks of fermentation, and your precious wort is now precious beer. Now just one step remains between you and a cold, bubbly glass of homebrew: Priming.

What is Priming?

Without priming, the beer a homebrewer has invested so much time, energy and money into will pour flat and lifeless. Proper priming gives beer its trademark carbonation and foamy head and can significantly benefit aroma, taste, mouthfeel and overall appearance. Priming is essentially the home stretch of the marathon that is homebrewing, but luckily it’s a simple process that’s made even easier by the wealth of equipment and resources available to homebrewers today.

Newcomers to homebrewing likely prime their beer directly in the bottle. This process, known as bottle priming, involves mixing dissolved sugar with beer, transferring it to bottles, and securing those bottles with an air-tight seal. Yeast leftover in the beer from fermentation eats away at that added sugar in the bottle and produces carbon dioxide gas, which remains in the beer until it’s ready to pour. It’s the same process that produces the air bubbles in an airlock during fermentation. The difference is that during bottle priming, homebrewers want to trap that CO2 gas in the bottles to create carbonation.

There are several “must-have” pieces of equipment a homebrewer needs to bottle prime, including a bottling bucket with a spigot, food-grade tubing, a siphon or racking cane, and a bottling wand (spring-loaded is best). However, the most important aspect of the process is sugar. 

How much sugar, what type, and how it’s added to the beer can all impact the final product that comes out of the bottle. Fortunately, the Brewer’s Friend Beer Priming Calculator makes it easy for homebrewers both novice and veteran to dial in the priming of any brew. Simply enter the volume of beer to be bottled, the desired volumes of CO2 (more on that shortly) and the temperature of the beer being bottled. The calculator will then give an exact measurement of how much priming sugar to use.

However, before getting started, there are a few things every homebrewer should be mindful of when it comes to bottle priming. First, there is a very real danger of creating infamous “bottle bombs.” These are exactly what they sound like – bottles of beer turned into explosives by excess pressure produced from the priming process. Remember that the point of bottle-priming is to trap CO2 gas inside the bottle. However, a standard beer bottle has a limit on how much pressure it can contain before it explodes, which is why it is of utmost importance to use the proper amount of priming sugar AND use proper sanitation practices to avoid introducing unpredictable bacteria and wild yeast to the beer. You also want to ensure that the fermentation is actually complete and not just stalled.

As scary as bottle bombs may sound, they can be easily avoided by adhering to several familiar principles all homebrewers should follow: proper sanitation, careful handling of the beer, and attention to detail. 

How Much Priming Sugar Do I Need?

With bottle priming, the first choice a homebrewer encounters is how carbonated he or she wants their beer to be. That carbonation is measured in “volumes of CO2,” which vary by style and taste. Most beers will fall between 2.0-3.0 volumes, which conveniently is the amount most standard beer bottles can hold. For reference, the Brewer’s Friend Beer Priming Calculator lists a number of beer styles and their appropriate ranges of carbonation.

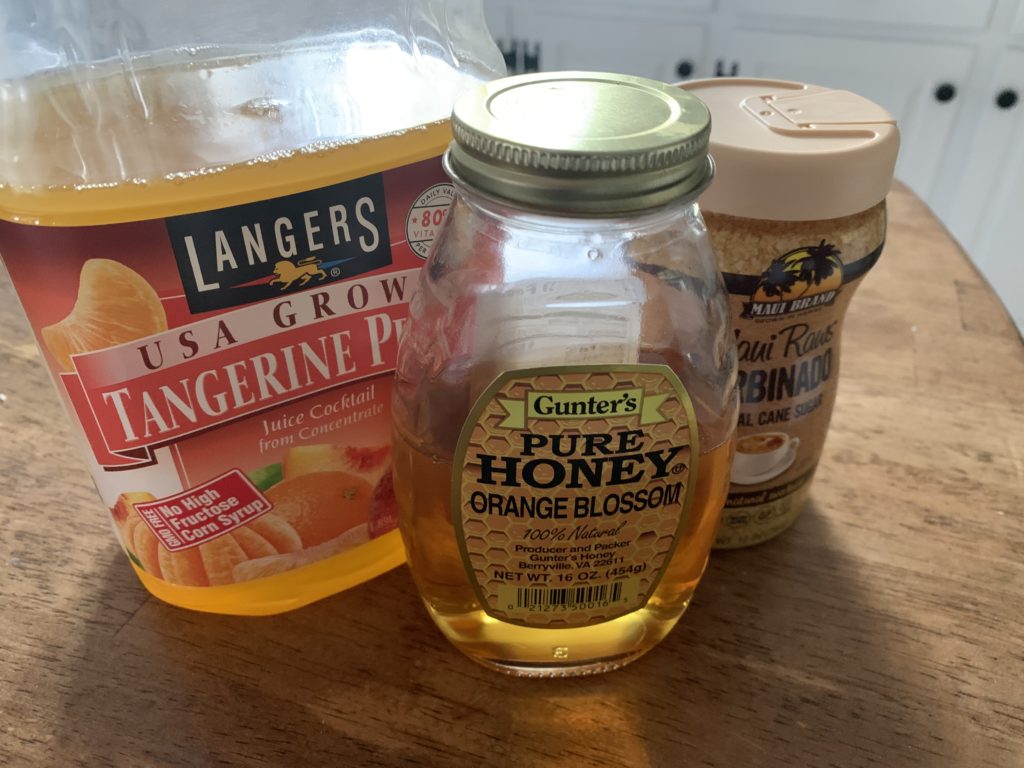
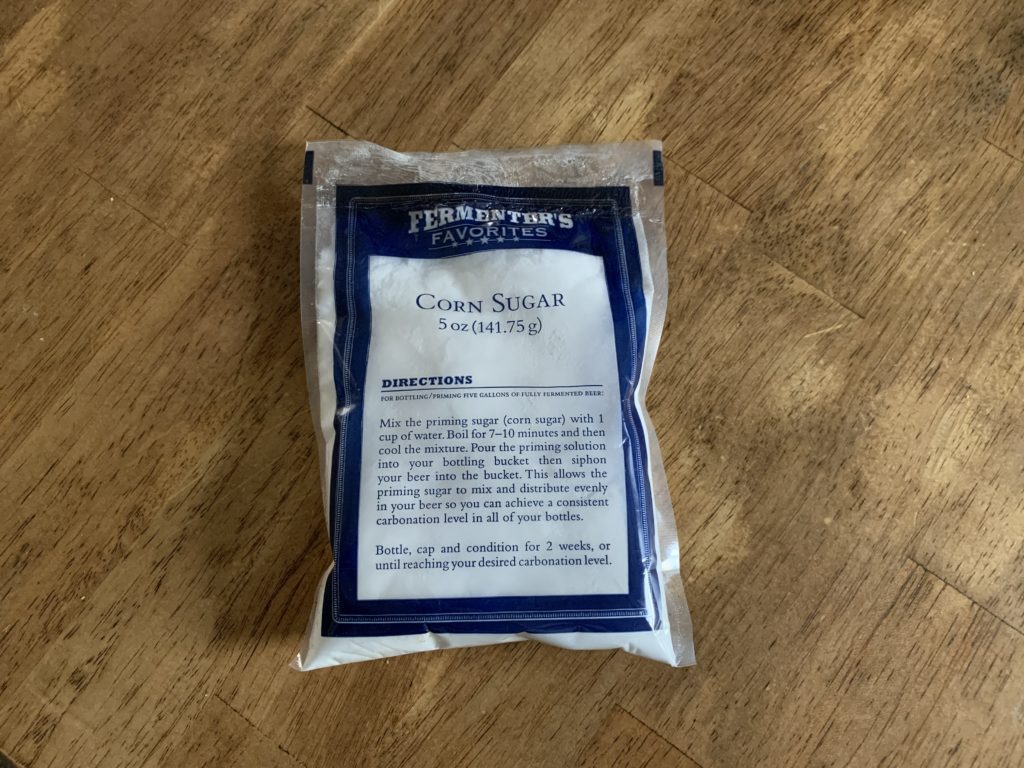
The next decision regards what type of sugar to use to prime the beer. Different sugars will impact the final product in various ways, from the negligible impression of common table sugar to other options such as dried malt extract (DME), honey and candy syrup, which leave trace characteristics and take longer to carbonate. Table sugar and corn sugar are the most common products used because of their neutrality, availability, simplicity to handle, and the quickness in which they finish up. Beginners should stick to one of those until they have nailed their bottle-priming process, though the Brewer’s Friend Beer Priming Calculator will be ready and waiting with calculations for each type of priming sugar when homebrewers decide to experiment. 

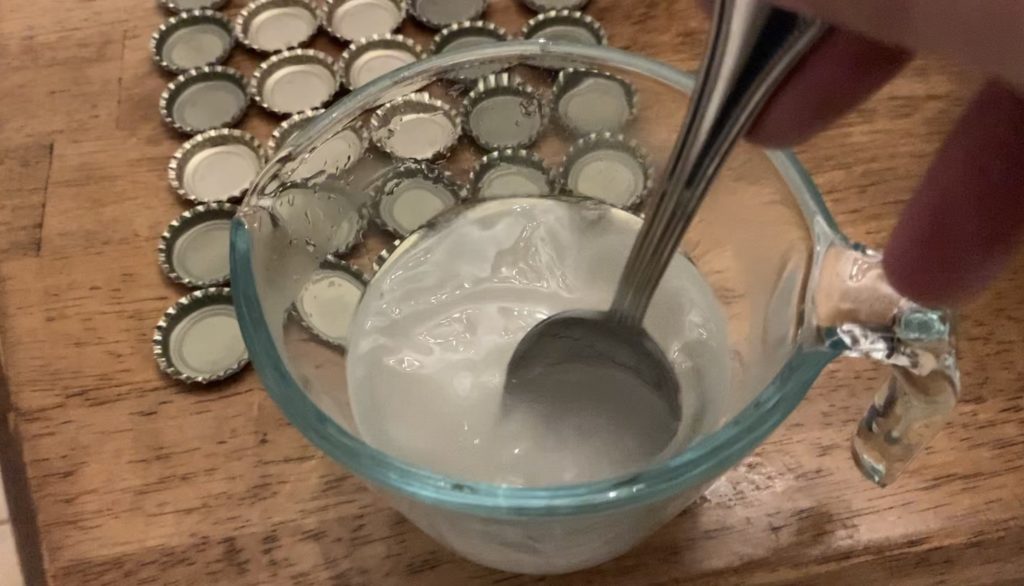
The last variable is how a homebrewer introduces priming sugar to the beer. The tried-and-true method is to dissolve the chosen sugar in boiling water, cool it down to approximately 80 degrees, and pour it into the bottling bucket. From there, the beer is carefully transferred from the fermenter to the bottling bucket where it mixes with the sugar solution. Splashing can lead to dreaded oxidation, so take care to transfer slowly (auto-siphons help tremendously).

Once the beer and priming sugar have been mixed in the bottling bucket, the beer is ready to be bottled, capped, and stored. Most table sugar-primed beers take 2-3 weeks to fully carbonate if stored between 65-70 degrees. However, it’s always a good idea to test the carbonation by refrigerating and testing one bottle at two weeks, another at three weeks and so on, until the carbonation levels off. 

Note that while bottle priming is a process most common for beginners (compared to kegging), it is by no means unique to newcomers to the hobby. Many lifelong homebrewers, and many breweries at that, still bottle prime and bottle condition their beer because of the unique characteristics it can, and how much easier and cost-effective it is compared to kegging. Any homebrewer that can properly bottle prime his or her brews will never be in short supply of consumables for themselves and their fellow beer-lovers.


Gose Beer – History, Style, And Recipes

Thursday, June 18th, 2020

By: Ricardo J. Corbella – Brewmaster – Certified Beer Server Cicerone

Editor’s Note: This article was translated from Spanish. Every attempt was made to ensure proper meaning and grammar is true to the source.

Gose-style beer was first brewed more than a thousand years ago in a small town called Goslar in northern central Germany. That beer was probably significantly different from the Gose beer we drink today.

Gose, in German is pronounced “GO-zuh”, the name derives from the river that flows through Goslar, called Gose.  As with most classic beer styles, it’s hard to know exactly when it originated, or what it looked and smelled like. This may be especially true for Gose, as it has a history that extends well in the past long before most beer styles.

The original Goslar beer, according to many sources, was fermented spontaneously or naturally, a culture that had established its residence in the wooden containers used to make and ferment beer. Overall, the process of elaboration before the 1400s was very different from today. The bubbling and boiling were usually not even part of the process. In some cases the brewers did not boil the must at all, and in others, they boiled the must, but not for long.

It could be assumed that Gose was initially prepared with grain or some kind of spice mixture and not with hops. It can also be concluded that these early Goslar beers would have been fermented by multiple types of organisms, probably several strains of Saccharomyces cerevisiae, as well as lactic acid bacteria, Brettanomyces, other wild yeasts and probably a little acetic acid bacteria if the beer was left to age.

Features of Gose Beer

Photo by Helena Lopes on Unsplash

It is a highly carbonated wheat beer, acidic, and fruity, with a restricted character of salt and coriander with low bitterness. They are very refreshing and feature vivid flavors and typically have high attenuation.

Many things play a role in the formation of the final taste of a beer. Specific processes, time, cleaning, equipment design, brewer skill, and ingredients can all drastically change the results. But none can be more important than good ingredients, particularly the water and yeast to be used.

Gose Ingredient Selection

Image by uirá uirá from Pixabay

Water: It is known from many sources that water from the Gose River was used to brew beers in Goslar. In the case of Gose beer, the mineral content of the water, especially its salinity, is a good part of what this beer is all about.

Malt: Most Gose brewers adhere to tradition, using a grain bill that consists of wheat and barley in equal proportions with wheat occasionally taking a slight advantage. The malt for Gose beer should be pale two row, pilsner malt, or other well modified pale barley.

Hops: Herbs provided the scent in the earliest Gose renditions. Over time these spices stopped being used and only hops and coriander remain. Its remarkable low bitterness is one of the things that defines its style, so hops are used in small quantities. Another reason is that Lactobacillus is not a hop-tolerant bacterium, only 5 IBUs can affect the growth of some lactobacillus bacteria, and without lactobacillus, the Gose would not be a sour beer. Hop additions would have been enough to prevent unwanted bacteria but low enough to allow lactobacillus to do its job. Traditionally hops would be a noble German variety, a clean hops of flavor, soft with low cohumulone content to impart a milder bitterness. Classic German varieties such as Hellertauer Mittelfruh, Saphir, Hersbrucker or Perle might be good options.

Yeast: A yeast with a relatively neutral flavor profile will allow the acidity of the beer to shine. Attenuation can be important in this style. A highly attenuated yeast will leave the beer dry and crispy, while a yeast with low attenuation will leave a beer with more sweetness. Alcohol tolerance is not a problem for Gose as it is a beer with a low to medium-low alcoholic content, and the same goes for flocculation, as it is not a clear beer.

Spontaneous fermentation: Gose beers were most likely fermented spontaneously. These beers began fermentation in 12 to 24 hours so there should be an immediate source of microganies to get the beer fermenting quickly.  It has been suggested that wooden vessels, sometimes spruce, were a source of bacteria and yeast needed for fermentation. These containers may have acted as a home for resident microorganisms, brewers may have intentionally prevented deep washing of these, as they could have noticed that a more informal cleaning resulted in the next fermentation starting faster.

Fruits: Traditionally, fruit was not added to Gose, but as with Berliner weisse, flavored syrups were sometimes added to beer when served. Contemporary craft brewers have taken this concept and continue to add fruits, both natural and in syrup-form. The addition of fruits on the hot side has the obvious advantage in that they are sterilized by contact with the hot wort. The disadvantage is the loss of some subtle and more delicate flavors and aromas during boiling. Many fruits have seeds and if they are not removed before heating, they can be the cause of harsh and bitter flavors in beer. The fruit added on the warm side can also release pectin which will cause turbidity problems after fermentation. The addition of the fruit on the cold side can give the beer the closest flavors to the real fresh fruit. Like spices, the downside is that it has not been sterilized. Fresh fruit has a lot more bacteria than spices. To alleviate this problem many brewers use frozen fruit, as most bacteria cannot survive for long in freezing, but some bacteria can. Purees of pasteurized fruits are safer, which have then been frozen. The closer to the beginning of fermentation the fruit is added, the more flavor and aroma it loses from the decomposition it suffers during fermentation, the production and elimination of carbon dioxide, in particular, may be responsible for the loss of many aromatic compounds.

Salt: Legend has it that Gose’s salinity once came from the mineral-laden water of the Gose River. And unlike other regions of the world, salt was plentiful in the mountainous region of Harz around Goslar, therefore, salt was not a very expensive product.

Here’s the recipe of one of the great personalities of the brewing world:

Strong English Gose Recipe

“Gordon Strong,” BJCP Director USA
Original gravity: 1.042 (10.5oP)
Final gravity: 1,008 (2.1oF)
Bitternes: 9 IBU
Alcohol: 4.5% by volume
Apparent attenuation: 80%

Grain Bill

5.0 lb. (2.3 kg) German wheat malt
3.5 lb. (1.6 kg) Belgian Pilsner malt

Hops

0.7 oz. (20 g) Czech Saaz, 3% AA – first wort hop

Water

Reverse osmosis (RO) wáter 0.25 tsp. 10% phosphoric acid per 5 gallons (19 L) or until ph at room temperature.
1 tsp. (5 g) calcium chloride (CaCL2) to the mash

Yeast

Wyeast 1007 (German Ale) or White Labs WLP029 (German Ale/Kolsch) yeast.

*Two days before the day of preparation, make 1 qt. (1 L) yeast with the German strain ale, aerating the must thoroughly (preferably with oxygen) before releasing the yeast.

Additional Ingredients

0.26 az. (7.5 g) coriander seed, freshly ground 0 minutes.
0.35 oz. (10 g) kosher salt 0 minutes.

Souring Agent

19 capsules Swanson’s Probiotic Lactobacillus platarum Inner Bowel Support (10B cells/capsule)

Brewing Notes

Mash Target mash temp: 149o F (65oC)
Boil 10 min.

On the day of brewing, crush the malts to 149oF (65oC) into 13 gallon frames. (12 L) of water and keep this temperature for 60 minutes. Raise the temperature by infusion or direct heating to 168oF (76oC) for maceration. Recirculate for 20 minutes, spray with 168o F (76oC) of water until 6.5 gallons (25 L) of wort is collected. Lift the must until boiling and hold for 10 minutes. Do not add hops at this time. After boiling, I cooled to 95 degrees F (35 C). add the powder of 19 capsules of Swanson’s Probiotic L. Plantarum Inner Bowel Support (10B cells/capsule). Do not throw out the German ale yeast at this time. Purge the kettle with CO2 and cover. Hold for 12 or 24 hours at 95oF (35oC), or until the ph drops to 3.4. Add hops, boil the must for 90 minutes. Turn off the heat, then add the coriander into a mesh bag and salt. Steep for 5 minutes, then remove the bag. I cooled to 18oC placed the yeast initiator and fermented until complete. Once the fermentation is finished, ripen for a few days in cold, pass the beer to the barrel and force the carbonate to 3 volumes of CO 2.

Los Santos Hops – Gose Divino Recipe

Brewmasters: Ricardo Corbella, Juan Manuel Castagnini and Nicolas Piana.

Original gravity: 1,039 (10.5oP)
Final gravity: 1,008 (2.1oF)
Bitterness: 6 IBU
Alcohol: 4.2% by volume
Apparent attenuation: 80%

Grain Bill

12.12 lbs (5.5 kg) Malted Wheat
8.8 lbs (4 kg) Malta Pilsner

Hops

0.7 oz. (80 g) Czech Saaz, 3% AA first wort hop

Yeast

Yeast US-05, as it leaves us a neutral profile and works quite well despite the low ph of the must in fermentation.

Additional Ingredients

(0.8 g /L) fresh coriander and crushed 10 minutes before finishing the boil.
(10 g /L) himalayan salt 10 minutes before the boiling is over.
(3.5 L) pink grapefruit juice.
(8 kg) frozen pink grapefruit pulp.

Souring Agent

To acidify the wort we use 2 liters of liquid neutral yogurt containing L. acidophilus and possibly other strains of Lactobacillus.

BREWING NOTES

Mash at a temperature of 149oF (65oC) for 60 minutes.

We boiled for 10 min.

Prepare the pure and maintain this temperature for 60 minutes. Raise the temperature by mixing the infusion or heating to 76oC to finish mashing. Recirculate for 20 minutes, spray with water at 76oC of water until 58 or 60 L of wort is collected to bring to the boil. Heat the must until boiling for 10 minutes. Don’t add jumps at this time. After boiling, I cooled to 95 degrees F (35 C). At this time, add 2 liters of natural whole yogurt. Do not add US-05 yeast at this time. Purge the kettle with CO 2 and cover the pot. Hold for 12 or 24 hours at 95o F (35oC or 40oC), or until the ph drops to 3.4. Add hops in first wort, boil the must for 90 minutes. In the last 10 minutes of boiling add the cilantro and salt. Then transfer to fermenter cooling to 18oC, add the yeast and ferment until it is complete. Add the pink grapefruit juice and frozen fruit pulp. Allow to mature for a couple more days, transfer to a keg, force the carbonate to 3.2 volumes of CO 2.

Sources: Gose: Brewing a Classic German Beer for the Modern Era.
Fal Allen. September 7, 2018. Brewers Publications


Fermentation Temperature Controllers

Thursday, May 14th, 2020

Article and Photos By Mike Dalecki  

Most experienced brewers will tell you that their beer took a major leap forward when they began to do Fermentation Temperature Control (FTC). This article shows the range of methods to control fermentation temperature, from the simple and inexpensive to the complicated and pricey. At the end of the article, I’ll point out a way you might avoid worrying about temperature control altogether. Most of the discussion here presumes ale brewing, but lagers have similar issues–there are optimal temperatures at which they should be fermented, and your ability to control those temps will reward you.

Why Temperature Control is Important

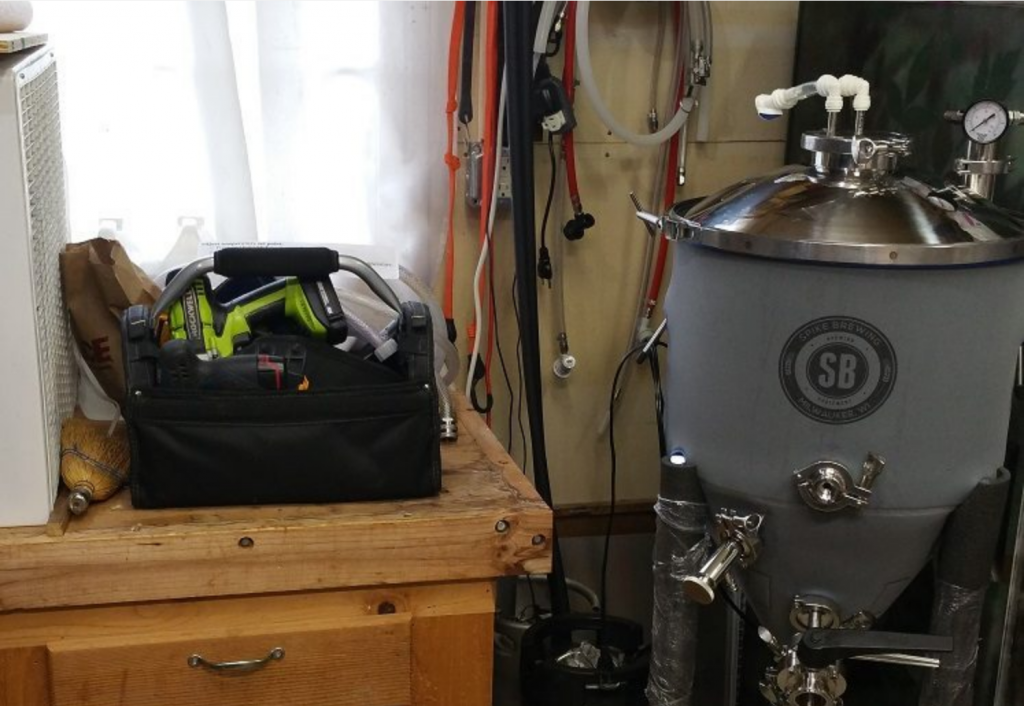
temper controller on spike fermenter

Different yeasts have different ideal temperature ranges. Yeast fermenting too warm will express unintended flavors, many of which are undesirable. Estery/banana flavors, an alcoholic flavor–these are to be avoided in normal beers and you can do that by preventing the fermentation temperature from becoming too warm.

There are a couple of exceptions; farmhouse or Saison beers use yeast designed to ferment at higher temperatures in order to express certain flavors; if all you brew are these beers, FTC may not matter to you. Kveik yeasts (covered below) can handle extreme temps up to 95 degrees without creating off-flavors. But for the most part, most fermenting beers benefit from some sort of temperature control.

Further, temperature control works both ways. There are times you want to warm up the fermentation (a diacetyl rest, for instance), and times you want to chill the beer (crashing prior to packaging, e.g.). The more control you have, the more you can do–and the more consistent your beers will be batch to batch. If you cannot control fermentation temperature, you’ll find it difficult to reproduce beers you like. Here are ways brewers control fermentation temperature, starting at the least expensive.

Ambient Temperature Only

Many new brewers assume that ambient room temperature is fermenting wort temperature. However, yeast is exothermic, meaning the yeast produces heat while it works. Actual wort temperature during fermentation can be 5-10 degrees higher than ambient temperature; further, the higher the temp, the faster the yeast works, and the more heat generated. If the ambient temperature is low enough it may not matter much–and by low enough, I mean in the mid-to-low 60s. You won’t be able to control fermentation temp but it won’t run away on you.

Swamp Cooler

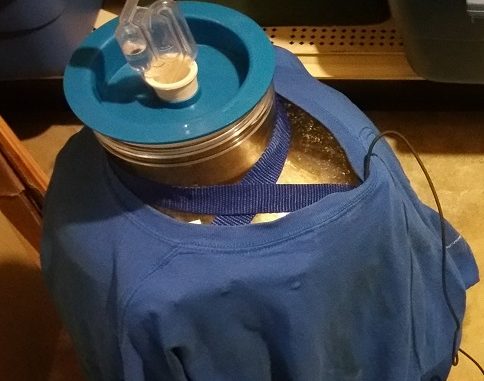
The redneck way to cool things without electricity is to use a Swamp Cooler; you place a piece of cloth over a vessel, wet it, and as the water evaporates it cools the vessel. Put the fermenter in a turkey pan ($1 at the Dollar Store) filled with a couple of inches of water, and drape a t-shirt or similar over the fermenter, allowing the shirt to dangle in the water. The shirt will wick up water that, when it evaporates, will cool the fermenter. I was able to produce about a 5-degree drop with my swamp cooler setup, but your mileage will vary with ambient temp, relative humidity, and size of the water pan. Some brewers live where ambient is just too high for evaporation to work on its own. They use frozen water bottles added to the pan in the morning and at night to help keep the temp down.

Refrigerator or Freezer Fermentation Chamber

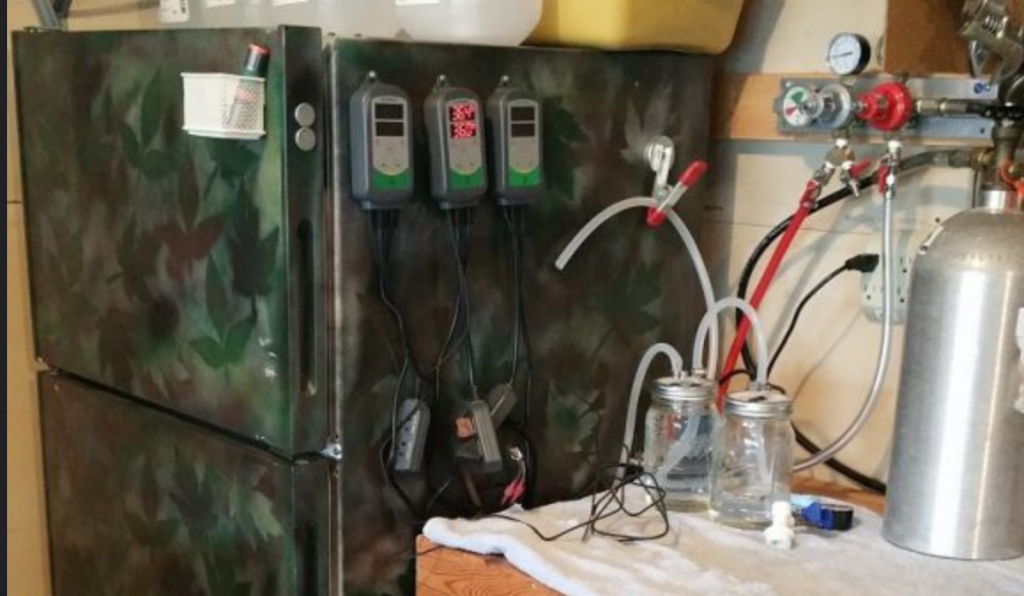
This is probably the most common approach besides doing nothing. Brewers will use either a refrigerator or freezer and an electronic control like an Inkbird 308 to manage fermentation temps. The refrigerator is turned to as cold as it will go, and when the temperature probe indicates the wort is
too warm, the controller turns on the refrigerator to cool it. If a heat source is also used, the controller will turn that on when wort temp is too cold.

The temperature probe can be held against the fermenter with a piece of insulation and a bungee cord or string; the insulation ensures the probe picks up the temperature of the wort, not ambient temperature. Some will use a thermowell, a hollow tube that extends from the bung into the wort, and into which the temperature probe is inserted. Typically the brewer will also use a heat belt or mat wrapped around the fermenter to allow warming the wort toward the end of fermentation for a diacetyl rest or even just to help the yeast clean up after itself. It’s also common in areas where ambient temperatures in the winter, such as my garage here in Wisconsin, can drop well below the desired fermentation temperature. There needs to be a way to warm the fermenter at times like these. In fact, if you have a pretty cold area to manage fermentation, you might not even need a refrigerated fermentation chamber–just a way to heat the wort up to the level that the yeast requires.

Probably the two most common ways of warming a fermenter like this are a FermWrap, or a seedling heat mat. Wrapped around the fermenter and held in place with string, wire, or a bungee cord, they apply warmth directly to the fermenter and thus, the wort. If ambient is fairly cold, some insulation like a towel may be wrapped around the fermenter. Some brewers use a light bulb inside a metal can, or a reptile heat bulb to add heat inside the fermentation chamber, but it’s a slower and less direct way to control heat.

It doesn’t matter much whether you use a refrigerator or freezer; it’s a personal preference. I prefer a refrigerator, as I don’t like lifting a fermenter into a freezer. You can get these cheaply used; Craigslist is a good source. I use both a large refrigerator that can handle two fermenters at a time, and a tall dorm-style refrigerator which is perfect for those whose space won’t allow a larger unit.

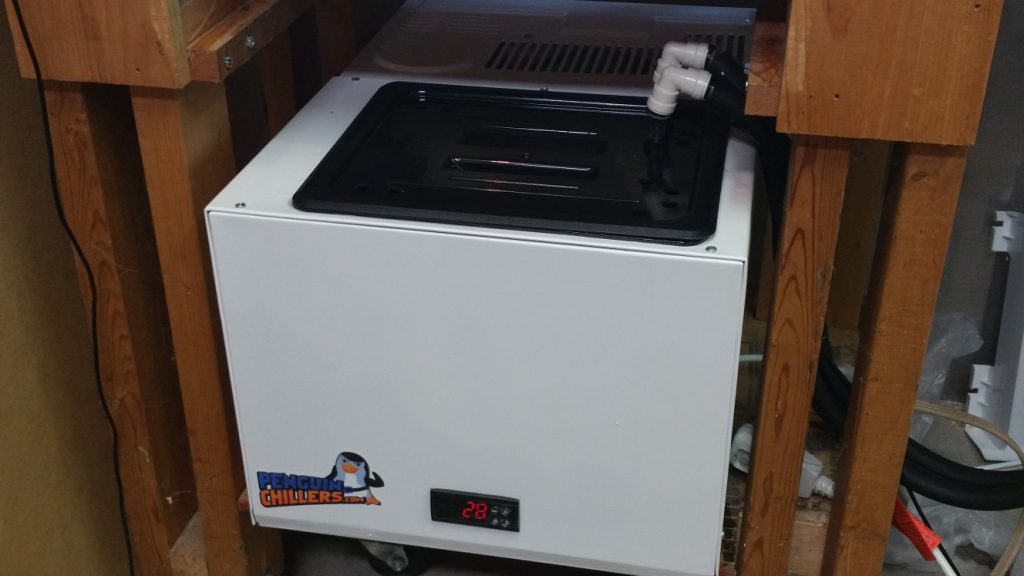
Glycol Chilling Units

glycol chilling unit

Glycol, which mixed with water reduces the temperature at which it freezes, is used to chill coils suspended into a fermenter. Commercial units range in price from about $700 to $1000. The advantage of glycol is speed and control, as the chilling is applied directly within the wort through stainless coils inside the fermenter. The better glycol chillers can handle up to four fermenters at a time; each fermenter simply needs its own pump to control flow. Some have had success with a DIY glycol chiller. I created a Glycol reservoir inside the freezer compartment of my large fermentation chamber; it was quite effective in controlling fermentation temp, though less effective in crashing.

Others have repurposed air conditioners to glycol chilling, and still, others have used small dorm-style refrigerators for this purpose. If you’re interested in researching this, search “DIY glycol” on Homebrewtalk and you’ll find a number of threads dealing with this, including my own.

Kveik Yeast

This last isn’t fermentation temp control but rather a way to ignore it. Kveik yeast is an ancient yeast that developed in northern European countries. It is fairly immune to high-temperature fermentation, meaning it can handle fermentations up to 95 degrees without producing typical
off-flavors. While Kveik doesn’t offer the variety of strains that dry or other liquid yeasts present, it is an option for those who for whatever reasons simply cannot keep ferm temps down. When using Kveik yeast, high temperatures aren’t a bug, they’re a feature.


How to Use Chocolate in Your Beer

Thursday, April 9th, 2020

By Jesse Southard

Personally, I love chocolate beers. Before I was a homebrewer, I took a trip to the Czech Republic and had my fair share of beer. However, a chocolate beer stood out to me called Opat Chocolate Stout. I remember thinking how did they get so much chocolate flavor into this beer? Anyway, looking back I laugh because adding chocolate to your beer, in my opinion, is one of the easiest ways to elevate your beer’s flavor. You can bring out more chocolate flavors in a base recipe or build a recipe around chocolate. Either way, you need to have some basic knowledge on how to use chocolate in beer, what type of chocolate to use, and some tips on how to get the flavors right. The end goal is to have a chocolaty beer without the beer tasting artificial. So, my advice is to always use whole ingredients such as cocoa nibs, 100% cocoa powder, or pure chocolate extract. Let’s dig a little deeper.

Using Cocoa Nibs In Your Beer

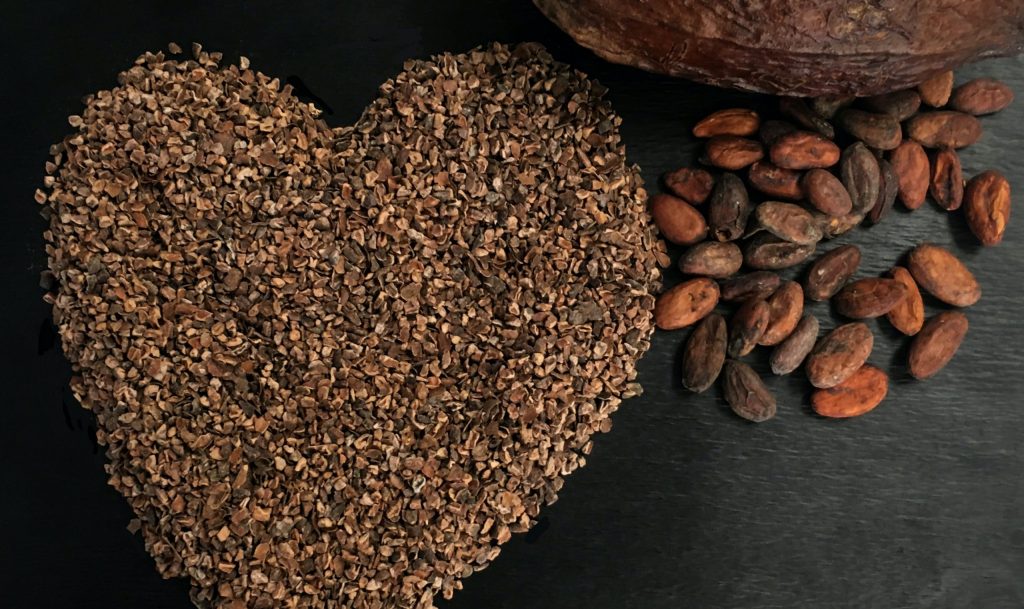
cocoa nibs

Cocoa nibs are the closest thing you will find to the raw cocoa bean outside of the tropical regions that it is grown. The bean is harvested, fermented, and crushed to produce a raw cocoa nib. The nibs are then either packed for sale as a raw item or slightly roasted to produce a richer chocolate flavor. At any rate, if you buy raw or roasted you should taste the product before brewing with it to ensure it has the flavor you are looking for. If you are wanting control of the chocolate flavor, buy the raw nibs and roast them in your oven at home. You can accomplish this by setting your oven at 350 degrees Fahrenheit (177 degrees Celsius), then laying the nibs on a baking sheet and roasting them at five-minute intervals until they have reached the flavor you are looking for. If you fail to roast raw nibs before adding them to your beer, they will impart little-t0-know chocolate flavor. You can use cocoa nibs in any step in the brewing process.

In The Mash

If using cocoa nibs in the mash, you should crush the nibs as you would crush your grains and add them in with the rest of your grain bill. Adding to the nibs to the mash will extract a more bitter dark chocolate flavor which is preferred in more robust stouts and porters.

In the Boil

You can add the cocoa nibs to the boil which will also extract a more bitter dark chocolate flavor. When adding to the boil, I suggest pitching them into a hop spider so you can strain them after the boil.

Primary & Secondary

You can add them to your primary or secondary by first soaking them in vodka overnight. Pitching earlier in fermentation allows for more flavor extraction. Pitching in primary provides a more mellow dark chocolate flavor which is preferred in porters and brown ales. Pitching in secondary will produce a more subtle chocolate undertone which can be experimented with in nontraditional ways.

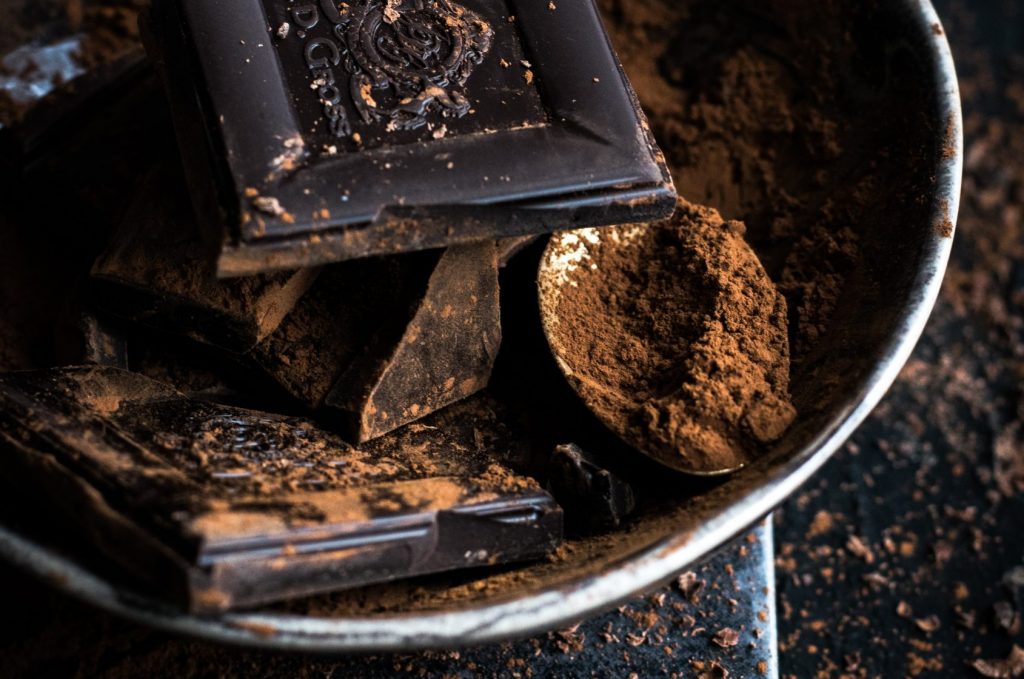
Using 100% Cocoa Powder In Your Beer

Cocoa powder is a more refined version of cocoa nibs. It has already been roasted to the manufacturer’s specifications and milled into a fine powder. You have no control over the roast factor; however, cocoa powder is a great way to get chocolate flavor into your beer. I do caution about using only 100% cocoa powder as anything else will have fillers, fats, evaporated milk, or other unnatural ingredients. 100% cocoa powder, in my opinion, is the most convenient cocoa product because it is sold in nearly all big box stores and is relatively inexpensive.

Using cocoa powder in your beer is fairly easy as you can add it at any stage to achieve your desired results.

In the Mash

You can add cocoa powder directly to the top of your grain bed when mashing or sparging. You do not want to mix this in when you dough in unless you enjoy having a stuck sparge. When you are finished doughing in, wait 15 minutes and sprinkle your desired amount of cocoa on top of the mash. Adding to the mash allows the chocolate flavor to be extracted while leaving the powder behind when lautering. You can achieve a more subtle chocolate flavor by adding it to the top of the grain bed when fly sparging. If you batch sparge, you can achieve the same effect by adding the cocoa after adding your sparge water. Both methods work perfectly for use in stouts, porters, brown ales, and out of style experiments.

During the Boil

You can add cocoa powder directly to the boil, any time during the boil, or at flame out. Adding at these times, gives you the same result in my experience. Adding cocoa to the boil provides a darker bitter chocolate flavor which is desirable in robust stouts and porters. If adding to the boil, leave the black sludge behind when transferring to the fermentation vessel.

Primary & Secondary

You can also add cocoa powder directly to primary or secondary. To keep things sanitized, you will want to make a vodka cocoa slurry by mixing cocoa powder in vodka. Just like cocoa nibs, adding cocoa powder in primary provides a more mellow dark chocolate flavor which is preferred in porters and brown ales. Pitching in secondary will produce a more subtle mellow chocolate undertone which can be experimented with in nontraditional ways.

Using Chocolate Extract In Your Beer

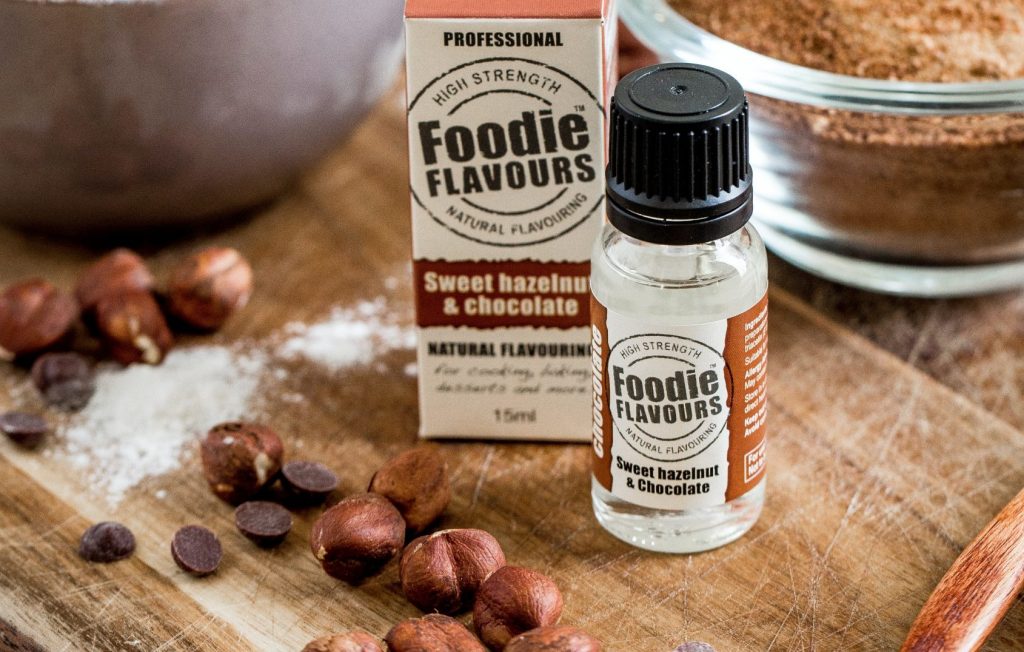
chocolate extract bottle

The simplest way to add chocolate flavor is by adding a chocolate extract. Now, there are plenty of chocolate-flavored extracts on the market, but we do not want to end up with an artificial tasting beer. So, do yourself a favor and ensure you are using pure chocolate extract. Unlike using cocoa nibs or cocoa powder, extract needs no contact time to achieve the chocolate flavor you want. However, it will impart an alcohol flavor that may be detectable in lighter beers. You can make your own extract at home with cocoa nibs and distilled spirits. A simple extract can be made by adding 6 ounces vodka and 3 ounces of cocoa nibs. Let them soak for a week and then straining off the nibs. You can get quite creative with cocoa nib roast time, extraction time, and type of distilled spirit. I personally like to soak my nibs in bourbon when making chocolate stouts.

To use pure chocolate extract in beer you will want to add it any time after the boil. However, since this product needs no contact time to extract the flavor, you can easily add too much. So, I prefer to add extract at packaging. When adding at packaging, you want to minimize oxygen exposure so you can rack off a few cups of beer to experiment with before adding the extract to your brew. I add drops of extract from an eyedropper to each glass, starting with three and going up three with each glass. You can experiment with more or less extract in each glass, just remember how many drops you added to reach your desired result. If you are adding extract to a five-gallon batch there are 80 cups in a gallon, so if you like nine drops of extract in a cup, you will need to add 720 drops of extract (9×80=720). According to Traditional Oven, there are 98.5 drops in one teaspoon, which means you would add just shy of 7.5 teaspoons (720/98.5=7.3) of extract to a five-gallon batch of beer.

Chocolate is a sweet treat that can be enjoyed in many ways; however, there is nothing like having a nice chocolate beer, especially one that you made yourself. It can be a nice compliment to freshly baked cookies, campfire smores, or even as a dessert beer. Whether you are chasing after that one chocolate beer of your dreams, or just want to experiment with chocolate, I hope that this article helps you in your homebrewing endeavors. Cheers!

Recipe Spotlight

Bill’s Double Chocolate Milk Stout is a great way to test the waters with several of these chocolate-flavor producing methods.


Ensuring Success With Your First Lagers

Friday, March 20th, 2020

By Old Standby Brewing

You’ve been homebrewing for a while now and have pumped out some pretty tasty ales, impressing the hell out of friends and family; probably some IPAs, stouts, maybe even a porter or an ESB. Now you’re thinking you might want to try your skills at a crispy lager since you’ve been seeing them pop up more and more at breweries lately. Well, here are the most important things to consider before you take on the challenge of producing a tasty lager. The 3 most important things to remember when crafting a quality lager: Yeast, Temperature, and Patience! Let’s discuss further.

Your First Lager Recipe

Photo by Helena Lopes on Unsplash

Photo by Helena Lopes on Unsplash

As far as recipe development goes, it’s best to keep it simple in the beginning. Start with a basic malt bill that uses high-quality Pilsner malt and only small percentages of 1 or 2 specialty malts. Don’t worry about step mashing for this recipe. Pick a single infusion temperature (around 150°F) and mash in just as you would with all the ales you’ve brewed. Next, collect all that sweet wort into your kettle and once again, keep your hop schedule pretty simple. Refer to the BJCP guidelines for the lager style you’re brewing and keep the IBU in the suggested range. Perhaps you’ll want to use a noble hop variety or two here to really capture those traditional aromas and flavors. Once your boil is complete, which you may want to increase to 75 or 90 minutes to help reduce some off-flavors associated with high levels of pilsner malt, try to chill as quickly as possible and transfer to your sanitized fermenter. This was the easy part! If you’re looking for a great go-to lager recipe check out the Oktoberfest recipe created by Daily_Brewer. You can also check out the recipe section for more lager recipe inspiration.

Yeast Strains For Lagers

Here’s where your lager really needs some tender love and guidance to reach its full potential. Since lager yeast moves slower & does its best work at cooler fermentation temperatures, you’re going to want to pitch at least double (or maybe triple) the amount you normally pitch into your ales. This yeast also needs to be fresh so check the packaging dates. I try to use yeast that is dated within 1-2 months of my brew date. If you can’t get super fresh yeast, you’ll either want to purchase more or make a starter to get your yeast ready to tackle your lager. Remember, the yeast is doing all the work here, so make sure you’re adding enough to make your first lager attempt successful. I find that the pitch rate calculator on Brewer’s Friend is an excellent resource to determine how much yeast I actually need to use. It’s better to pitch more viable, healthy cells than not enough!

Lagers And Temperature Control

Now that you’ve brewed the beer and pitched plenty of fresh lager yeast, it’s time to create the optimum fermentation environment for your lager yeast to do the important work it needs to do. In order to create a choice lager, you have to be able to keep your fermenter at consistent lager temperatures for a long period of time. This means in the range of 48-52°F for 2 weeks and then down to almost freezing temps for a month or more. Each variety of yeast that you use will have an optimum fermentation range so use this information as your guide. If you don’t have the ability to control your fermentation temperature yet, you may want to consider not brewing a lager at this point in your homebrewing career. Sorry for the brutal honesty here, but I’m just trying to save you the heartache of your lager not turning out very good!

Stay Patient With Your Lagers

Sticking with the theme of keeping it simple, hold this temperature for at least 7-14 days before you do anything. Now, you’re going to be used to the activity that you’ve seen from your ale fermentations; you’ve possibly even blown a few airlocks off the top of your carboy, right? Well, lager fermentation happens much slower. Picture the sloth DMV scene in Zootopia or maybe even your last service call with your utility company! I digress. There are a few very well-known techniques for attempting to speed up your lager fermentation by some very well respected brewers, but I would urge you to keep it simple for your first lager and stick to a basic fermentation schedule which takes a few more days, but is less complex and doesn’t require you to take a bunch of gravity readings. Once your lager activity starts to really slow down after 7-14 days, raise the temperature of your fermentation vessel a few degrees, to the upper end of the range that we talked about earlier from the yeast manufacturer, and hold at this temp for at least another 3-4 days. This warming at the end of the fermentation will give your yeast a chance to clean up any off-flavors that have been produced. This is also known as a diacetyl rest. Diacetyl is a buttery flavor that you don’t want in your finished lager so be patient and give the yeast a chance to tidy things up. If you’re still seeing some activity in your blow-off, take a gravity reading to see if your lager is getting close to being finished. If not, give the beer a few more days to wrap things up.

Packaging Your Lagers

lagers in keezer

Photo by Adam Barhan via Flickr

When all activity in your fermenter has stopped and you’ve hit your final gravity, it’s time to start cooling your beer down to start the lagering process. The word lager, or lagern in German, means “to store” or “to keep,” so really you’re just beginning to create the amazing flavors that you’ve come to love from a crispy lager. Lower the temperature of your fermenter about 2-3 degrees per day (patience, remember?) until you get down to 32-35°F and hold at this temp for as long as you can possibly stand it! Usually, 3-4 weeks is a good lagering time, but some of the more powdery yeast strains will need longer to drop out of suspension completely and some higher alcohol lager varieties will need even more time to fully mature. It is best to do this lagering phase with all of your yeast still in the fermenter, so don’t worry about racking into a secondary fermenter at this time. This allows your lager yeast to continue working its magic and creating the delicate flavors that you’ll want in your finished beer.

Now that you’ve completed your lagering stage you’re probably really thirsty and hopefully, you brewed enough ales before this lager to get you through the last couple of months! If you have the ability to keg and force carbonate your lager, you could be enjoying pints in just a few days. If you bottle condition your beer, then you’re going to have to wait a couple more weeks for your lager to fully carbonate. Bottle carbonation happens when the remaining yeast in your beer consumes the priming dextrose that you add at bottling, but since you’ve just finished a month-long lagering phase, there isn’t too much yeast left in your beer. So once again be patient because carbonation will take longer than usual. I probably don’t have to remind you, but I will anyway since you’ve come this far, sanitation is so important when making quality beer after your boil is complete. When you make a lager there is nowhere for off-flavors to hide, so make sure you’re cleaning and sanitizing everything that will come in contact with your beer once it leaves your boil kettle.

When it comes time to pour the first pint of lager that you crafted and cared for over the last couple of months, you’re going to have a new appreciation for lager brewing. Pay close attention to the delicate and subtle flavors of the pilsner malt and the traditional aromas of the German hops. Planning your next lager is a great thing to do while you enjoy your first few pints of the brew you just completed! Prost!


6 Hops That Can Make an Impact Next Brew Day

Tuesday, March 3rd, 2020

By: Ryan Celia

Hops are 1 of 4 ingredients required to brew beer according to traditional German Reinheitsgebot. They impart bitterness, flavor, and aroma to beer when used during specific times before, during, and after the boil. Hops come in several forms, the most common being whole leaf hops, pellet hops, cryo hops, and hop extract. Here are 6 hops that can make an impact on your beer on your next brew day.

Everyday Hophead Hops

Photo by Missy Fant on Unsplash

These are the hops that every hophead uses on a regular basis. These hops are readily available online and at your Local Homebrew Store. You’ll also be able to find them in a variety of forms, not just standard pellets.

Simcoe Hops

Simcoe hops are very popular among professional and home brewers due to them being very well rounded and predictable. Simcoe hops usually range from 12% – 14% alpha acid and work well for a bittering addition as well as a flavor and an aroma addition, making them a triple purpose hop. Not all high alpha acid hops work well as a bittering hop. Some high alpha hops don’t have the clean or desired bittering profile needed to add them early in the boil. Simcoe hops work well in a SMASH beer due to their high alpha acid content that works well for bittering and their exceptional ability to provide their flavor and aroma as advertised. A SMASH beer is a beer brewed with a Single Malt And Single Hop. Simcoe hops are known to impart flavors and aromas of grapefruit, pine, and citrus. Simcoe hops can be found in a wide variety of beer styles but are typically found in IPAs, Double IPAs, American Pale Ales, Wheat beers and Amber Ales.

Citra Hops

Citra hops are in high demand among professional and home brewers due to their incredible ability to add highly desirable flavor and aroma. Citra hops are known for imparting aromas of grapefruit, citrus, and tropical fruit. Citra hops typically have an alpha acid range of 10% – 15%, however, they are one of those hops that the higher alpha acid doesn’t necessarily translate into being a great bittering hop. The bitterness they produce tends to be a bit harsh for some people’s likings. Citra hops make their magic happen when added towards the end of the boil, the whirlpool, and as a dry hop addition. I’ve had and enjoyed several all Citra hopped beers, but the common thread was that the bitterness of these beers was quite restrained. Citra hops can typically be fund in IPAs, Double IPAs, American Ales in general, and New England IPAs.

Mosaic Hops

Mosaic hops are another high demand hop that can be considered a triple purpose hop. They continue to grow in popularity. Their alpha acid range is typically 11% – 14%. Mosaic hops typically impart flavor and aromas of tropical fruit, pine, citrus, and blueberry. Mosaic hops can be found in New England IPAs, American Pale Ales, IPAs, and Double IPAs. I’ve had a few beers that were dominated by Mosaic hops and the blueberry flavor really shined through. This made these beers and this hop very enjoyable.

Sought After Hophead Hops

Photo by Markus Spiske on Unsplash

These hops may not always be hard to find online but they may cost quite a bit more than what you’re used to spending, they may only be available certain times of the year, and they may not be readily available at your local homebrew store. They are hops that all homebrewers need to try at least once to see the impact they make on their finished product.

Galaxy Hops

Galaxy hops are one of the most in-demand hops on the market today. The demand has driven the price up to anywhere between $30 and $40 per pound, one of the highest-priced hops on the market. Galaxy hops are a triple purpose hop coming in between 11% and 16% alpha acid. Galaxy hops have flavors and aromas of peach, passionfruit, pineapple, citrus, and a lovely generic tropical fruit flavor that is close to being unmatched by any other hop. Galaxy hops are best used late in the boil, post-boil, or as a dry hopping addition. Galaxy hops are a desired addition to any hop-forward beer.

Amarillo Hops

Amarillo hops are primarily used as a flavor and aroma hop. Amarillo has some uniqueness in that it’s grown in both the United States and Germany and the hops you get from each country are noticeably different from one another. They typically range from 7% – 12% alpha acid, which can be fairly high for a hop that is primarily used for floor and aroma. The higher alpha acid version of this hop are usually the ones from Germany. The American Amarillo hop will have flavor and aroma characteristics of citrus, orange, floral, and tropical fruit. The German version will have a few distinct variations to include a tropical / fruit punch version, a lemon/citrus version, and a stone fruit version. These are one of my favorite hops to use at the end of the boil, in the whirlpool, or hop stand when making a hop-forward beer. Give them a try, I assure you they won’t disappoint.

Sorachi Ace Hops

Sorachi Ace hops maintain their popularity and demand due to their unique flavor characteristics even though they are grown in limited quantities. Sorachi Ace hops contribute flavors and aromas of lemon, dill, and citrus. Their lemon and dill flavors are the most noticeable, with the lemon being in the forefront. They range in alpha acid from 11% – 16% and have been used successfully as a bittering, flavor, and aroma hop. Some commercial breweries have even used Sorachi Ace as the only hop in certain beers that they’ve brewed. I’ve used them in IPAs, American Pale Ales, American Barleywines, and Saisons. This is definitely a hop you must try once either on its own or combined with another fruit-forward or citrus-forward hop.


Import your Brewtoad files into Brewer’s Friend- Quickly and Easily!

Tuesday, January 8th, 2019

Exporting recipes from Brewtoad, or any type of *.xml file, and into Brewer’s Friend is simple and straightforward.   When you are on the Brewtoad website, you can export the recipes one at a time easily.   However, that could be very tedious,  so you could try using this technique for exporting all of them found on here:   https://www.reddit.com/r/Homebrewing/comments/a4lx1v/brewtoadcom_is_shutting_down_at_the_end_of_the/ebg48iu/?sort=new

Please be advised that we did not write that script, so please be cautious in trying it.

Brewer’s Friend accepts both *.bsmx (Beersmith) and the *.xml file formats, so you can import ANY .xml files into Brewer’s Friend from other software programs or from recipes on the internet that have an .xml or *bsmx file type.   Once you export your recipes,  save to your computer or in a dropbox if you have a very large number of recipes.  It’s a good idea to save it to your desktop, for ease in finding it again.

Then, to import your recipes into Brewer’s Friend, just open your internet browser, and go to Brewersfriend.com. 

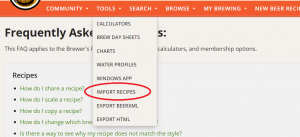
Log into your account, and choose “Tools” in the orange tool bar.

Then choose “Import Recipes” in the dropdown.


A screen will appear, telling you to choose a file, or to drag it into the box.

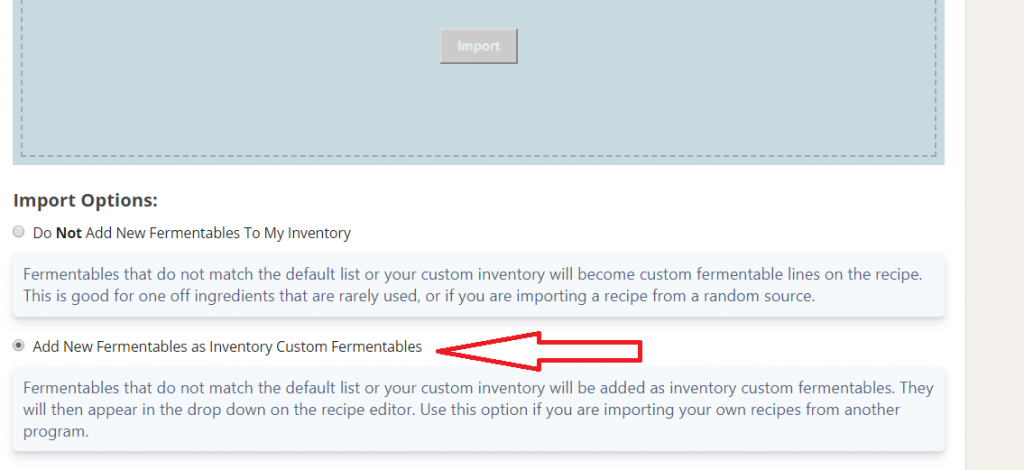
You also have a choice about what to do with ingredients in the recipe that may not have an exact match in Brewer’s Friend.   When importing from Beersmith or Brewtoad (or many other programs), the bottom box should be checked, as this will allow those unmatched items to be listed in your recipe:


When you have made your selection here, scroll back up a little and once you have chosen the file(s) to import, click “import”.

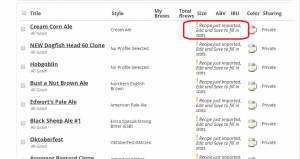
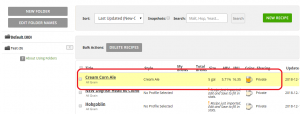
When the import is finished, the new recipes will be listed in your dashboard under “My Recipes”.

You’ll see that a notice will say:  “! Recipe just imported, Edit and Save to fill in stats.


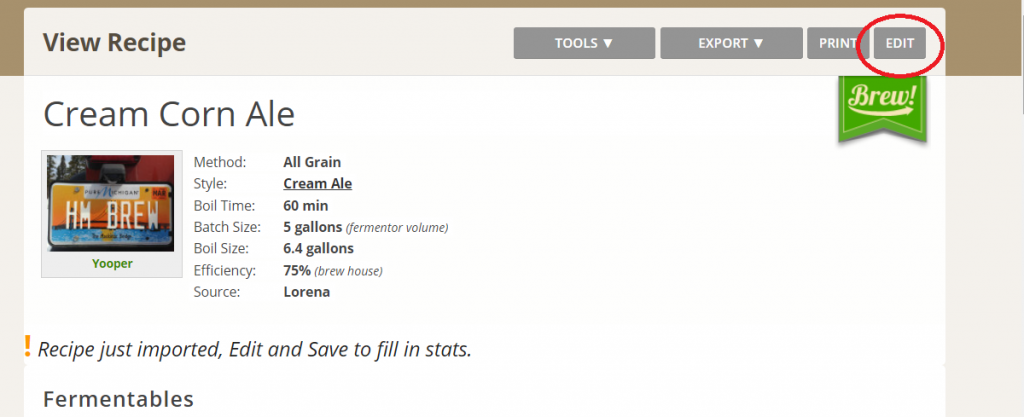
Click on the title of the first recipe you wish to save in Brewer’s Friend.   Then, click “edit” on the right side near the top of the screen.


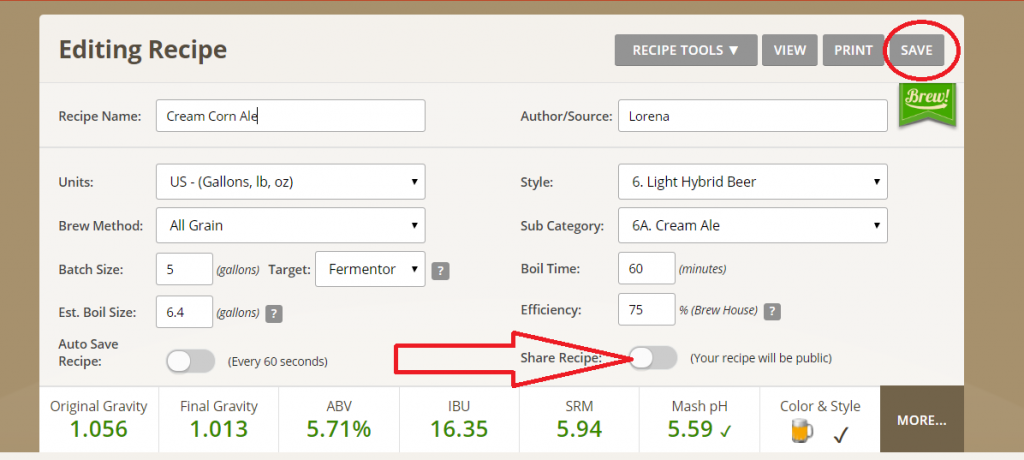
That will bring up the full recipe and here you can save it.   You can also choose whether to make this recipe public (shared) or private by moving the slider (see below).


Once you click save, this recipe will be in “My Recipes” in Brewer’s Friend as one of your regular recipes.


That’s all there is to it!  It’s quick, easy, and enables you to keep your entire collection of recipe files on our cloud.  Cheers!


Migrating Your Recipes from Beersmith To Brewer’s Friend

Wednesday, December 19th, 2018

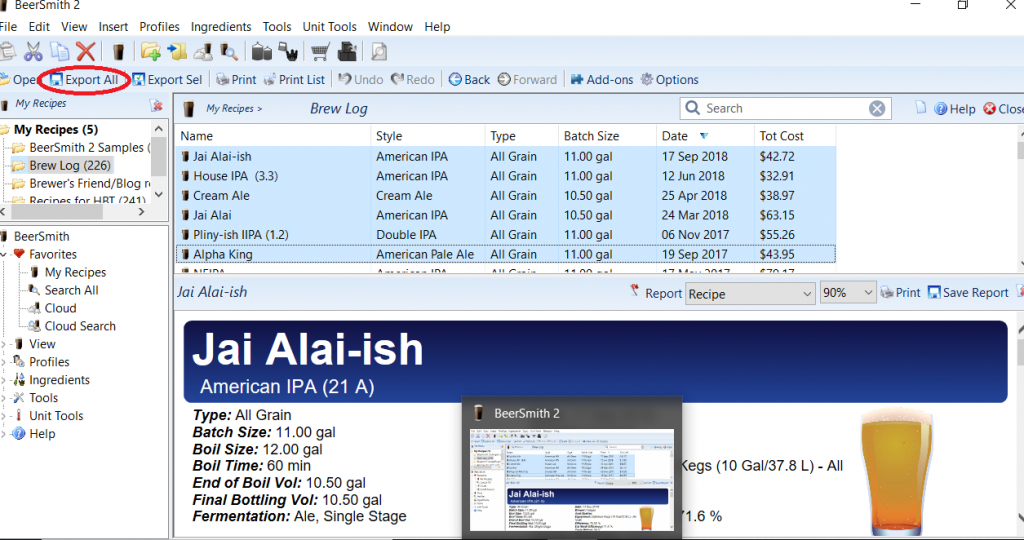
Exporting recipes from Beersmith and into Brewer’s Friend is simple and straightforward.   When you are in the Beersmith program, you will have two options for exporting your recipe files.    The “Export All” command exports all of the items in the current view or folder to a file which you can save to your computer or email to other brewers.

The “Export Selected Items” choice exports only the items you have selected in the current view.  You can select multiple items by holding the Ctrl key while you click on the items you are choosing.  The blue highlights in the view above show the chosen recipes.

Beersmith files have a *bsmx file extension which can be directly imported into Brewer’s Friend, or you can import those files as BeerXML files (with a .xml extension) as well.   Brewer’s Friend accepts either one of those file formats, so you can also import ANY .xml files into Brewer’s Friend from other software programs or from recipes on the internet that have an .xml file type.

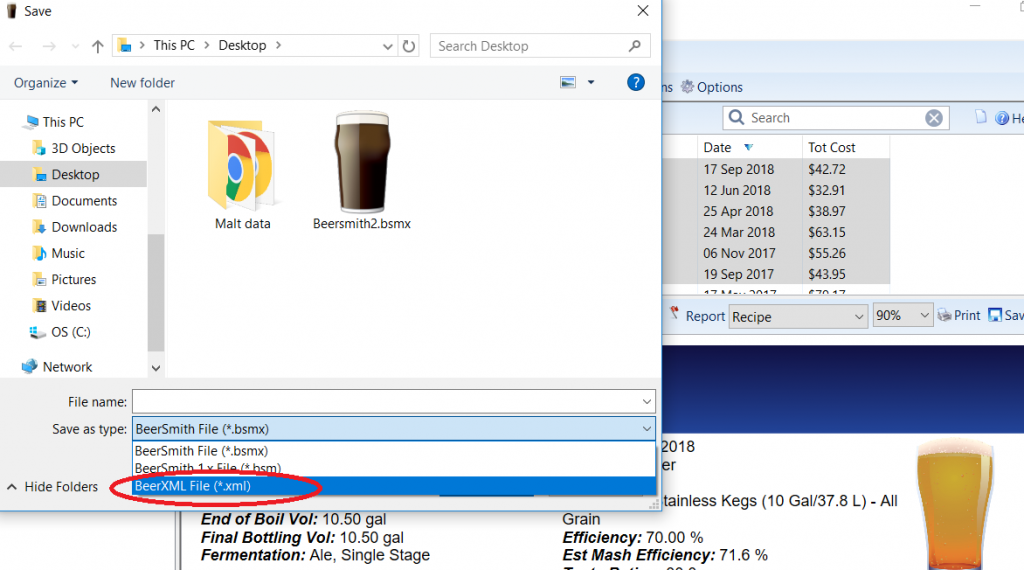
After you choose the “export all” or “export selected”, the following screen will appear: 


Choose the file type that you would like to use for importing.   Either *.bsmx or *.xml will work in Brewer’s Friend.   Save to your computer or the cloud as in a dropbox if you have a very large number of recipes.  In this case, this file was saved to the desktop for ease in finding it again.


Open your internet browser, and go to Brewersfriend.com. 

Log into your account, and choose “Tools” in the orange tool bar.

Then choose “Import Recipes” in the dropdown.


A screen will appear, telling you to choose a file, or to drag it into the box.

You also have a choice about what to do with ingredients in the recipe that may not have an exact match in Brewer’s Friend.   When importing from Beersmith, the bottom box should be checked, as this will allow those unmatched items to be listed in your recipe:


When you have made your selection here, scroll back up a little and once you have chosen the file(s) to import, click “import”.

When the import is finished, the new recipes will be listed in your dashboard under “My Recipes”.

You’ll see that a notice will say:  “! Recipe just imported, Edit and Save to fill in stats.


Click on the title of the first recipe you wish to save in Brewer’s Friend.   Then, click “edit” on the right side near the top of the screen.


That will bring up the full recipe and here you can save it.   You can also choose whether to make this recipe public (shared) or private by moving the slider (see below).


Once you click save, this recipe will be in “My Recipes” in Brewer’s Friend as one of your regular recipes.


That’s all there is to it!  It’s quick, easy, and enables you to keep your entire Beersmith recipe files on our cloud.  Cheers!


Want no ads? Go Premium and unlock all our brewing tools!