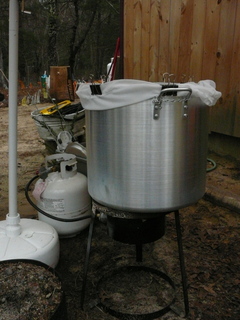
Home Brew Blog - Brewer's Friend - Part 25
Brew your best beer EVER. Start your Free Trial of Brewer's Friend today! Sign Up ×

Sparging Methods

Saturday, July 4th, 2009

There are several ways to extract the sugars that we convert during the mash from the grain bed, they include, fly sparging, batch sparging and NO sparging.

Fly Sparging: When the mash is complete the brewer will vorlaugh and begin the sparge. With this method the brewer wants to slowly and gently add water to the top of the mash, leaving 1-2” of water above the grain bed at all times to avoid grain bed compaction, while also slowly draining the MLT into the boil kettle at the same rate. Typically a flow rate of .5 – .75 quarts per minute will result in an effective and efficient fly sparge. For this reason it can take 40-60 minutes to complete a sparge for a 5 gallon brew session.

Pros of fly sparging include:

  • While one benefit of fly sparging in the past was increased lauter efficiency, this is debatable at best and with new split batch sparge techniques, most definitely not worth the extra time that it takes to perform. Thus the increased popularity in batch sparging.

Cons of fly sparging include:

  • The need to have an effective mashout, due to the fact that fly sparging can take up to an hour, the brewer will want to denature any enzymes in the mash.
  • Extended fly sparging can increase mash pH to a level where tannins will be extracted from the grain husks, which is not desirable
  • Channeling can become a problem if the manifold in the bottom of the MLT is not designed properly, which causes the sparge water to drive right through the grain bed, reducing efficiency and leaving sugars in the MLT.
  • You must match the Inflow of the sparge water very closely to the OUTflow of the wort from the bottom of the MLT during the entire sparge.
  • Possible lower quality wort during extended fly sparging due to rising pH and low sugar content of final runnings.

Batch Sparging: This is a method by which the sparge water is typically split into two equal batches. Proper and accurate calculation of the sparge water requirement is essential! When the mash is complete the brewer will vorlaugh and drain the MLT into the boil kettle, followed by refilling the MLT with the first half of the sparge water. The brewer will then thoroughly stir the mash, let rest for a few minutes, varlough again and drain into the boil kettle a second time. The last of the two sparge water infusions will follow this same pattern.

Pros of batch sparging include:

  • It can be completed more quickly than the slow and steady fly sparge.
  • Channeling is reduced since the MLT is being drained completely between sparges.
  • Temperature control is not as critical since each sparge water infusion is so large.
  • It eliminates the need to monitor the runoff speed, no need to match this with the inflow as you do during a fly sparge.

Cons of batch sparging include:

  • The grain must be resettled (vorlaughed) after each sparge water addition.
  • MLT size may need to be larger to accommodate the sparge water and grain volume while mixing and resting between sparges.
  • Efficiency “can” suffer, though with new split batch sparge techniques, brewers achieve 80+% efficiency, which is comparable to fly sparging techniques.

No Sparge, um, Sparging: This method is just as the name suggests… a method by which there is NO sparge. In order to accomplish this method, a brewer will mash in with ALL of the water that their brew will require., this could be upwards of 9-10 gallons of water alone for a 5 gallon brew session. When the mash is complete the brewer will vorlaugh and simply drain the entire MLT into the boil kettle, and if calculated correctly, meet their pre-boil volume.

Pros of ‘no sparge’ include:

  • It can be completed more quickly than either fly sparging or batch sparging.
  • Channeling is reduced since the MLT is being drained completely.
  • It eliminates the need to monitor the runoff speed, no need to match this with the inflow as you do during a fly sparge.
  • Extremely high quality wort due to no sparing resulting in low pH and high sugar content wort.

Cons of ‘no sparge’ include:

  • MLT size may need to be larger to accommodate the entire quantity of water needed to complete a brew session and the grain bill.
  • Efficiency will suffer, badly, due to the lack of an effective rinse of the grain bed.
  • Nearly impossible to accurately estimate the OG of a beer with this method.

Closing Thoughts: From the discussion above, it is clear to see why batch sparging, namely the split batch sparge, has become so popular with home brewers who value their efficiency and their time.  Don’t expect to hit 80% on the first try.  Water chemistry and temperature control are big parts of success in this area, so make sure to check out the calculators at this site to prepare you.

The Hops Race

Friday, July 3rd, 2009

All six new rhizomes sprouted this year. Some are doing better than others. Nugget is doing the best, while cascade and magum are lagging. They were both hit with excess water during a storm. The gutter overflowed right on top of them for an hour. It was painful to watch.

All told I am really happy with the result so far:
growing hops at home

I had planned to do a trellis system. Then I noticed the plant hanger hooks already on the house. A simple length of twine and a piece of bamboo at the foot saved me several hours of work. I had planned to do cemented posts and a 12′ trellis which could be disassembled at the end of the season and saved for next year. This was much easier and it proves just how simple hops growing is. We have been watering them every other day, about a ten second dosing with the hose.

Nugget is the offical winner this season:
growing hops vines

Followed by:

  • Hallertau #2
  • East Kent Goldings
  • Hallertau #1
  • Magnum
  • Cascade

More images to come as cones develop.

Brew House Efficiency Defined

Saturday, June 27th, 2009

For the all grain brewer, brew house efficiency is of great importance. Brew house efficiency will directly affect your recipe formulation and how many pounds of malt will be required to reach a specific OG at a specific volume in the fermentor. This is a brief explanation of brew house efficiency.

Brew house efficiency is the calculation of the overall efficiency of your brewing system. It takes into consideration the percent of potential grain sugars that are converted in the mash, effectively washed during the latuer and all wort losses in your system. If you do not accurately calculate the brew house efficiency of your brewing system you will find it very difficult, of not impossible, to anticipate the OG of the recipes that you are brewing. Here are some helpful equations to calculate efficiency in your brewing system: The following equations assume 10 pounds of 2-row pale malt in 5 gallons of water, with a mash/lauter efficiency of 75%.

Calculating Extract Potential:

((grain points)*(pounds of grain)) / (volume in gallons) = extract potential
((36)*(10)) / 5 = 72 or 1.072

Calculating recipe OG:

(potential points) * (brew house eff.) = OG
(72) * .(75) 75% = 54 or 1.054

Calculating Efficiency:

(measured points) / (potential points) = efficiency
(54 or 1.054) / (72 or 1.072) = 75%

Calculating Brew house Efficiency:

(Measured Points * Actual volume) / (Potential Points * Target Volume) = Brew house Efficiency
((54) * (4.5 gallons)) / ((72) * (5.0 gallons)) = 67.5%

Each pound of grain has an extract potential per gallon of water. Typical 2-row pale malt has a potential of 36 points, or 1.036, per gallon of water. Theoretically, if you achieved 100% mash and lauter efficiency (which is impossible) you could use 10 pounds of 2-row pale malt in a 5 gallon batch of beer and achieve an OG of 1.072. Most brewers are accustomed to achieving 75% efficiency during a typical mash and lauter, which would translate into 72 potential points * .75 (75%) = 54 points, or an OG of 1.054 with a volume of 5 gallons. But…..

The above can be considered mash efficiency (mash/lauter efficiency) since it does NOT take into consideration system losses of wort. Typically this is a loss that is created in the boil kettle and is lost to hops, trub or dead space in the boil kettle. In our example, if you end up with 5 gallons of wort in the boil kettle at an OG of 1.072, you have a mash efficiency of 100%, but if you transfer this wort to the fermentor and leave .5 gallons behind due to hops, trub and dead space you have now effectively reduced your system efficiency, your brew house efficiency to 90%. This would be calculated as such.

(Measured Points (72) * Actual volume (4.5 gallons)) / (Potential Points (72) * Target Volume (5.0 gallons) = Brew house Efficiency (90%)

In our same example, if you realized a typical mash/lauter efficiency of 75%, or an OG of 1.054 at a volume of 5.0 gallons in the boil kettle and 4.5 gallons to the fermentor after hop, trub and dead space losses, your brew house efficiency would look like this:

(Measured Points (54) * Actual volume (4.5 gallons)) / (Potential Points (72) * Target Volume (5.0 gallons) = Brew house Efficiency (67.5%)

So as you can see, mash/lauter efficiency is basically your efficiency into the boil kettle, but brew house efficiency is the efficiency throughout your brewing system which takes into consideration exactly what gravity and VOLUME you get into your fermentor. Understanding this calculation and the brew house efficiency of your brewing system will allow you to achieve a precise OG and volume into your fermentor each time, resulting in repeatability.

If all this math just gave you a headache, check out the brewhouse efficiency calculator found at this site.

Adding Fruit Flavors

Sunday, June 21st, 2009

Fruit-flavored beers are extremely popular, and fun to make. One advantage the home brewer has over large breweries is the use of local ingredients and less concern over cost per unit. There are three options for adding fruit flavors to your beer, and they vary in cost, effort, and flavor.

The easiest approach is to use flavor extracts. These small bottles (typically 4 to 8 ounces) can be purchased from most homebrew stores or online. Four ounces is enough to provide adequate flavor for a 5 gallon batch. The extract should be added late in the fermentation, one to two weeks prior to bottling. This will allow time for the flavors to blend together, without losing aroma. The more complex flavors a beer has, the longer it should be bottle conditioned for maximum enjoyment. The drawbacks to extracts are fairly simple. First, flavor options are limited: you’re much more likely to find a “cherry” flavor extract than a “black cherry” or “Bing cherry” extract. Dovetailing this issue is the problem that flavor extracts may have an overpowering, even artificial flavor. Banana flavor extract may taste more like banana-flavored candy than actual bananas.

The next option is to add fresh fruit to the fermenting beer. To achieve best results, a wide-mouthed carboy or covered bucket should be used for the primary fermenter. The fruit should be rinsed clean and gently crushed. (not pulped; apply just enough pressure to break the skin) Once the wort has finished boiling, remove it from the heat source, add the crushed fruit, and cover it. Let the fruit sit in the hot wort for about 5 minutes. In cooking terms, this is somewhere between “blanching” and “poaching” the fruit. Strain out the fruit, chill the wort, add the wort to the fermenter, and return the fruit to the wort once the yeast has been added. After one week, rack the beer off to a normal carboy, and thoroughly clean your fermenter. Using fresh fruit is highly dependant on supply, and this approach will give the fruit flavor, but none of the fruit’s sweetness, which will be rapidly consumed by the yeast. The result is a nice natural flavor with a nice aroma; don’t underestimate the strength of the flavor. This approach works in stouts and porters as well as it does in wheat beers and pale ales.

Your last option is to boil your wort an additional hour, reducing the volume by one gallon. Ferment as usual, but a week prior to bottling, you’ll be adding your fruit. Take 1 gallon of water, add your crushed fruit to the water, and simmer it at 160 degrees for half an hour. It is essential that the temperature not go above this level; more heat (or more time) will release pectins and other jelling agents, and instead of beer, you’ll get jam. After thirty minutes, chill the water & fruit to below 70 degrees, and add it to your beer. By adding it later, you’ll retain more of the aroma, and some of the fruit sweetness. The trade-off is that this approach is much more work.

Brew In A Bag (BIAB) All Grain Brewing Method

Saturday, June 20th, 2009

BIAB is an acronym for Brew In A Bag. It is a dead simple all grain brewing technique. All it requires is a large grain straining bag, 15 gallon kettle and a propane burner. This method is excellent for brewers who are wishing to convert from extract brewing to all grain, because you can make that leap for a very minimal cost. It will also save an all grain brewer 1.5-2.5 hours on a typical brew day. If you combine this method with the No Chill brewing method also listed on this site, you can go from extract to all grain brewing for as little as $25!

BIAB utilizes THREE pieces of equipment:

The kettle: This kettle is the ONLY vessel required to BIAB. The only special requirement is that the kettle have a volume of at least 15 gallons for a 5 gallon brew session. This is because this one vessel will have to hold your entire water requirement as well as your grain bill. This volume will regularly exceed 10 gallons. You will mash and boil in this vessel.

The bag: This is a mesh bag that is large enough to conform to the inside diameter of the kettle and reach over the top lip. This bag is sometimes likened to a large pillow case, the kettle should be able to fit INSIDE it while still being able to close the top of the bag. Typically composed of “voil” or another mesh like material, this will hold your grain bill and must be strong enough to hold the water saturated grain when you lift it out of the mash water at the end of the mash.

The heat source: This is typically the very popular “turkey fryer” burner that is used widely by home brewers. This will be utilized to provide heat for strike water, maintaining mash temperature, mash-out and the boil.

brew in a bag
Fig 1.

The process:
Crush your grain finer than you would with a typical all grain brew. This is because you no longer have to worry about a stuck sparge. The bag is the filter and the finer crush will improve your conversion efficiency.

Fill the kettle with the TOTAL water required to complete the entire brew session. Take into consideration that the water absorbed by the grain with this method is about HALF that of a typical all grain brew session that utilizes a MLT. Remember, when you remove the grain bag after the boil, the wort that is left is exactly what you are boiling, so calculate this carefully. Insert and secure the bag at this time.

brew in a bag
Fig 2.

After heating the water in the kettle to your calculated strike temperature, pour your entire grain bill into the secured bag. Use a mash paddle to thoroughly mix the grain with the water so that there are no dough balls. There will be a very large volume in the kettle, so temperature control should be as easy as intermediate stirring and a couple quick firings of the burner if the temperature drops.

brew in a bag
Fig 3.

After the mash is complete you heat the mash to mash-out temperature, which is crucial to achieving good efficiency with BIAB since you are NOT rinsing the grains.

After mash-out, remove the grain bag and allow it to drain into the kettle. Some brewers will place a rope and a hook above the kettle to suspend the grain bag as it can become heavy with larger grain bills.

brew in a bag
Fig 4.

brew in a bag
Fig 5.

Finally, boil the wort just as you normally would.

brew in a bag
Fig 6.

Additional References:
https://www.homebrewtalk.com/f36/more-brew-bag-biab-success-88486/
https://www.aussiehomebrewer.com/forum/index.php?showtopic=11694

Here are a few important points to make about BIAB:

**DO have a large enough kettle to accommodate about 9 gallons of water AND your grain bill.

**DO have a bag large enough that you can fit the kettle INSIDE it and still close the top.

**DO crush your grain fine, it will produce better conversion efficiency and there is no danger of a stuck sparge.

**DO NOT skimp on mash time, this is more crucial with BIAB, mash for 60-70 minutes to achieve full conversion.

**DO NOT allow your grain bag to come into contact with the bottom of the kettle when you are applying heat, it may melt! Some place a wire cake cooling rack in the kettle to lift the bag off the bottom.

Photos courtesy of user “Daddymen” on homebrewtalk.com. Thank you!

Casking small batches with oak chips and wine/liquor

Sunday, June 7th, 2009

Very few homebrewers have access to used wine or alcohol barrels, and even fewer brew in 50 gallon batches to properly use them, but it’s quite possible to achieve the “barrel aged” flavor in smaller batches. By using small amounts of wood chips, liquor or wine, water, and time, it’s possible to add those flavors in trace amounts to your home brew.

First, begin with your wood. Most homebrewing stores will sell oak chips of varying colors and origins. Since the goal is to add only a hint of this flavor, only a few ounces are necessary, 2-8 ounces for a 5-6 gallon batch. Liquor & wine are similarly used in only minute amounts. The strongest of Russian Imperial Stouts might use 12 ounces of whiskey, while a delicate Belgian triple would be overwhelmed by more than 2 ounces of bourbon. Again, that’s 2 ounces for a 5 gallon batch.

Once you’ve decided on the volumes of wood chips and adjunct alcohol, mix the two in a glass jar or other nonporous container. (If you use plastic, label it and only use it for that purpose afterwards) Add enough water to fully cover the chips (usually ¼ cup to 1 cup), seal, and place out of direct sunlight. After about two weeks, the liquid in the container will have taken on a darker color from the wood, and can be poured into the fermenting beer. Because you’re adding an aromatic, you should wait until the initial fermentation blow-off is done (at least one week) or you’ll lose a lot of the nose. For a more intense flavor, you can choose to add both the liquid and the wood chips and let them ferment with the beer for a few weeks. The alcohol will have sterilized the wood chips, eliminating the risk of infection.

Australian NO CHILL Brewing Technique TESTED

Saturday, June 6th, 2009

“No Chill” is a term used for the Aussie method of transferring HOT wort into a sealed container and letting it cool gradually, over a period of time. Aussie brewers generally pitch the yeast when they see fit to do so, sometimes days or even weeks later. This method has evolved out of the necessity to conserve water in some areas of the world, such is the case in Australia.

By utilizing this method I hoped to:

  1. Conserve the many (50) gallons of water that I waste while operating my immersion chiller.
  2. Conserve time (20-30 minutes) that is spent cooling the wort on brew day.
  3. Conserve time by fermenting in the same HDPE (High-density polyethylene) vessel that I transfer the hot wort into after the boil.
  4. Reduce the amount of equipment required (no chiller) to complete an all-grain brewing session. This may be of special interest to new all-grain brewers.

The “PLAN”: Brew a recipe that I have brewed many times before, something low ABV and lightly hopped so that any real flaws in the flavor will be very apparent. I brewed the beer normally except for a small change to my late hop additions. The planned OG is 1.040, FG 1.011 and comes in at a light 18 IBUs.

There is still a noticeable amount of hop utilization happening in the wort as it cools in the HDPE container; at temperatures above 170F this is more pronounced and will affect the total IBUs of the beer. For this reason I have adjusted my late hop additions to keep them from bittering the beer.

The CONTAINER: A 6 gallon HDPE container from www.USPlastics.com ($15) and a #11.5 drilled stopper ($2.25) to accommodate the large opening where the cap currently exists. Aside from this, the HDPE container is simply outfitted with a stick on thermometer to indicate when the temperature is appropriate to pitch the yeast.

The PROCESS: After the boil I added what remained of my late addition hops to the HDPE container, those that were not moved to FWH. I gently whirl pooled the wort in the boil kettle and let it stand for 10 minutes to allow some of the material in the wort to settle to the bottom of the kettle.

The kettle was drained into the sanitized HDPE fermentor, once filled, the cap went back on tightly and I gently turned the vessel on its side to allow the hot wort to further sterilize the inside of the container. I then placed the container in my 65F fermentation freezer for a 24 hour period to chill.

aussie no chill brewing

When I drained the kettle I saved about 1 quart of the wort to create a 24-hour yeast starter. This is referred to as a RWS, or Real Wort Starter. NO MORE DME!

aussie no chill brewing

After 24 hours: The wort had cooled to yeast pitching temperatures, so the fermentor received a good shake to adequately aerate the wort. Once this was complete, the yeast starter went in and the cap came off so that I could affix the stopper/air lock in its place. Signs of a healthy fermentation were visible in the air lock within 5 ½ hours of pitching the starter.

14 days later: The fermentation is complete, the hydrometer is showing the target FG of 1.007. Very light, very crisp! The beer is transferred to an awaiting keg for a couple weeks of cold storage and carbonating. The cold and flat beer has a distinct “twang” to it… much like any green beer, time will tell if this brew will have any off flavors from the “no chill” method.

28 days later: After much anticipation it is time to pull the tap! This beer is still young, it has not completely cleared, though it is clearer than it was when first kegged. The aroma is slightly malty, slightly hoppy (Cascades) but very mellow, just as this Haus Ale has been in the past (4) keggings while using an immersion chiller. The flavor… it is again identical to previous batches that were chilled in the conventional manner. It is very light, slightly citrus (Cascades) and very easy drinking. There are no indications of DMS (a corn like flavor) and the hop profile is identical to previous batches that were chilled conventionally.

Following are the guidelines I followed to reduce the perceived bitterness of hop additions.

  1. Assumed that the HOT wort in the HDPE container would add 20 minutes of utilization to ALL hop additions.
  2. Moved my (20) minute hop addition to the HDPE container (20 minutes utilization in the container from #1).
  3. Moved any hops that required LESS than (20) minutes boil time to FWH (this provides a complexity in flavor and bittering and less perceived bitterness).

Water Chemistry Calculator Updated

Thursday, June 4th, 2009

The water chemistry calculator at this site now allows NaCl (non iodized salt) as an additional brewing salt! Use canning salt, kosher salt, pickling salt, or pure salt – just make sure it is not iodized. Avoid regular table salt because it is iodized! Yeast will not handle iodine well so avoid ‘table salt’ or ‘iodized salt’.

The calculator automatically converts grams to teaspoons. For reference we created the following guideline:

  • A teaspoon is best measured with a baking set of measuring spoons:

  • A teaspoon looks like this in a normal spoon:

  • In more humid climates, the salts will absorb water from the air, so pad 10% or so.

Over Priming Home Brew Bottle Bomb

Monday, June 1st, 2009

If you happen to over prime your bottled home brew beer, this is what you will get:

home brew bottle bomb

“Huston We Have A Problem”

This beer was very excited to see me!  It had a texture more like soda at least until it settled down.

Over priming creates a veritable fountain of fizz, and if left unattended can shoot off on its own.

A tell tale sign of over priming when the cap begins to buckle. The bubble in the middle should be a dimple.  If you see a cap in this state, make sure to open it over the sink! Some folks call this a bottle bomb, but I have never had one explode. More than likely the cap will shoot off and you will have a sticky mess wherever the beer was stored. One way to contain the situation is to use a bottle opener to gently relieve the pressure without prying off the cap.

beer over priming

The solution to this problem is to add the correct amount of sugar at bottling time. Make sure to measure out how much dextrose (corn sugar) you are using. I use about 3oz by weight for a five gallon batch. Don’t get aggressive with this ingredient, less is more. You can also prime with dry malt extract (DME), however it is more expensive, requires more, and I have not been able to tell the difference.

The hard core home brewers will tell you to solve this problem, keg the beer instead of bottle it. I consider myself a hardcore brewer, and I do keg a lot of my beer. That said, I still enjoy bottling as the flexibility and portability are big advantages, though it does take more time. The photos above were from an experimental one gallon batch of mint porter, which didn’t turn out that great. I manually primed each bottle and a few bottles got too much dextrose.

Yeast terminology attenuation and flocculation

Saturday, May 30th, 2009

Flocculation describes the process of yeast sticking and clumping together once all the nutrients have been used. As the yeast gathers, they become too heavy to remain in suspension in the beer, and fall to the bottom of the fermenter, mixing with the sediment and nutrients. Home-brewed beer can use yeast to carbonate bottles (aka bottle conditioning), so this process also occurs in the bottles, causing the yeast and ‘trub’ to form a thin layer along the bottom of the bottle.

The strength of this “clumping” is determined by a host of factors from O2 levels in the beer, temperature, and nutrient levels, but the primary factor seems to be the strain of yeast itself (in truth, flocculation is still being researched, and has a few mysteries remaining.) Flocculation occurs near the end of the yeast life cycle, so a yeast that flocculates early will not convert as much sugar, and result in a lower-than-expected alcohol content. Strong flocculation gives a clearer beer, while weaker flocculation can lead to a cloudy beer, sometimes with a yeasty taste. Hefeweizen yeast is a good example of a strain that has very low flocculation, meaning a lot of it is left behind in suspension. Traditional non filtered hefeweizens should look cloudy from the yeast (not the wheat as some might think).  The clove like signature flavor in a hefeweizen comes from the yeast.

Attenuation describes the overall efficiency of a yeast strain in converting sugars into alcohol under a specific set of conditions. Higher gravity beers require the use of yeasts with higher attenuation rates. Attenuation is listed as a percentage, meaning the percentage of sugars present in the wort that get converted into alcohol. Most beer yeasts have a 65-80% attenuation rate. Wine & mead yeasts have a higher attenuation rate. The exact attenuation rate can be found for a given beer by comparing the starting (pre-yeast) original gravity (OG) to the final gravity (FG) of the finished beer.

When selecting yeasts, the beer style should be considered. When brewing a Belgian Witbier, a yeast strain with a 65-70% attenuation rate would be appropriate. A “stronger” yeast (higher attenuation) could be used, resulting in a higher alcohol content, but the overall flavor & style of the beer would be “off” from the standard. The attenuation for yeast for an English ale would be lower than the yeast for a Belgian brown.

The attenuation of a particular batch is affected by anything that would affect the health of the yeast. Unexpected flocculation, changes in temperature and insufficient nutrients can all lower attenuation.