Home Brew Blog - Brewer's Friend - Part 24
Brew your best beer EVER. Start your Free Trial of Brewer's Friend today! Sign Up ×

Beer Aeration Oxidation and Mitigation

Saturday, August 22nd, 2009

Oxidation is not the same as aeration. Aeration is the process by which oxygen is introduced to your beer or your wort, oxidation is the outcome, it is what happens to your wort or beer when exposed to oxygen at the wrong point in the process. Aeration of COOL wort (<80F) prior to fermentation beginning, is the only safe type of aeration.

Aeration of HOT wort (>80F): Aeration of hot wort will cause oxygen to bind with various wort compounds. Over time, these compounds will break down, releasing oxygen into the beer and oxidize hop compounds and alcohol, leaving off flavors. These flavors taste like wet cardboard or Sherry.

Aeration during fermentation: Likewise, introducing aeration after fermentation has begun can cause yeast to create more diacetyl in your beer (buttery flavor or smell).

Aeration of finished beer: Aeration after fermentation is complete will cause more rapid staling of your beer, loss of long term stability.

Below we will discuss where in the process aeration and subsequent oxidation can occur and how to mitigate these dangers.

How can aeration/oxidation occur?

  • Whipping up a froth while stirring your hot mash (>80F)

  • Whipping up a froth while chilling your wort after the boil (>80F)

  • Pouring hot wort from one vessel to another causing splashing (>80F)

  • Transferring hot liquids through spigots without tubing to reduce splashing (>80F)

  • Agitating the fermenter AFTER primary fermentation has begun (any temperature)

  • Agitation after fermentation is COMPLETE (any temperature)

  • Bottling, leaving too much head space and O2 in the bottle

  • Not purging the head space in the keg when kegging beer

How to mitigate the danger of aeration/oxidation:

  • Stir your mash gently

  • Stir your cooling wort gently, create a whirlpool effect

  • Do not pour hot wort from one vessel to another, it is dangerous AND can cause oxidation

  • Use high temperature tubing to transfer hot wort from one vessel, to the bottom of another

  • Do not agitate fermenting wort

  • Do not agitate or splash fermented wort, use a siphon or a spigot and tubing to transfer beer

  • Leave as little head space as possible when bottling (1” usually)

  • Use O2 absorbing caps when bottling

  • Purge kegs with CO2 prior to racking beer into them, and purge the head space with CO2 after the keg is sealed.

  • Use spigots, siphons and hoses to allow gentle movement of hot or fermented fluids

Mentioned above is the issue of beer becoming oxidized through the bottling process. This can be caused by improper (turbulent) transfer of the finished beer from the fermenter to the bottle, or by leaving too much head space in the bottle. One way to mitigate the oxidation danger of head space in your bottles is by the use of O2 absorbing bottle caps (called Oxycaps).

These caps have a special liner in the underside of the cap which absorbs and sequesters O2 that is left in the bottle after capping. These caps are easy to come by and are only slightly more expensive than standard bottle caps ($1-$2 more per gross) Oxidation from bottling may not be an issue in bottled home brew if you consume your beer in a timely manner. However, for extended aging and storing these caps are cheap insurance to preserve your creation over time.

How To Make a Yeast Starter (OG 1.040)

Wednesday, August 19th, 2009

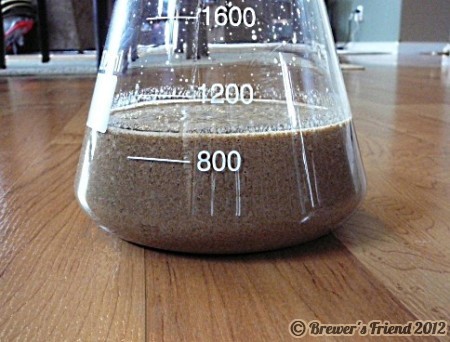
Creating a simple starter can help assure viability of your yeast prior to brew day, it can also work very effectively to increase the yeast cell count so that you do not under pitch (too few yeast cells) your brew. Under pitching can stress your yeast, impede a healthy fermentation, increase lag time and lead to off flavors. Create your starter anywhere from 24-72 hours prior to pitching.

beer yeast starter

When to use a yeast starter:

  • First, check our Yeast Pitch Rate and Starter Calculator.  In general, for a typical ale – 11 grams of dry yeast is enough.  With liquid yeast, a starter is recommend to hit the pro pitching rate (which you want).
  • When brewing a beer with an OG of 1.060 or greater – ALWAYS.
  • When brewing  a Lager beer – ALWAYS – the colder fermentation temperature requires a higher yeast pitching rate.  A 1-2 quart starter has always been sufficient for my five gallon batches of Munich Helles or Oktoberfest.
  • If your yeast is old or past its expiration, stepping it up with a starter is safer, but you should always try to use the freshest yeast possible. Liquid yeast is pretty much completely dead after just under 5 months.
  • Yeast pitch rates is a complicated subject, click here to read our article Yeast Pitch Rates Explained.

What you need to create a simple starter:

  • Extra light DME (3-4oz)
  • 1 quart water
  • 4-6 quart sauce pan with lid
  • Pyrex flask or a 1 gallon glass carboy
  • Tin foil
  • Room temperature liquid yeast or dry yeast that has been re hydrated in 95F-105F water

The process:

  • Bring 1.5 quarts of water to a boil in the sauce pan.
  • Measure 3-4 oz of DME and introduce this to the boiling water, stir well, boil 10-15 minutes.
  • Remove from heat, placing lid on the sauce pan.
  • The boiling process should have reduced the volume to ~1 quart.
  • Cool the starter wort in a shallow, cold water bath or in the refrigerator until it reaches the target fermentation temperature of the beer you will brew with it.
  • Once cool, pour the starter wort into a sanitized flask or carboy.
  • Secure a piece of tin foil on the opening of the flask or carboy and shake vigorously to aerate the wort.
  • Pitch the yeast (add yeast into the flask / carboy containing the aerated wort).
  • Seal container with a clean piece of foil, or a cork fitted with an air lock.
  • Place starter in a dark area where it can maintain the proper temperature for fermentation.

When you are ready to use the starter you can swirl the flask/carboy to rouse the yeast and pitch the entire volume of the starter into your awaiting wort. Likewise, you can chill the starter after fermentation to facilitate the settling of the yeast, on brew day decant the “beer” from the flask/carboy and pitch only the yeast slurry left in the bottom. The starter should start bubbling in about 24 hours and can be pithced into your batch 24-48 hours later (ideal), or up to a week if you refridgerate it.

Almost time for the hop harvest

Monday, August 17th, 2009

It is almost that time of year – the hops harvest!   For us, Centennial, Mt. Hood and Hallertau are almost ready. Nugget is not yet ready.

small hops cones

Harvesting and storing hops:

  • It is time to pick when the petals on the cones just start fading to brown.
  • The vines can be cut down to the base and composted.  Vines can also be buried to propagate the plant for next year.
  • The cones must be dried before packaging. Make sure not to mix up the varieties.  A low budget solution is to setup a drying rack made from an old screen and saw horses. Leave them from 2 days in a protected area like the garage. A food dehydrator works too, and much faster.
  • When dry and ready for packaging, the cones will open up some.
  • Then it is time to vacuum seal.  Store the sealed bags, labeled, in a freezer, where they will keep for years.

Anatomy of a Corny Keg

Saturday, August 15th, 2009

If you do not keg your beer already, someday you almost certainly will. It is a superior package for the home brewer. They save time and they feel cool. Only downside is they are not portable.  Cornelius kegs, or corny kegs for short, are a widely available means for home brewers to package their beer. Generally they hold 5 gallons.  Most of the ones home brewers use were formerly soda kegs.   Beyond the keg itself, a CO2 tank, regulator, gas in line, gas in connector, beer out connector, and a beer line + picnic tap are needed to complete the setup.

The following is an introduction to what a 3, 5 or 10 gallon home brewing keg is comprised of and what to look for while using and maintaining them.

keg parts

KEG VESSEL ITSELF: This is a SS vessel which can have a volume ranging from 3-10 gallons typically. When buying kegs, the condition of outer vessel itself is of little concern… dents, scrapes and bruises from years of service will not affect the performance of the keg. If you want pretty kegs, you can buy them new, but there is a price for vanity.

LID: Lids come in different shapes depending upon keg make and model but the purpose is the same, to provide you with a large opening and access to the inside of the keg for filling and cleaning. Lids require pressure to properly seal, this is a plug type lid, it actually fits inside the keg where the pressure inside the keg pushes the lid out, tightening the seal as the pressure increases. The bail (locking handle) on the lid has small rubber feet, if these are worn or missing they can affect how well the lid seals since these feet help to pull the lid into place as well. If your lid simply will NOT seal on the first or second attempt, open the lid and turn it 180 degrees and try again, I assure you it will (if your seal is not faulty). Lids themselves will not wear out, but the O-ring around the circumference of the lid will, as well as the small rubber feet on the locking handle.

keg parts lid

PRESSURE RELIEF VALVE: This valve is located in the center of the lid and is simply used to purge the pressure from the keg at any time. Typical use this when you fill a keg and wish to purge the O2 from the head space before storing, or to relieve excess pressure after carbonating your beer at a pressure higher than your desired serving pressure. These spring loaded valves have a small rubber foot inside them that can wear and lead to a leak, but are easily replaced by unscrewing them and then inserting a new valve.

keg parts pressure relief valve

KEG POSTS: The keg has (2) posts, beer out and gas in, these are not interchangeable. There is one purpose to these posts, provide a means by which to secure a gas line and a beer line. Ball lock kegs are like quick disconnects with small ball bearings that will catch in a groove on the post to secure the connector. Pin lock posts will have three small pins that provide a locking mechanism so that you may twist and lock the connector into place. Depending on the make and model you will need different tools to remove these post for cleaning or maintenance. For the typical HEX post I recommend a suitably sized crescent wrench as these can vary in size. Other keg posts are star shaped with many small points, these will require a special tool. These rarely wear out, unless they become bent. Replace these with the style appropriate for your make and model of keg. (see poppets below as well)
keg parts post

POPPETS: These small spring loaded devices sit atop the dip tube and inside (under) the keg posts. The spring and pressure inside the keg will press these poppets securely into the small hole in the keg post so that the keg will remain sealed and pressurized when not in use. When you attach a gas or beer line, that connector will have a small pin in the center that will push the poppet in, thus allowing the flow of gas and beer. These wear out, these will leak and these do require cleaning and replacement at time. Poppets may look the same but they are NOT! You must be sure to buy replacement poppets that fit your make and model of keg or they may not seal inside the keg post.

keg parts poppets

DIP TUBES: Dip tubes come in two types, GAS IN and BEER OUT, associated with the GAS IN and BEER OUT keg posts. The difference between these two is that the gas tube only protrudes into the keg about one inch, while the beer out tube extends all the way to the bottom (so you can get all of that goodness out). These are mainly comprised of SS, though I have seen rare instances where the gas lines will be plastic. These components do not wear out, but if you do need to replace one, they are readily available.

keg parts gas in tube

keg parts dip tube out

O-RINGS: There are typically O-rings in the following locations:
Lid: (1)
Gas dip tube: (1)
Beer dip tube: (1)
Gas in post: (1)
Beer out post: (1)

These O-rings will wear and need replacement at some point, but the sizes are standard so you can buy them anywhere keg components are sold, or find the industrial equivalents at a supplier like McMaster-Carr.

Stay tuned for an article on keg maintenance.

CCB Haus Ale All Grain Aussie No Chill

Saturday, August 8th, 2009

This beer can be a staple in anyones refrigerator or kegerator. A light and crisp gateway beer for the non-homebrewing crowd, this beer is a great thirst quencher on a hot summer day, or a great session beer for anytime gatherings.

The following recipe is based on 82% brew house efficiency. See an explanation of brew house efficiency here at Brewers Friend.

Style: Blond Ale

BJCP Guidelines:
OG: 1.038-1.054
FG: 1.008-1.013
ABV: 3.8-5.5
IBU: 15-28
SRM: 2.0-5.0

Recipe Targets:
OG: 1.040
FG: 1.008-1.010
ABV: 4.2%-3.94%
IBU: 23.2
SRM: 5.0
Volume: 5.5 gallons

Malt Bill:
Rahr 2-Row Pale Malt 6.0 lbs
Caramel Pils 0.5 lbs
Vienna 0.5 lbs
Crystal 20L 0.5 lbs

Water Profile:
Ca: 46 SO4: 58 Mg: 8.3 Na: 17 Cl: 25 (carb): 76

Mash in with 3.75 gallons (2qt/lb) of water at 160F to rest at 152F for 60 minutes. This water was also treated with Five Star Buffer 5.2.

Mash out at 168F utilizing additional infusions or direct heat.

Collect 8.00 gallons (adjust to compensate for your own boil rate) at a SG of 1.028

Boil for 100 minutes with the following hop schedule. (Adjust your qty. to adjust for any difference in AA value)

Cascade 7.2AA .25oz FWH
Cascade 7.2AA .25oz 100 min.
Cascade 7.2AA .25oz 35 min.
Cascade 7.2AA .25oz 20 min.

Chill wort to pitching temperature. See an explanation of “no chill” brewing here at Brewers Friend.

Yeast: SafAle (Fermentis) S-05 (you may choose to use any clean fermenting yeast strain such as WLP001, Nottingham or California Ale)

Fermentation Temperature: 68F

Time in Primary: 14 days

Carbonation: 2.50 volumes

session ale

Introduction to Partial Mash Brewing

Saturday, August 1st, 2009

Whether you’re a novice home-brewer who has outgrown kits and all-extract limitations, or a long-time brewer looking for an easier day brewing, the partial-mash technique of brewing has several merits worth exploring. It is considerably less time- and labor-intensive than all-grain brewing, requiring fewer steps and less cleaning.

Process-wise, partial-mash brewing most closely resembles extract brewing, and is a good intermediate step before going all grain. With partial mash brewing, some of the fermentable sugars come from mashed grains, and the rest from extract. The introduction of a more natural mash process using fresh ingredients translates into higher quality beer. The added control also allows for a boarder variety of styles and control.

The transition from all-extract to partial-mash brewing is fairly simple. In terms of hardware all that is needed extra are a strainer or grain bag, a floating thermometer, and an extra cook pot. In terms of brewing, it is just one additional step called mashing.

Mashing is simply the process of converting the starches in grains to sugars. All it takes is crushing the grain, and steeping it for an hour at 150F. The husks are then separated from the wort that is left behind, and the boil proceeds as normal.

The Process:

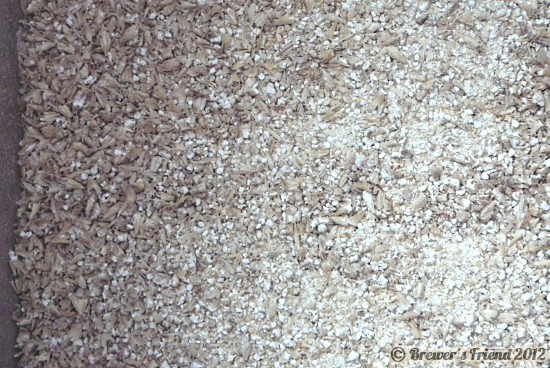
First the grains need to be crushed lightly. The goal is to crack the exterior shell of the grain, allowing the hot wort to convert the starches and proteins inside into sugars and non-fermentables for flavor. Most brew stores can crush your grains for you, or you can do it yourself with a rolling pin or similar instrument; if you decide to crush your own, remember that the goal is to crack the shell, not grind into powder. The best way to do it is with a grain mill attached to a cordless drill. Corn style mills called corona mills can be used as well. Make sure to crush the grains within 24 hours of brewing.

Start by heating 2 gallons of water to 170F in a 5 gallon pot. The reason the water is heated to 170F is when the room temperature grains hit the water the temperate will drop. 150-155F is the standard mashing temperature you are shooting for. When the water is ready, called the ‘strike water’, add the crushed grains to a bag and submerge. Make sure to gently stir the crushed grains so there are no dough balls. Cover the pot, and let sit for an hour. Monitor the temperature every 10-15 minutes for fluctuations and either increase or decrease the heat accordingly – do not let it boil!

At this point start preparing an additional 2 gallons of water at 175F. This will be your sparge water, used to strain the reaming sugars from the grain bag. You should have a really nice sweet smell emanating from the pot. After an hour, the partial mash is completed. The spent grains should be separated from the wort. Once separated, the grains should be sparged (washed with water) to remove as much of the converted sugars and non-fermentables as possible. When washing and pressing the grain, be as gentle as possible; the goal is not to further crush your grain, (which can add grist to your wort) but merely to wash and press out the converted wort.

Now you have your very own sweet wort you mashed yourself! Fire up the kettle and proceed as normal like you do for an extract batch. You will need less malt extract because you created some of the fermentables during the mash. The recipe should guide you to the correct amounts already.

Other thoughts:

There is some debate between home brewers as to ideal method of mashing the adjunct grains. One method is to add the grains to the extract as it comes to a boil, and allow the grains to boil with the wort. This method allows the grains to fully mash, but because of the high heat of the boil, a lot of the tannins in the grain enter the wort as well, giving it a more astringent or dry flavor, and leading to a chill haze in the finished beer. Chill haze is an aesthetic issue, but the grainy tannic flavor can be a serious negative depending on the brew. In pale ales and bitters, you may not notice, or may even find it a plus, while in sweeter beers such as bocks and browns, the dryness may be in strong (and unpleasant) contrast to the base flavors.

There are tools available online to convert between all grain and partial-mash recipes, letting brewers move up from extract brewing to partial mash at their own comfort level and experiment with more varied recipes. For exceptionally sweet or high-gravity beers, it may be easier to use a partial-mash approach; my brewing group’s attempt at an 17% ABV beer would have used almost 30 lbs of grain; by replacing the base malt with an extract, we saved ourselves several gallons of water and several hours of reducing the wort. For all-extract brewers, partial-mash lets them tinker with their tested recipes; the difference between a Porter and a Smoked Porter may be as little as half a pound of peat-smoked grain, and a dopplebock might get a nice biscuit flavor from a pound of Belgian Special B grain.

Dry Hopping Beer

Saturday, July 25th, 2009

While hops can be added to the boiling wort for as little as fifteen, ten, or five minutes to impart aroma and flavor, true hop-heads know the best approach to really punch up the hop profile of a beer is dry-hopping. Because hops have gone up in price over the last few years, dry-hopping your home brew is something of a luxury, and it’s especially important to make sure you do it right.

Dry hopping refers to adding hops to the fermenting beer and letting them soak in it for a period of no less than 10 days. For the typical five-gallon batch of home brewed beer, one to four ounces is the appropriate range of hops to use. In dry-hopping, as with flavor and aroma hops, the strain of hops used is crucial. Since the goal is to increase the hop character, the IBU and Alpha values are much less important.  For example, Amarillo imparts grape fruit notes, Centennial adds citrus, and Nugget is herbal.

The key to dry-hopping (beyond picking a strain you like) is timing. The most common error in dry-hopping is adding the hops immediately to the cooled wort. DON’T! The initial fermentation period is an active one, and the hops (which will float on the surface of the beer for about a week or so) will be highly agitated as a result, with some of the pollen and other aromatics (and thus flavor & aroma) being quite literally ‘blown out’ of the beer. Waiting until the initial blow-off is complete (about 3-5 days) removes this risk. Additionally, the alcohol in the fermenting beer will strip off some of the acids and flavor from the hops, so adding the hops later (and letting them soak longer) gives a better, richer flavor.

The hops are added to the beer without boiling or pasteurization first. While this may seem like an infection risk, the surface of the dried hop provides a poor environment for wild yeasts and bacteria, and infection from hops is rare enough to be inconsequential. Some home brewers place the hops in a hop sock for easier collection, but unless you intend to rack the beer after the hops have been added and continue dry-hopping, this isn’t necessary. It won’t affect the product, but it will save you a hop sock.  Tips on how to fully submerse the hops are provided below.

When the hops float on the surface they are not as well utilized. However you don’t want them stuck in the trub at the bottom either. To overcome this problem, get a muslin bag or similar, and add something inert to it so it is weighed down. Then tie a string around the hops bag so you can control how far down it drops. That way the hops will be suspended below the surface of the beer. Hops are quite buoyant so make sure to provide enough weight to sink it. In this case, glass beads are used:

dry hopping weight

These were enough to keep 1 ounce of loose leaf hops below the surface.

When primary fermentation is complete and the krausen is dissipating dry hopping can begin. In this case I did not bother to rack the beer, I just added the dry hops to the primary. First I sanitized the bag, beads, and string. Then I add the right amount of hops and beads into the bag and tied it off. Then I tied a string made of standard sewing thread around the top of the bag. I opened the cork on the carboy and pushed the bag inside, careful to keep hold of the string. When the hops were submerged, I put the cork back on, and tapped off the string. I let it sit for about ten days, then kegged. Delicious!

dry hopping beer

It is also possible to dry hop in the keg. Loose leaf hops or pellets can be added directly to the keg, or weighted down in a bag similar to above. If you don’t have them in a bag expect to get hops particles floating in the beer. Some hop heads are totally fine with this. The bag also makes cleanup easier.

Getting A Good Pour – Kegged Beer CO2 Line Length and Pressure

Saturday, July 18th, 2009

There are several variables that play a role in achieving this goal, AND you will need a calculator!

Factors that play a role in the quality of your pour are the following:

Beer Temperature: This will affect how readily the beer absorbs CO2. Colder beer absorbs CO2 into solution more readily. The lower the temp. the lower the pressure required to obtain a given number of volumes of CO2.

Keg Pressure: Along with beer temperature, this will control the actual volumes of CO2 in solution.

Beer Line Inside Diameter: This provides resistance, keeping CO2 in solution by slowing the pour.

Beer Line Temperature: Warm beer lines will warm the beer as it travels from the keg to your glass, causing a release of CO2.

Beer Line Length: This provides resistance, keeping CO2 in solution by slowing the pour.

Beer Line Rise to Tap: The height of the tap from the center of the keg. This provides resistance, keeping CO2 in solution by slowing the pour.

There are some simple rules to follow as well as an equation to help you balance your beer line length to accommodate the pressure needed in the keg to sustain your desired CO2 volume.

  1. Keep your beer lines cold. For some this is not an issue, but if you use a draft tower you need to take care to refrigerate those lines and insulate the tower to keep CO2 release to a minimum, thus reducing foam in the glass.
  2. Beer line length MUST be balanced with the amount of pressure in the keg used for serving. The longer the line, the more resistance you have.
  3. Beer line inside diameter MUST be included in the beer line length calculations to properly determine length. The narrower the line, the more resistance you have.
  4. Beer line RISE from the keg to the tap MUST also be included in the beer line length calculations to properly determine length. The greater the rise, the more resistance you will have.

Numbers 2-3 all work together to provide a total amount of resistance between the keg and your glass. Too much resistance and you will have a slow pour, too little resistance and you will have nothing but foam in your glass.

Here is an example of how to determine the proper temperature, pressure and beer line length for a given scenario.

BEER STYLE CARBONATION GUIDE

British Style Ales 1.5 – 2.0 volumes
Belgian Ales 1.5 – 2.4 volumes
American Ales and Lager 2.2 – 2.7 volumes
Fruit Lambic 3.0 – 4.5 volumes
Porter, Stout 1.7 – 2.3 volumes
European Lagers 2.2 – 2.7 volumes
Lambic 2.4 – 2.8 volumes
German Wheat Beer 3.3 – 4.5 volumes

Beer Temperature: 38F

Keg Pressure: 21.7 PSI

Volumes of CO2: 3.50

Beer Line ID: 3/16” inside diameter plastic beer line

Beer Line Temperature: COLD (ideal)

Beer Line length: 6′

Beer Line Rise to Tap: 24”

Beer Line Length Formula:

L = (P -(H x .5) – 1 ) / R

Where:
L = length of beer line in feet
P = pressure set of regulator
H = total height from center of keg to faucet in feet
R = resistance of the line from the following table
1 = residual pressure remaining at faucet (this can be increased to 2 if you need to increase pressure to increase dispense rate)

Line Type: Resistance:
3/8” OD stainless beverage tubing .2
5/16” OD stainless beverage tubing .5
1/4” OD stainless beverage tubing 2
3/8” ID plastic beer line .11
5/16” ID plastic beer line .17
1/4” ID plastic beer line .7
3/16” ID plastic beer line 2.7

L = ( 21.7-(2 x .5)-1 ) / 2.7

L = 7.3 feet of beer line, or 7′ 4”

In this scenario the beer line length is too short, ideally one would have over 7′ of beer line to create enough resistance to counter the 21.7 PSI in the keg to obtain the volumes of CO2 for this German wheat beer. If you simply reduce the temperature of the beer to 33F and reduce the pressure to 18.3 PSI you will still achieve 3.50 volumes of CO2 in your beer, but the reduction in pressure will now not overwhelm the 6′ beer line that you have. Pressure and resistance are now balanced.

Baby Hops Cones

Monday, July 13th, 2009

The cones are starting to form on the hops plants outside. I just wanted to share a few pictures.

This one is hallertau:

baby hops cones
This is from nugget:

hop buds

Malted Grain Types and Mash Profiles

Saturday, July 11th, 2009

Today’s modern, high quality and highly modified malts are excellent performers for the home brewer. As with nearly any ingredient, the science behind the creation and use of any malt should be clearly understood in order for the brewer to create the desired outcome. Malt type, mash temperature and mash time all play a large role in the final product. Seeing as though the sweet wort that is created by the mashing process is the base for any beer being brewed, it is imperative that the brewer know what is going IN to the process so that he/she may know what they will get OUT of the process.

Malted barley can be classified in several categories:

  • Pale Malts (base malts)
  • Crystal (caramel)
  • Roasted (highly kilned)

The following is an overview of the particulars with each malt type, including the kilning/roasting process, typical mash temperatures, mash times and any special instructions for their use.

Pale Malt (2 row and pilsner base malt):
pale malt home brewing

Kilning/Roasting: The kilning temperature is quite low, between 104F and 113F. The ventilation is very high and therefore the malt is dried to a moisture content of 10% very quickly. Once below 10% the temperature can be raised, raising the temperature earlier would result in the destruction of too many enzymes. The low moisture content protects the enzymes. Pale malts are generally cured at 176F to 203F for about 5 hours.

Mash Temperature:
Beta Amylase 131F-150F, maltose is produced Lower final gravity, dryer beer.
Alpha Amylase 154F-162F, maltose and other sugars are produced. Higher final gravity, maltier beer.

Mash Time: Conversion can be complete in anywhere from 30 minutes to 90 minutes. The lower the mashing temperature, the longer conversion will take, the higher the temperature the faster conversion will be. Typical mashes are approximately 60 minutes.

Special Instructions: This malt MUST be mashed to convert starches to sugars. The mash temperature will determine the fermentability of the final wort and must be monitored closely.

Crystal (caramel malt):

crystal caramel malt home brewing

Kilning/Roasting: This is imperative when compared to the kilning process of the pale malts. Crystal malts when wet (green) are put into the kiln or roaster from the germination tanks and the moisture is kept very high with absolutely no ventilation. Additionally water is frequently sprayed to keep the moisture high. The temperature is raised to 140F to 158F for 30 to 40 minutes. Then the temperature is raised to 302F and normal ventilation is resumed for 1 to 2 hours, depending on how much caramelization is desired (i.e. depending on whether 10L crystal or 120L crystal is being made). If prepared in the kiln, further drying is necessary.

This process essentially causes conversion to take place inside the husk (moisture and heat), therefore denaturing the enzymes and converting the starches to sugars. This removes the need for this malt to be mashed, and therefore it can be steeped in hot water for extract brewing.

Mash Temperature: No need to be mashed as the starches were converted in the kilning process. This malt can be steeped for extract brewing, or used in a mash with the remainder of an AG mash.

Mash Time: No mash needed. Generally mashed with the remainder of the grain bill.

Special Instructions: These sugars are not as fermentable, resulting in a fuller, maltier beer. Use as 5% to 25% of the grain bill.

Roasted Malt (highly kilned malt):

roasted highly kilned malt home brewing

Kilning/Roasting: Creating this malt is a matter of taking a typical pale malt similar to Pilsner or 2 Row and place it in a roasting drum. Water is sometimes used to cool the malt quickly when the roasting is complete. The main difference between this roasting and the curing of Pale malts is temperature and time, both being increased in the production of this malt.

Mash Temperature: No need to be mashed as the starches were converted in the kilning process. This malt can be steeped for extract brewing, or used in a mash with the remainder of an AG mash.

Mash Time: No need to be mashed as the starches were converted in the kilning process. This malt can be steeped for extract brewing, or used in a mash with the remainder of an AG mash.

Special Instructions: Dark roasted malts can provide needed color and flavor to darker beers, but can also add some bitter astringency. One technique to provide a smoother flavor is to add this malt at the end of the mash so as to lessen the astringency it can contribute.