Home Brew Blog - Brewer's Friend - Part 16
Brew your best beer EVER. Start your Free Trial of Brewer's Friend today! Sign Up ×

Wine Season and New Wine Calculators Released

Wednesday, October 26th, 2011

Home wine makers are wrapping up the season with late harvests coming in throughout the Northwest. This weekend is going to be the last chance for Oregon Pinot Noir. The California harvest is of course long over by now. Recent wine making activity has inspired me to write a couple new calculators related to wine making with more on the way.

Pinot Noir Clusters

New Wine Calculators:

  • Brix and Specific Gravity Conversion Calculator– Converts Brix to Specific Gravity and vice versa. The Brix scale is commonly used in wine making. Specific Gravity is commonly used in home brewing. Some hydrometers have only one or the other, which is where this calculator comes in.

    Brix and Specific Gravity are used to tell how much sugar is in solution. In wine making the freshly crushed juice is being measured (commonly known as the ‘must’). The Brix scale is very close to the Plato and Balling scales.

  • Chaptalization Calculator – Chaptalization is the process of adding sugar to must (grape juice) to boost the final alcohol level. This is often done in poor growing years where the grapes did not mature to the desired Brix level. The amount of sugar to add is dependent on how much wine is being made, and how big of an increase in Brix is needed.

I currently have 160 pounds of Pinot Noir fermenting. I split the must into two 24 gallon fermentors after doing a two day cold soak. The left one has RC-212 yeast, and the right one has Assmanshauser. After the crush they will be blended and put through Malolactic fermentation. The house smells really, really good!

24 Gallon Wine Fermentors

The above image shows the two fermentors all setup waiting for the cold soak to finish. The 1 gallon container on the side is a starter for the Assmanshauser yeast.

Wheat Malt in All Grain Brewing

Sunday, October 16th, 2011

Wheat malt takes extra preparation in brewing since it is smaller in size than standard malts. The first time I ran wheat malt through my grain mill, it was frustrating to discover the gap was set too wide for the wheat malt only! The other grains were being crushed perfectly. I ended up trying a few different approaches until I was successful. My mill is not easy to adjust, so adjusting the gap only makes sense for me if I am going to do a lot of it. For crushing small amounts of wheat malt, the best approach I found is to use a blender.

wheat malt

To make this more confusing, there are several types of Wheat Malts: white wheat, read wheat, pale wheat, carawheat, chocolate wheat, etc. Rye malts are even smaller than wheat malts. Be prepared to adjust the gap on your mill when using Rye or Wheat malt, or resort to the blender.


Option 1 – Plastic bag and a hammer:

This was a lot of work but it got the job done for the most part. This is really only feasible for a half pound of wheat malt or less. The plastic bag is ruined and you need a nice smooth concrete slab to hammer against. The floor of my brew shed worked well, but this took a good 10 minutes to complete.

wheat malt crush in bag

You can still see a few whole kernels in this picture.

wheat malt crush

The bag is completely shot. Many small holes develop as part of the pulverization process.

wheat malt crushing

Option 2 – Rolling pin and plastic bag:

This is completely out. I could not get enough pressure on the kernels to break them. Gave up after a minute.

Option 3 – Adjust the gap on your mill:

Great if your mill is easy to adjust and you can reliably adjust the gap back to the correct setting for standard malts. This is only viable for me if I am doing more than a couple pounds. Next time I make a Hefe, which requires 60% Wheat Malt, this is the option I will use.

Option 4 – Mill it twice:

Some people have reported they run the wheat malt through their mill twice. In my case this did not help at all. Way too much of the wheat malt was falling through without being crushed.

Option 5 – Use a Blender:

This is the winner! The blender is a cheap-o no name brand, with a weak motor and a dull blade. In other words, a fancy blender is not needed to mill wheat malt.

wheat malt blender

My approach is to crush 1-2 cups of wheat malt at a time. Adding just a touch of water really helps. Without water the kernels tend to bounce around too much. Some of the very fine flour got stuck in the bottom of the blender. In the final image below, a few kernels are left whole, but everything underneath it has been nicely ground and is ready to go into the mash.

wheat malt mill


Notes for All Grain brewers:

A protein rest is recommended when brewing with Wheat Malt (~120F for 20 minutes), but not required. If the grain bill has more than 25% Wheat Malt, it would be a good idea to add rice hulls to help prevent a stuck mash. When Wheat Malt is mashed it globs up and looks like oatmeal.

Wheat malt is traditional used in beers like Hefeweizen, Bavarian Weisse, Wizens, where it makes up 40-60% of the grain bill. Wheat malt can also be used in extract brewing as a steeping grain. Increasing, a small percentage (3-5%) of wheat malt is added to grain bills of all types of beer to aid in head retention and body. I have been experimenting with this myself.

Electric Brewing Upgrade

Wednesday, October 5th, 2011

Upgrading to electric brewing makes home brewing a real pleasure. This article covers the details, including a 30 amp GFI’d outlet, drilling holes, and ordering ~$280-500 worth of parts. Dave Knott at HighGravityBrew spent years perfecting electric brewing equipment for his own use. He sells everything you need online and through his home brewing store in Tulsa, Oklahoma. HighGravityBrew saved so much time and headache! I highly recommend their products and I am writing this article as an acknowledgement of their quality, and a thank you.

Heating Elements Used In Brewing:

With electric brewing a heating element is mounted inside the kettle. It works the same way an electric water heater works. Instead of heating the kettle from the bottom, the wort boils from inside. Here is how my boil kettle looks:

electric brew kettle element

The elements can be purchased from HighGravityBrew:

For the HLT, they recommend a 5500 watt unit.

For the Boil Kettle, they recommend a 4500 watt unit.

Weld-less vs Welded fittings:

Getting the element into the kettle requires drilling a hole and using either a welded or weld-less fitting. Weld-less is a simpler option that worked well for me.

Step 1 – Drilling the hole:
This I did myself by carefully marking where I wanted the hole, relatively low in the kettle, such that the element would not hit my dip tube. On the mark, I took a center punch and made a dimple so the drill would have a place to slot into. Lots of oil, walled off with a damn made of plumber’s putty, and a standard hole saw made the cut in under a minute. For the HighGravityBrew elements a 1.25″ hole needed to be drilled. I spent some time fretting about the bit type. Some sites suggest using a stepped bit (aka unibit), but they are expensive. For the thin wall of my kettle (which was from MoreBeer / Polar Ware), a standard hole saw worked fine.

electric brew drill hole

Step 2 – Fitting the element:

In the case of a welded fitting, a coupler is welded over the hole. The element slides through it and screws in to female pipe thread on the coupler. Welding shops were quoting around $75, plus the couplers.

The weld-less fittings use a silicone gasket and a stainless steel nut that go on the inside of the kettle. This approach was feasible to do on my own and cheaper overall. Zero leaks from the weld-less fittings after two brews.

Power Source:

A 30 AMP GFI breaker is required. Get it installed by a professional. My brewery has a 4 prong dryer outlet which the controller plugs into. The controller is described in the next section.

electric brew 30 amp breaker

electric brew dryer outlet plug in

Controller:

To regulate the power going into the element, a controller is used. The controller plugs into the dryer outlet. The cord that leads out of the element plugs into the controller.

HighGravity brew has a couple turn key options. I bought the ECB II for $300. With this unit I can vary the power using the knob. The ECB II also has a bypass for a temperature controller. This allows the element to be turned on or off by a temperature probe. That way a HERMS system can be built with the ECB II as its heart.

electric brew controller

HighGravityBrew also has a $200 model, which doesn’t not allow a temperature probe to be hooked up to it.

Wort Chiller:

I had to redesign my wort chiller so it would not sit on or bang up the element. My solution was to wrap another 50 feet of soft copper tubing around a 4″ PVC pipe and form it into the following:

wort chiller swan

wort chiller electric element

Plate chillers and counter flow chillers are another alternative. I researched those quite a bit and decided against them. Stay tuned for an article on that.

Performance:

On the highest setting, the elements will increase temperature at the following rates:

  • 15 gallons, +3 deg F / min
  • 10 gallons,- +4 deg F / min

electric brewing boil

Strike water is ready in under 30 minutes. Going from mash out to boil takes under 10 minutes! After a rigorous boil starts, the dial can be set back to around 60% to maintain a steady boil.

In an electric brewery, the cost of boiling is measured in kilowatt-hours (kWh). In the northwest the price is around $0.10/kWh, but in Hawaii it is higher. Check your electric bill to be sure.

The equation is:
hours used * (wattage / 1000) * price/kWh = total cost

For an example, let’s say the the price is $0.12 / kWh, and a typical batch is brewed:

  • 1 hour * (5500 / 1000) * $0.12 = $0.66 (hot liquor tank)
  • 1 hour * (4500 / 1000) * $0.12 = $0.54 (boil kettle)

Total electricity cost for a standard batch of beer: $1.20

No More Propane:

Minimal cost savings aside, eliminating propane from the brewing equation is just awesome. Exhaust fumes are no longer a concern. There is no worry of a seal or hose coming loose and burning the shed down. Best of all, no more lugging the tanks around and having to get them refilled. If you are brewing indoors on a propane burner, seriously consider this upgrade. I have enjoyed brewing even more. I did not think that was possible. Electric brewing is safer, cheaper, and more environmentally friendly.

Hops Harvest Update

Tuesday, September 13th, 2011

It is time again to pick home grown hops. What a fun experience. The smell is just heavenly. In fact, I’m sure they have a section in heaven devoted to hops…

dried fresh hops

So far, the only vine ready to pick was Nugget.  We got 2.35 dried ounces out it.  That seems like a small amount compared to some sources that say you can get pounds of hops per vine. I’m not dissapointed, but I do plan to make some adjustments next year and see if I can increase the yield.

I did not use fertilizer, besides a shovel of steer manure in the spring on top of each crown.  I know I could have done better on watering. The hops and the garden both suffered through a few dry spells, which I’m sure reduced the yield.  Next year I plan to run a soaker hose hooked up to a timer so they get watered every morning – thanks to my friend Brian for pointing that one out!

The Nugget vine grew heathily, and was about 11 feet tall. It actually tried to climb up the roof but couldn’t hang on to the flashing.
nugget hop vine


This metal window screen set on top of my brew wagon makes a great drying rack.
nugget hop vine


The two Hallertauer vines should yield 3-4 ounces combined.  This year I decided against pruning and let it go wild at the base.  Last year was a poor growing year and I wanted to give the hops a chance to really establish a strong healthy root system. These should be ready to pick in a couple days.

hallertauer hop vines

Sadly the Cascade vine was infected with Spider Mites. Spraying the leaves with a solution of water and isopropyl alcohol every 3 days for about two weeks seemed to get rid of them.  However, there are not many Cascade cones this year.  BrewersFriend will post more about Spider Mites next spring.


Make sure to check out other articles in the Hops Growing category!

Wine Making Overview

Monday, September 5th, 2011

If you are into making wine, and live in a northern climate, now is the time to start lining up your local grapes. Grapes all over Oregon and Washington will ripen in the next 4-6 weeks. Check local message boards, your local home brew store, or craig’s list. I have found my local wine maker’s club is the best source for group purchases.

Last year I made an Oregon Pinot Noir that turned out really good. This year I’m going to try for Oregon Pinot Noir again, and Tempranillo a red Spanish grape.

About Wine Grapes:

All wine grapes have clear juice. White wine is crushed and pressed before fermentation. Red wines however are crushed, but fermented on the skin. Breaking the skin releases the tannin’s and imparts the red color and more robust flavors.

How making red wine is different from making beer:

1. Wine grapes can’t be stored effectively like grain. Wine makers get essentially one shot per season. Kits are an alternative, but don’t provide the same aroma since they are pasteurized. Personally I skipped them and went straight to fresh local grapes. The key to a good wine is fresh high quality grapes.

wine grapes vineyard

2. The grapes need to be picked, crushed, and brought home. $1/pound is a good starting price. Last year, these two buckets were enough to hold 115 pounds of crushed grapes. This resulted in 41 bottles, about 8 gallons of finished wine.

crushed wine grapes must

3. Unlike brewing beer, with wine there is no boil. What goes into the fermenter is not sanitized. This includes an unavoidable bit of mold, dead spiders, the odd rotten grape, wild yeasts, etc. You do your best not to get those in there, but it happens. The next step takes care of this.

grape must

4. A sulfite solution is added to the crushed grapes (more properly called ‘must’) to kill off unwanted microbes. This sits for 24 hours, and then the yeast is pitched. Some wine makers do a cold soak for a number of days before pitching to try to extract more flavor.

5. Yeast selection is key, in researching Pinot Noir, I selected Assmanshauser and had great results.

6. Primary fermentation is done ‘open air’. A large bin makes a good fermentor. To keep bugs out I put a towel over the bin. The board keeps the towel in place.

wine fermentor

7. Temperature control during fermentation is important. The fermentor is outfitted with a heating strip to keep it in range. I was shooting for 85F. I probably exceeded that, since fermentation generates a lot of heat. Ideally you want a temperature controller with the probe stuck in the middle of the fermenter. Every wine maker has a different practice. Some wine makers go for a slower fermentation to soak up more flavors.

wine temperature strip

8. As the must ferments, it forms a crown that must be punched down twice a day. Oxygen is beneficial at this stage.

red wine crown

9. For red wine, after primary fermentation is done, the grapes are pressed, and the young wine is transferred to the secondary. Some wine makers go for an extended maturation, which allows more of the tannins to soak into the wine before pressing. For Pinot Noir, without an extended maturation, the wine will be fruity and light, but not as robust.

wine press in action

10. It takes a long time, minimum 6 months, maximum 2-3 years before your wine will be ready. Full bodied reds take the longest. My wine was drinkable in 7 months, but I should have let it sit another couple of months in the carboy.

wine in the barrel

11. Control of acid levels and sulfites is critical to good wine making. Test kits are expensive. The ability to interpret the test results and adjust the wine is what true mastery in wine making is all about. Many books have been written on this subject and it can take many years to get good. Wine makers are also a bit like cats and have their own way of doing things. Since I am new to it, I take a hands off approach and let the process happen naturally. Perhaps I was just lucky on the first try, but I think I had excellent grapes and made a good yeast selection.

12. An inoculation of Malolatic yeast is recommended for some wines to smooth out the flavor. Nature may take care of this for you too, perhaps after the wine has been bottled! Malo releases CO2, as you can see in this image:

malolactic fermentation

13. The wine is racked several times. The carboys need to be topped off with a similar wine, since head space is very bad for aging wine. As the wine ages, the sulfite level drops. To protect the wine from spoiling, a sulfite level around 60 ppm is recommended, and needs to be maintained. Be careful though, over sulfited wine will be terrible.

racking wine

14. Barrels can be used instead of carboys. I see this as an advanced practice. Barrels are expensive. You have to really know what you are doing for a barrel to add value to the wine. To me, over oaked wine tastes terrible.


There are important differences when it comes to making white wine, but I have not tried that.

For more information:
https://www.brewersfriend.com/2010/10/16/a-beer-brewer-tries-making-wine/
https://www.brewersfriend.com/2011/07/09/basket-press-for-fruit-based-brews/

Growler – The Perfect Gift

Sunday, September 4th, 2011

My friend got me a growler of Deschutes beer for my birthday. What a great gift! It came full of cold, delicious beer. The best part is, the growler is mine too. After we drank our way through several home brews, we finished off the growler among three of us.

home brew growler

I have had my eye on this particular growler for awhile. The design really stands out from the rest. It appears to be made in Germany too. They are not cheap. As of September, 2011, at the Portland Deschutes location, it is $26 for growler, and $14 to fill it. I hear it used to be a lot cheaper to fill them.

beer growler

Be careful if you want to bring in your own growler. My research indicates some breweries will only fill growlers with their name on them. It sounds like Oregon is more lax than California on this issue.

This growler holds 2 liters, which comes out to a little over 67 ounces. Most growlers are 64 ounces. It is a very high quality growler with a nice decorative handle.

deschutes beer growler

I really like the porcelain lid, it seals down nice and tight. I’ll be choosing this growler first when I show up at parties with home brew.

Brew Shed Complete and Brewing

Sunday, August 14th, 2011

The brew shed is looking good in time for the rains to return. It is a relief to have it done (at least on the outside). All it needs is interior trim. Slowly but surely all the equipment is migrating out there.

brew shed

The best part is the brewery is now operational. The first brew was an American Hefeweizen and it went great! The beer was drinkable in a week. It is already on draft and quenching my thirst. It’s true – a cool glass of hefe comes in real handy after painting all afternoon.

home brewery

My brew rig is presently a gravity fed electric setup. The main reason I made the push to go electric is the hazard of using propane indoors. It wasn’t cheap to go electric, nor was it without a few minor headaches. However, the team at HighGravityBrew.com is just awesome. They have all the parts you need worked out in advance. I highly recommend their products.

electric brewery

In the next few posts I will cover how to ‘go eletric’ and what it involved. I have to say I love it. Electric brewing is so quiet. It heats up fast (+4 degrees Farenheight per minute with about 8 gallons). Scorching is a myth – at least with the low density stainless steel element I got.  That light batch of Hefe was done in part to test for scroching – there was none whatsoever. I did have to modify my immersion chiller so it didn’t crush the element.

brew shed

I hope this inspires you to do your shed too. Total cost $8200.

Plans for the future:

  • RELAX!!!!
  • Finish up brew stand, add trim to front.
  • Fermentation chamber. I can build one of these for about $225. Next year…
  • Hops trellis on the front. Next year…

My advice to fellow brewers:

  1. Make at least two batches of thirst quenching beer BEFORE you start a shed. That way you have something to enjoy after working all day.
  2. Take the time to make the brewery functional and look cool. A brew shed is a once in a lifetime project for most people. The galvanized panels in my shed were hard to work with but the results were well worth it. I love the reflective look. It should last a long time. I wish I would have thought ahead about the wiring layout though. I had to work around where the electrician put one of the switches. It worked out fine but it would have made life easier had I drawn out everything.
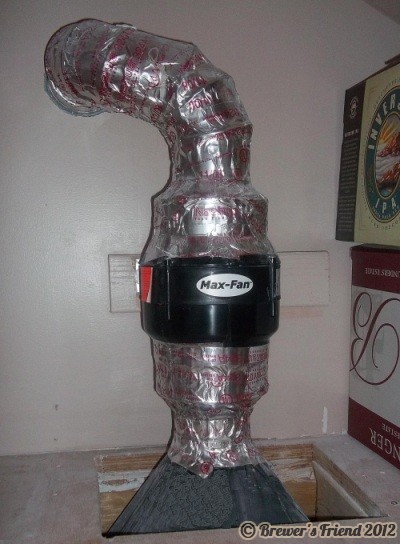
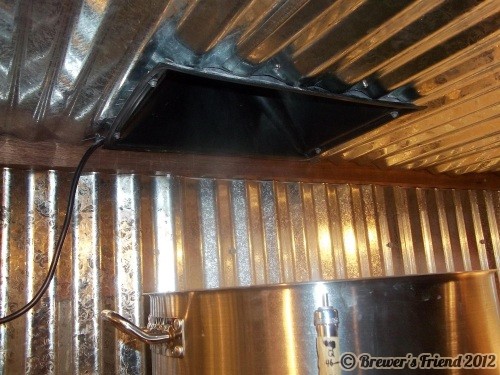
  3. Invest in ventilation. Commercial vent hoods are really expensive ($600+). You will need a good one in order to vent all the steam out of the brewery during the boil. A kitchen hood is not powerful enough. Thankfully, my loft doubles as a vent hood. The intake is a dust collector attachment from a wood working catalog. The fan I went with is the Can Max Fan Mixed Flow Inline Fan (6-Inch 334 Cubic Feet Per Minute). It is quiter than the poplar 6″ Vortex fan, and has a built in 3 speed switch.
  4. Go electric for indoor brewing. Don’t even think about it, just do it. Yes it is a luxury, but it is night and day over propane. It is more energy efficient and safer (if wired correctly). HighGravityBrew.com is the place to go for parts. Porpane + indoors = recipe for Darwin award. I used to do it in my garage with the bay door open. Reading up about propane accidents scared the crap out of me and my wife (this helped justify the purchase too).

Stone Brewing Tour in Escondido

Monday, August 1st, 2011

We had a chance to visit Stone Brewing in southern California last month. It is a blast, I highly recommend it. After the brewery tour, they give you a predetermined ‘flight’ of their four main beers. Tours are every two hours most days. We went on a Tuesday and it was full but not too busy. Their main website: https://www.stonebrew.com/

stone brewing arrogant bastard

The exterior is very nondescript. There is no signage. When you see ‘growler fill parking only’, you know you are in the right place.

stone brewing entrance

I do think their beer quality has slipped some. I noticed some harshness in the Arrogant Bastard, not as smooth as I remember – but still a flavorful bitter beer. Their IPA is very good as people often say. I think the batch we were sampling from in the tap room was a little green. The pale ale was over mineralized and tasted chalky. Still, tastier than many batches of home brew I have made.

Their location also features an upscale bar and bistro.

It is not a typical burger and a beer joint. If you come with an appetite be prepared to pay. There are a few exotic things on the menu, like Duck Tacos, which we avoided. You can get a Buffalo burger for $16.50. The food was good, prepared with care, and the service was excellent.

stone brewing bistro

stone brewing bar

The garden area out back is great for relaxing while waiting for the tour to start. I took a short nap back there after drinking an Arrogant Bastard and having the sausage and potato dish. Yes!

stone brewing garden

The Brewery Tour:

They do approximately 10,000 pound grain bills for their batches. That is about 1000 times a typical home brew recipe, so they must be doing 5000 gallon batches.

stone brewing grain

stone brewing brewery

stone brewing grain

The tour guide said a typical fermentor holds enough beer for a single person to drink a six pack everyday for the next 60 years. I think he said it was a 500 barrel fermentor. A single beer barrel in the US is 31 gallons. That means there are 128 x 31 = 3698 ounces in a barrel. Checking the math: 60 years * 365 (days / year) * 72 ounces / day = 1,576,800 ounces. Divide that by 128 and we get 12,319 gallons. Divide that by 31, and we get 397 barrels, so yeah it is about right. So by that logic each man needs about 1.5M ounces of beer in his lifetime. Honestly, drinking a six pack per day would probably be enough to kill me in a few months. I’ll stick to moderation thank you very much, Stone Brewing tour guide.

They are using American and New Zealand hops from the boxes in the hop storage area – damn that smells good in there! The water supply is via Rincon, which is essentially from San Diego County which is fed from a combination of the Colorado and the Sacramento-San Joaquin River Delta. That is a long way to move that water. They carbon filter it several times then re-add brewing salts.

I love this see through pipe that shows the color of the brew being made:
stone brewing brewery

The place is huge, all under one warehouse style roof. Sort of like being in heaven:
stone brewing brewery

Their main website:
https://www.stonebrew.com/

The Bistro:
https://www.stoneworldbistro.com

Aeration Practices Simplified

Saturday, July 23rd, 2011

In the interests of simplifying the brewing process I no longer aerate with an oxygen tank and stone! This saves the trouble of sanitizing the tube and stone each brew day. There is no worry of running out of oxygen, or keeping a second tank on hand. My tube is impossible to clean thoroughly because the stone is fused to the tube and water will not run through it.

oxygen tank for brewing

(O2 tank is no longer needed!)

aeration kit brewing

(Hose and regulator are no longer needed!)

The way I aerate is so simple it seems lazy. Just splash around the wort as it drains into the fermenter. The procedure is to occasionally shake the bucket or carboy as it is draining to build up a nice frothy head. It reminds me of early extract brewing days. Some people sanitize a large spoon and stir up the wort. Some people rock the carboy back and forth, I find that takes extra effort though.

In the future I plan to rig up a splash manifold at the end of the drain hose. It would be suspended above the wort level in the fermenter and cause the wort pouring in to go all over the place. Stay tuned for a future article on that. It should be a pretty cool looking gadget and cost next to nothing.

I am an all grain brewer, so aeration is especially important because of the full wort boil (which drives off oxygen). The last four batches I brewed have been aerated with the new lazy approach. I have noticed zero problems with fermentation time, attenuation, and flavor. Aeration in home brewing is over emphasized by some sources. There is at least one experiment showing it is okay to be “lazy” about it. The following test indicated little if any improvement with using an aeration system, vs shaking:

Link: Aeration Experiment Including Time Lapse Video of the Sample Fermentations

For a commercial brewery, monitoring exact levels of oxygen in the wort is important for quality control. Personally, I am not going to loose sleep over O2 levels in my brewing. This information will hopefully save some readers the $50 it costs for a basic aeration system, if not more in time and hassles.

Basket Press for Fruit Based Brews

Saturday, July 9th, 2011

Fermenting crushed berries, grapes, and fruits can be a fun diversion from making beer. Home brewers who make beer already have all the equipment, except for a basket press. I tasted an amazing pear, blueberry, raspberry cider at a home brew club meeting last year. This inspired me to get more into fruity meads and wine. I tired making wine last fall. It is now in the bottle and going fast. It was totally worth it! Apples, Cherries, strawberries, blueberries, raspberries, blackberries, apricots, peaches… the list goes on, could all be experimented with.

wine and sweet mead home made

The Basket Press:

Once again, you will need a new piece of equipment to make this work. I looked into the Do-It-Yourself solutions. A good basket press would take a lot of time to build, more time than I wanted to spend. Personally, I decided to buy a professionally made press. The pressure from the screw, alignment, and reliability were reasons I decided not to build my own. A small size is perfect for the small amounts I am working with.

basket press
(Action shot of the wine press.)

When shopping for a basket press, check out the Yakima Press Company.

Yakima Press Company

Yakima Press Company sells high quality basket presses. If you are interested in pressing more than a few gallons, you will probably want a bigger press. All their products are 100% made in the USA.

Yakima Press Company


Outline of the process to make Fruit Wine, Hard Cider, Sweet Mead:

1. Pick and wash your fruit. Get good quality fruit, it will shine through in the end result! Wine grapes are normally not washed, as it is too time consuming, and not necessary due to addition of sulfites later on. You’ll need a lot of fruit to get 1 gallon of juice. For example, with apples one bushel is about 42 pounds, and gives 2-3 gallons of juice. You can top this off with water and add sugar or honey to compensate. You don’t have to go with 100% juice to get a good result.

2. Crush the fruit to release the juices. Wine grapes are done with a de-stemmer / crusher. Raspberries and blueberries can be done easily by hand. Fruits like apples and pears can be chopped and then put through a food processor.

3. Run fruit through basket press. The harder you press, the more tannins and other harsh flavors will come through. I sampled for flavor as the crush went just to tell where I was at. When it gets hard to turn the press, that’s probably a good sign it is time to stop. Beware, this step is sticky and messy but tastes good.

Note: Red wine is an exception. With red wine pressing comes after fermentation, as the skins are what give red wine its color.

4. Add 1 campden tablet per gallon of juice. Let sit for 24 hours. This step kills off all the wild yeasts and other bad guys and creates a stable environment for the brewing yeast to take off.

Campden is the same thing as  potassium or sodium metabisulfite. An equivalent solution can be created on your own (1 campden table in 1 gallon of water gives 67 ppm sulfur dioxide). Be careful not to over sulfite the batch!

Note: Again with wine from grapes the story is a little different. Sulfites are added right after the crush, targeting 60 ppm.

5. Measure gravity and volume. At this point, adjust with water and sugar or honey as desired so your target volume and alcohol level will be reached. This is going to vary widely depending on the recipe.

6. Transfer to carboy and pitch yeast. Yeast nutrient is a good idea. Dry mead yeast is very dry and will strip out all the sweetness. I’d recommend a sweet mead yeast on the first go.

7. Rack after primary fermentation is complete – could take up to a month. Expect to get a lot of trub, aka lees on the bottom of the carboy. Top off secondary with water or last year’s product. You may want to add more sulfites at this point to protect your new brew. The sulfites that were originally added are pretty much eliminated during primary fermentation.

8. Rack again and repeat every week or so until desired clarity is reached.

9. Bottle and age as desired.

10. Enjoy!