August 2013 Release Live
Friday, August 30th, 2013Multiple equipment profiles supported, new yeasts added, updates to extract/partial mash calculations and more.
Multiple Equipment Profiles:
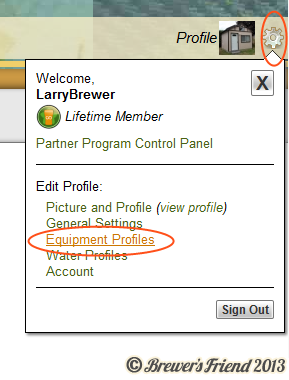
The system now supports up to 5 equipment profiles under each account. To manage your equipment profiles click the gear icon in the upper right and then on Equipment Profiles. The equipment profile is used by the water requirements feature and more heavily in the brew feature.

One of the profiles may be set as the default. The default profile is used unless a recipe overrides it. To point a recipe at a specific profile, in the recipe editor click on the ‘More…’ button and look for the Equipment Profile drop down that appears. The More… section was rearranged a little in this release to make room for the extra field (sorry to change things!). For more, see our FAQ entry on equipment profiles.

I already have an equipment profile setup for my IPAs where I squeeze out the hops, vs my standard profile where I don’t bother. This does make a difference when it comes to hitting the target batch size exactly. I will soon setup a profile for 2.5 gallon batches in the kitchen. Makes me want to brew more already!
New yeasts and yeast manufacturers added:
This release includes over 70 new yeasts! New brands include East Coast Yeast, Mangrove Jack, Real Brewers, Siebel Institute, and Brewferm. The Wyeast list adds a few extra private collection strains. The White Labs list adds a few lambic strains. The White Labs list also gets whiskey yeasts which can be used on beer to produce interesting profiles.
Given the yeast list is pretty long there is now a drop down to filter by yeast brand. There is also an option to sort the list by product ID or by name (a profile option determines the default yeast sort).

We felt it is better if we maintain the yeast list, since it is published by the manufacturers and doesn’t change too often. We are always open to making additions and corrections. Contact us anytime.
Note to iPhone users about the yeast list: We have an iPhone release due out very soon that will incorporate the new yeast list. If you setup a recipe with a new yeast and sync it down, the current iPhone version (1.6) will switch it back to the default yeast since it doesn’t have the new yeasts yet. Look for the update in the App Store in the next few days. We’ll announce it on our social media channels when it is released.
Extract and Partial Mash recipes get more in depth options:
This release enables the concept of batch size targets for extract and partial mash recipes.
Batch size target can be kettle or fermentor. To the ‘kettle’ is how much wort is in the kettle at the very end of the brew (corrected for temperature). To the ‘fermentor’ is how much wort made it into the primary fermentor. Previously only BIAB and All Grain had this option.
Enabling this option gives extract partial mash brewers doing full wort boils much more control. The water requirements section includes kettle dead space for extract and partial mash brews.
The following FAQ entries were clarified. If you haven’t read up on batch size and the definition of efficiency (there are really four types), make sure to check into that.
- How is batch size defined by the recipe editor?
- How is efficiency defined by the recipe editor?
- How is efficiency calculated in a brew session?
Brewer’s Friend GrogTag store:
We now have a GrogTag store that gives you an exclusive 10% off on professionally printed beer labels. These guys do a great job of making high quality labels. Way better than our DIY label generator. We’ll be following up with a complete review next month.

Other updates:
- Recipe editor will display a warning ‘are you sure you want to leave this page?’ if you try to navigate away when the recipe is in an unsaved state and the page has been loaded for more than 30 seconds. Does not apply to Internet Explorer.
- Inventory section allows sorting by yeast year.
- Priming calculator – fermentation temp vs bottling temp clarified.
- Users with browser plugins that force SSL should have a better time using the site in 100% SSL mode.