Anatomy of a Corny Keg
Saturday, August 15th, 2009If you do not keg your beer already, someday you almost certainly will. It is a superior package for the home brewer. They save time and they feel cool. Only downside is they are not portable. Cornelius kegs, or corny kegs for short, are a widely available means for home brewers to package their beer. Generally they hold 5 gallons. Most of the ones home brewers use were formerly soda kegs. Beyond the keg itself, a CO2 tank, regulator, gas in line, gas in connector, beer out connector, and a beer line + picnic tap are needed to complete the setup.
The following is an introduction to what a 3, 5 or 10 gallon home brewing keg is comprised of and what to look for while using and maintaining them.

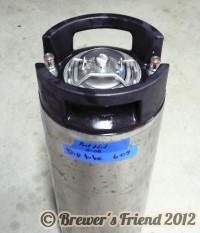
KEG VESSEL ITSELF: This is a SS vessel which can have a volume ranging from 3-10 gallons typically. When buying kegs, the condition of outer vessel itself is of little concern… dents, scrapes and bruises from years of service will not affect the performance of the keg. If you want pretty kegs, you can buy them new, but there is a price for vanity.
LID: Lids come in different shapes depending upon keg make and model but the purpose is the same, to provide you with a large opening and access to the inside of the keg for filling and cleaning. Lids require pressure to properly seal, this is a plug type lid, it actually fits inside the keg where the pressure inside the keg pushes the lid out, tightening the seal as the pressure increases. The bail (locking handle) on the lid has small rubber feet, if these are worn or missing they can affect how well the lid seals since these feet help to pull the lid into place as well. If your lid simply will NOT seal on the first or second attempt, open the lid and turn it 180 degrees and try again, I assure you it will (if your seal is not faulty). Lids themselves will not wear out, but the O-ring around the circumference of the lid will, as well as the small rubber feet on the locking handle.

PRESSURE RELIEF VALVE: This valve is located in the center of the lid and is simply used to purge the pressure from the keg at any time. Typical use this when you fill a keg and wish to purge the O2 from the head space before storing, or to relieve excess pressure after carbonating your beer at a pressure higher than your desired serving pressure. These spring loaded valves have a small rubber foot inside them that can wear and lead to a leak, but are easily replaced by unscrewing them and then inserting a new valve.

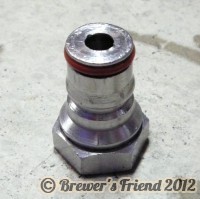
KEG POSTS: The keg has (2) posts, beer out and gas in, these are not interchangeable. There is one purpose to these posts, provide a means by which to secure a gas line and a beer line. Ball lock kegs are like quick disconnects with small ball bearings that will catch in a groove on the post to secure the connector. Pin lock posts will have three small pins that provide a locking mechanism so that you may twist and lock the connector into place. Depending on the make and model you will need different tools to remove these post for cleaning or maintenance. For the typical HEX post I recommend a suitably sized crescent wrench as these can vary in size. Other keg posts are star shaped with many small points, these will require a special tool. These rarely wear out, unless they become bent. Replace these with the style appropriate for your make and model of keg. (see poppets below as well)

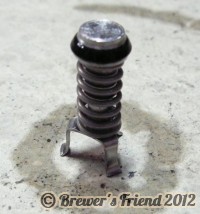
POPPETS: These small spring loaded devices sit atop the dip tube and inside (under) the keg posts. The spring and pressure inside the keg will press these poppets securely into the small hole in the keg post so that the keg will remain sealed and pressurized when not in use. When you attach a gas or beer line, that connector will have a small pin in the center that will push the poppet in, thus allowing the flow of gas and beer. These wear out, these will leak and these do require cleaning and replacement at time. Poppets may look the same but they are NOT! You must be sure to buy replacement poppets that fit your make and model of keg or they may not seal inside the keg post.

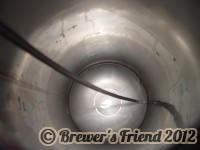
DIP TUBES: Dip tubes come in two types, GAS IN and BEER OUT, associated with the GAS IN and BEER OUT keg posts. The difference between these two is that the gas tube only protrudes into the keg about one inch, while the beer out tube extends all the way to the bottom (so you can get all of that goodness out). These are mainly comprised of SS, though I have seen rare instances where the gas lines will be plastic. These components do not wear out, but if you do need to replace one, they are readily available.


O-RINGS: There are typically O-rings in the following locations:
Lid: (1)
Gas dip tube: (1)
Beer dip tube: (1)
Gas in post: (1)
Beer out post: (1)
These O-rings will wear and need replacement at some point, but the sizes are standard so you can buy them anywhere keg components are sold, or find the industrial equivalents at a supplier like McMaster-Carr.
Stay tuned for an article on keg maintenance.


6 Responses to “Anatomy of a Corny Keg”
Hi, I purchased a carbonating stone and 2 feet of 1/4″ tubing. I attached the stone to the tubing easily, but it says I need to now attach the tubing to the gas-in dip tube of the keg. I can’t seem to be able to get it on there at all. What’s the diameter of the gas-in dip-tube? Do you know how to attach it to a 1/4″ tube?
By Roman on Aug 5, 2010
Your local home brew store can get you setup with the proper fittings. My tube looks like 3/8″.
By Larry on Aug 8, 2010
My cornies were Challenger VI’s, and they had the plastic dip tubes that warp and break, so I had to drill out the keg posts with a 5/16 bit to fit the stainless diptubes. YMMV.
By Tyson on Nov 23, 2010
Very nice article about the components. It is a great idea to actually know the pieces of the keg before you intend to use it. Much easier to diagnose problems and better maintain it that way.
By Eric on Aug 3, 2011